To install a clutch kit on a car, begin by detaching the transmission from the engine and removing the old clutch components. Then, carefully align and secure the new clutch, ensuring proper installation.
The Importance Of A Properly Functioning Clutch
Smooth and Efficient Gear Changes
Smooth and efficient gear changes are crucial for a seamless driving experience. The clutch plays a vital role in facilitating these gear changes by smoothly transferring power from the engine to the transmission. When the clutch is worn out or not functioning properly, shifting gears can become a jerky and frustrating experience.
It can lead to difficulties in finding the right gear, increased clutch slippage, and even grinding noises. This not only affects the overall driving experience but also puts unnecessary strain on other components of the transmission system.
Prevents Transmission Damage
A properly functioning clutch is essential for preventing transmission damage. When the clutch is not working correctly, it can cause excessive wear and tear on the transmission components. Slipping or dragging of the clutch can result in overheating, which can damage the clutch disc, pressure plate, and flywheel.
Additionally, a worn-out clutch can also lead to improper synchronization of gears and premature wear on the synchro rings. By installing a new clutch kit and ensuring its proper functioning, you can safeguard your transmission from costly repairs and extend its lifespan.
Enhances Overall Driving Experience
An efficient and well-maintained clutch enhances the overall driving experience. With a smooth and responsive clutch, gear changes become effortless and seamless, allowing for a more enjoyable and comfortable drive. Whether you are navigating through city traffic or accelerating on the open highway, a properly functioning clutch ensures you have better control over your vehicle.
It improves the acceleration, maneuverability, and responsiveness of your car. Investing in a high-quality clutch kit and ensuring its proper installation can significantly enhance your driving experience and make every journey a pleasure.
Tools And Equipment Needed For Clutch Kit Installation
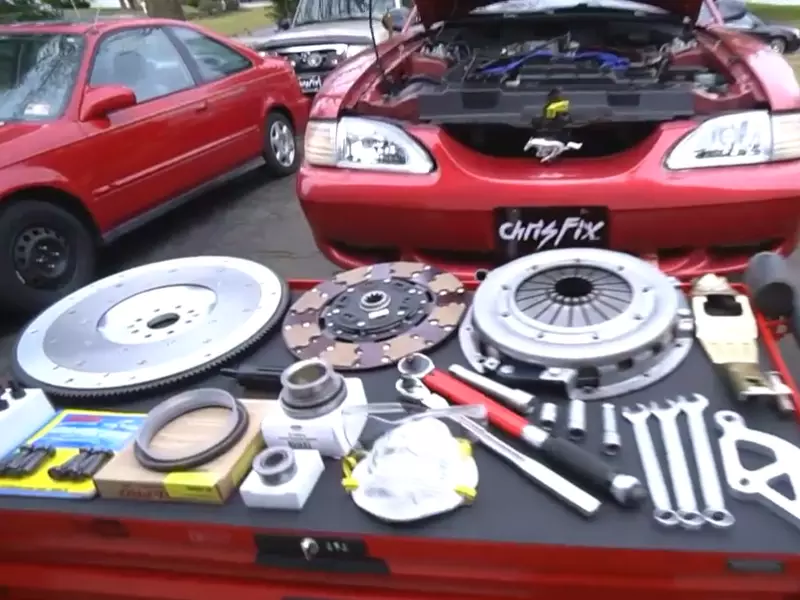
When it comes to installing a clutch kit on your car, having the right tools and equipment is essential for a successful installation. In this section, we will discuss the various tools you will need to complete the task. From wrenches and socket sets to jack and jack stands, a clutch alignment tool, torque wrench, screwdriver, and pry bar, each of these tools plays a crucial role in ensuring a proper clutch kit installation. Let’s dive deeper into each one of them:
Wrenches and Socket Set
One of the first tools you’ll need for clutch kit installation are wrenches and a socket set. These tools are essential for loosening and tightening bolts and nuts. Wrenches come in different sizes, so it’s important to have a set that includes various sizes to ensure a proper fit. A socket set, on the other hand, allows you to use different socket sizes to accommodate bolts and nuts of varying sizes. Having both wrenches and a socket set will make the installation process much easier.
Jack and Jack Stands
Next on the list of tools needed for clutch kit installation is a jack and jack stand. These tools are important for raising and securing your car so that you can have enough clearance to access the clutch assembly. A hydraulic jack is recommended as it provides stability and ease of use. Once the car is elevated using the jack, place the jack stands under the vehicle to provide additional support and prevent any accidents or injuries.
Clutch Alignment Tool
Another important tool for clutch kit installation is a clutch alignment tool. This tool is specifically designed to ensure precise alignment between the clutch plate and the flywheel. It helps in centering the clutch disc and aligning it with the input shaft. Using a clutch alignment tool will prevent any misalignment issues that may affect the performance of the clutch system.
Torque Wrench
To ensure that the clutch assembly is properly tightened, a torque wrench is essential. This tool allows you to tighten bolts and nuts to a specific torque value recommended by the car manufacturer. Using a torque wrench ensures that the bolts are not over-tightened, which can lead to damage, or under-tightened, which can result in a loose clutch assembly.
Screwdriver
In addition to the above-mentioned tools, a screwdriver is also needed for clutch kit installation. A screwdriver comes in handy for removing and installing screws or fasteners that hold various components together. It is important to have a set of different screwdriver sizes to accommodate different types of screws or fasteners used in the clutch assembly.
Pry Bar
Lastly, a pry bar is a useful tool for clutch kit installation. It helps in prying apart components that are stuck or tightly fit together. This tool provides leverage and allows you to separate components without causing any damage.
In conclusion, having the right tools and equipment is crucial for a successful clutch kit installation. Wrenches and socket sets, a jack and jack stands, a clutch alignment tool, a torque wrench, a screwdriver, and a pry bar are some of the essential tools needed for this task. By ensuring you have all the necessary tools, you can confidently proceed with the installation process and enjoy a functioning clutch system in your car.
Step-By-Step Guide To Installing A Clutch Kit
If you’re an automotive enthusiast or simply looking to save some money on car repairs, installing a clutch kit on your own can be a rewarding project. However, it’s important to approach this task with caution and follow a step-by-step guide to ensure the job is done correctly. In this article, we’ll walk you through the process of installing a clutch kit on your car, providing detailed instructions for each important step.
Preparing the vehicle
- Park on a flat surface: Find a level and spacious area to park your car for the duration of the clutch kit installation. A flat surface will help ensure stability and safety.
- Disconnect the battery: Before you begin working on your car, it’s crucial to disconnect the battery to prevent any electrical mishaps. Locate the car battery and remove the negative terminal using a wrench.
- Raise the vehicle using a jack and secure with jack stands: To gain access to the clutch components, you’ll need to elevate your car using a good quality hydraulic jack. Once raised, use jack stands to secure the vehicle and ensure stability during the installation process.
Removing the old clutch
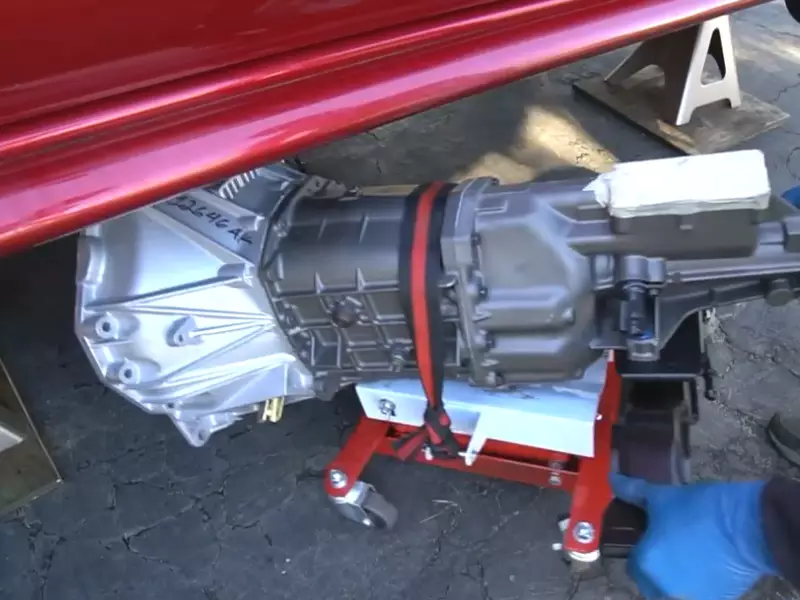
- Remove the transmission: First, you’ll need to remove the transmission to access the clutch. Consult your car’s service manual for specific instructions on how to remove the transmission in your vehicle.
- Disconnect the clutch linkage: Locate the clutch linkage and disconnect it from the clutch pedal using a wrench or socket set. This step will allow you to separate the clutch from the rest of the drivetrain.
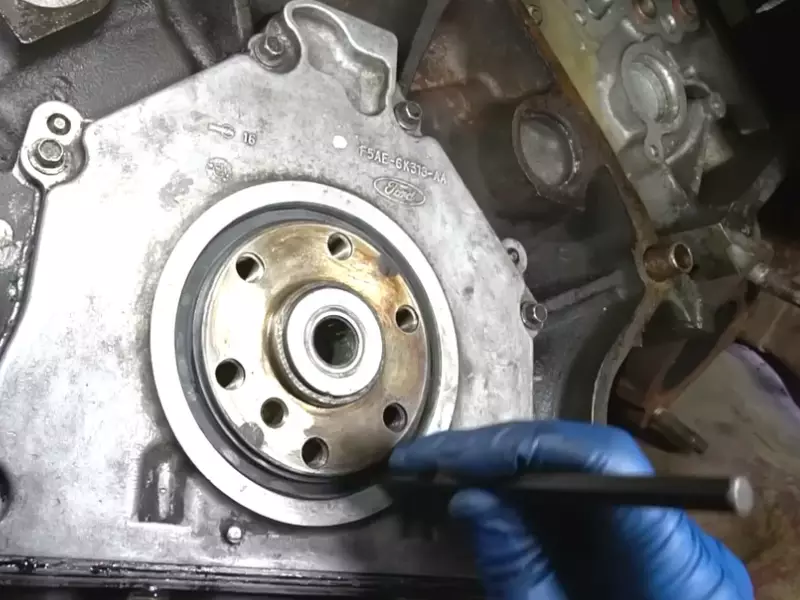
- Remove the pressure plate and clutch disc: With the transmission out of the way, you can now access the pressure plate and clutch disc. Use a socket set to remove the bolts securing the pressure plate to the flywheel. Carefully remove the pressure plate and clutch disc, taking note of their position for reinstallation.
Installing the new clutch kit
- Align the new clutch disc using the alignment tool: Before installing the new clutch disc, use the alignment tool provided with the kit to ensure proper alignment. Insert the tool into the pilot bearing and align the clutch disc accordingly.
- Install the pressure plate and tighten the bolts evenly: Place the new pressure plate over the clutch disc, aligning the bolt holes with those on the flywheel. Begin tightening the bolts in a crisscross pattern, ensuring even torque distribution.
- Reconnect the clutch linkage: Reattach the clutch linkage to the clutch pedal, ensuring everything is securely fastened. This step will restore the connection between the clutch and the manual transmission.
Reassembling the transmission
- Reinstall the transmission: Carefully reposition the transmission and guide it back into place using the appropriate tools. Follow the reverse procedure of removing the transmission, ensuring everything is aligned and properly connected.
- Secure all bolts and connectors: Once the transmission is back in place, make sure all bolts and connectors are securely fastened. Double-check everything to avoid any potential issues during operation.
- Lower the vehicle and reconnect the battery: Using the jack, carefully lower the vehicle back to the ground. Reconnect the battery by attaching the negative terminal, completing the installation process.
Testing and fine-tuning the clutch
- Depress and release the clutch pedal to ensure proper engagement: With the installation complete, test the clutch by depressing and releasing the pedal. Ensure that the clutch engages and disengages smoothly, without any slippage or hesitation.
- Adjust the clutch pedal if necessary: If you encounter any issues with the clutch pedal, such as excessive play or difficulty in engagement, consult your car’s service manual for instructions on adjusting the clutch pedal.
- Test drive the vehicle to ensure smooth operation: Once you’re satisfied with the clutch performance, take the car for a test drive. Pay close attention to how the clutch engages and disengages, ensuring a smooth operation throughout the gears.
Congratulations! You’ve successfully completed the step-by-step guide to installing a clutch kit on your car. By following these instructions carefully and taking the necessary safety precautions, you can tackle this job confidently and enjoy the benefits of a properly functioning clutch system.
Tips And Tricks For A Successful Clutch Kit Installation
Installing a new clutch kit on your car can greatly improve its performance and ensure smooth gear changes. However, the installation process requires careful attention to detail to ensure everything is done correctly. To help you achieve a successful clutch kit installation, we have compiled some essential tips and tricks that you should keep in mind.
Clean and inspect all relevant components before installation
Before you begin installing a new clutch kit, it is crucial to clean and inspect all the relevant components. This includes the flywheel, pressure plate, clutch disc, and release bearing. Any dirt, debris, or damage on these parts can affect the performance and lifespan of your new clutch kit. Use a suitable cleaning agent and a soft brush to clean them thoroughly, paying close attention to any grooves or mounting surfaces.
After cleaning, carefully inspect each component for any signs of wear, such as cracks, grooves, or excessive wear on the friction surfaces. Replace any damaged or worn-out parts before proceeding with the installation.
Use a torque wrench to ensure proper bolt tightness
Proper bolt tightness is critical for the clutch components. Using a torque wrench is the safest and most accurate way to achieve the manufacturer’s recommended torque specifications. This will ensure that each bolt is tightened to the appropriate level, preventing under- or over-tightening that could lead to issues with clutch engagement or premature component failure.
Refer to the manufacturer’s instructions or a reliable automotive resource for the specific torque settings for your vehicle. Be sure to follow the specified tightening sequence as well to distribute the load evenly.
Apply a small amount of grease to facilitate smooth movement
Applying a small amount of grease to certain contact points can help facilitate smooth movement and improve the overall function of the clutch components. This includes areas where there is metal-to-metal contact, such as the clutch fork pivot point and the release bearing guide. However, it is crucial not to over-apply grease, as an excessive amount can lead to clutch slippage or contamination of the friction surfaces.
Carefully apply a thin layer of grease using a suitable grease or lubricant, following the manufacturer’s instructions and lubrication points specific to your vehicle.
Follow the manufacturer’s instructions and specifications
Every clutch kit installation may have specific requirements and recommendations by the manufacturer. It is essential to carefully read and follow the manufacturer’s instructions and specifications throughout the installation process. These guidelines will help ensure that you install the clutch kit correctly and avoid any potential issues that could arise from improper installation.
If you encounter any discrepancies or have any questions regarding the manufacturer’s instructions, it is best to reach out to them directly or consult with a professional mechanic.
Take your time and double-check each step before proceeding
One of the most crucial tips for a successful clutch kit installation is to take your time and double-check each step before proceeding to the next. Rushing through the installation process can lead to mistakes or missed steps, which can compromise the performance and longevity of the new clutch kit.
Before moving on to the next step, ensure that all components are properly aligned, tightened, and greased, where necessary. Double-check all the connections and fasteners to ensure everything is secure and correctly positioned.
By taking your time and paying attention to detail, you can greatly increase the likelihood of a successful clutch kit installation.
Frequently Asked Questions For How To Install A Clutch Kit On A Car
Can I Install My Own Clutch?
Yes, you can install your own clutch. However, it is a complex task that requires technical knowledge and expertise. It is recommended to consult a professional mechanic to ensure proper installation and avoid any damage to your vehicle.
Is It Hard To Replace Clutch Yourself?
Replacing a clutch yourself can be challenging, but not impossible. It requires mechanical knowledge, tools, and patience. However, for those with experience and skills, it is a feasible task.
How Long Does It Take To Install A Clutch Kit?
Installing a clutch kit typically takes around 4-8 hours, depending on the vehicle and the mechanic’s experience. It involves removing the transmission, replacing the clutch components, and reinstalling the transmission. It’s best to consult a professional for an accurate time estimate.
Is Replacing A Clutch A Big Job?
Replacing a clutch can be a challenging task that requires expertise. It involves removing the transmission and replacing the clutch assembly. It is recommended to seek professional help to ensure proper installation and avoid further damage to the vehicle.
Conclusion
Installing a clutch kit on your car can seem like a daunting task, but with the right tools and step-by-step guidance, it can be done successfully. By following this comprehensive guide, you have learned the importance of proper preparation, the step-by-step process of installation, and the crucial factors to consider during the process.
Now, you have the knowledge and confidence to tackle this task, saving you time and money in the long run. Happy clutch installation!