To install a CD player in your car, remove the existing car stereo, disconnect the wiring harness and antenna cable, connect the new CD player’s harness and antenna cable, secure the CD player in place, and test the functionality. Integrating a CD player into your car’s audio system can greatly enhance your music experience while driving.
Whether you prefer physical CDs or simply want a convenient way to play your favorite albums, installing a CD player is a relatively straightforward process. We will guide you through the step-by-step process of installing a CD player in your car.
So, let’s get started!
Ensuring Compatibility With The Car Model
When it comes to installing a CD player in your car, ensuring compatibility with your car model is crucial. This will not only save you time and effort but also prevent any potential damage to your car’s electrical system. To ensure a smooth installation process, there are a few key steps you need to follow. Let’s dive in!
Research the car model specifications and requirements
In order to ensure compatibility with your car model, the first step is to thoroughly research the specifications and requirements of your particular make and model. You can find this information in your car’s manual or by searching online. Pay close attention to any specific instructions or restrictions mentioned by the car manufacturer.
Additionally, take note of any specific features or wiring configurations unique to your car model. This will help you better understand the installation process and ensure compatibility with your car’s electrical system.
Check if the car has the necessary wiring connections
Before beginning the installation process, it’s essential to check if your car has the necessary wiring connections for a CD player. This step will help you determine whether you can install the CD player directly or if additional wiring adapters or harnesses are required.
To check the wiring connections, start by locating the car’s stereo system. In most cars, the stereo system is located in the center console or dashboard. Next, carefully remove the existing stereo system to access the wiring connections.
Once the stereo is removed, examine the wiring connections to see if they are compatible with a standard CD player. Look for the presence of color-coded wires labeled for power, ground, and speakers. If your car has these connections, it means you can proceed with a direct installation.
If you don’t find the necessary wiring connections, don’t worry! You can still install a CD player in your car by using a wiring adapter or harness. These adapters are specifically designed to bridge the gap between your car’s existing wiring and the CD player’s wiring, ensuring compatibility and a secure connection.
Remember, it’s crucial to follow the manufacturer’s instructions when using wiring adapters or harnesses to ensure a proper and safe installation.
In conclusion, ensuring compatibility with your car model when installing a CD player is essential for a successful and efficient installation process. By researching the specifications and requirements of your car model and checking for the necessary wiring connections, you can confidently proceed with installing a CD player in your car.
Gathering The Required Tools And Materials
Before you start installing a CD player in your car, it’s important to gather all the necessary tools and materials. Ensuring you have everything you need will save you time and frustration during the installation process. In this section, we’ll cover the list of tools needed, the necessary materials, and optional accessories that can enhance the functionality of your CD player.
List of tools needed for the installation:
When it comes to installing a CD player in your car, having the right tools is crucial. Here is a list of tools you’ll need:
- Screwdriver set (Phillips and flathead screwdrivers)
- Socket set (various sizes)
- Torque wrench
- Wire cutters/strippers
- Electrical tape
- Crimping tool
Necessary materials to complete the installation:
In addition to the tools, you’ll also need a few materials to successfully install your CD player. These materials include:
- CD player unit
- Mounting bracket
- Wiring harness adapter
- Antenna adapter
- Insulated crimp connectors
- Heat shrink tubing
Optional accessories for enhanced functionality:
If you’re looking to enhance the functionality of your CD player, there are some optional accessories you might consider. These accessories can improve your audio experience and provide added convenience. Some popular options include:
- Bluetooth adapter for wireless connectivity
- Auxiliary input adapter for connecting external devices
- USB port for playing music from USB drives
- Steering wheel control adapter for integrating with the car’s steering wheel buttons
- GPS navigation module for turn-by-turn directions
By having these optional accessories, you can customize your CD player installation to best suit your needs and preferences.
Removing The Old Stereo System
Introduction: If you’re looking to enhance your car audio experience by installing a new CD player, the first step is to remove the old stereo system. In this section, we will guide you through the process of removing the old stereo system, ensuring that you can safely and effectively install your new CD player.
Disconnecting the car battery for safety
Before proceeding with any electrical work, it’s crucial to ensure your safety by disconnecting the car battery. This step not only protects you from potential electrical hazards but also prevents any damage to the electrical components of your vehicle.
To disconnect the car battery, follow these steps:
- Park your car in a safe location and turn off the ignition.
- Open the hood of your vehicle and locate the car battery.
- Using the correct size wrench or socket, loosen and remove the negative (-) battery cable.
- Secure the disconnected cable away from the battery to prevent accidental reconnection.
Removing the trim panel and accessing the stereo unit
Once the car battery is safely disconnected, the next step is to remove the trim panel and gain access to the stereo unit. The trim panel is typically located around the stereo system and may require the use of specific tools to remove it.
Follow these steps to remove the trim panel:
- Identify the fasteners or screws holding the trim panel in place. These are commonly located along the edges of the panel or hidden behind small caps.
- Using the appropriate tool, such as a screwdriver or trim removal tool, carefully remove the fasteners without causing any damage to the panel or surrounding components.
- Once the fasteners are removed, gently pry the trim panel away from the dashboard, starting from one corner and working your way around. Take care not to force or bend the panel.
- Set the trim panel aside in a safe location, ensuring it won’t get scratched or damaged.
Now that the trim panel has been successfully removed, you can access the stereo unit.
Detaching the old stereo system from the wiring harness
With the trim panel out of the way, it’s time to detach the old stereo system from the wiring harness. This step involves disconnecting various electrical connections that allow the stereo to interface with the car’s electrical system.
Follow these steps to detach the old stereo system:
- Identify the wiring harness at the back of the stereo unit. It consists of a cluster of wires connected to the stereo.
- Inspect the wiring harness and identify any connectors or plugs attached to it.
- Carefully disconnect each connector or plug from the wiring harness by gently pushing down on any release tabs or buttons.
- Once all the connectors and plugs are detached, you can safely remove the old stereo system from the vehicle.
By following these steps, you have successfully removed the old stereo system from your car, creating a clean canvas for the installation of your new CD player. In the next section, we will guide you through the process of installing the new CD player and connecting it to the wiring harness.
Understanding The Wiring Connections
When installing a CD player in your car, one of the essential steps is understanding the wiring connections. This ensures that the new stereo integrates seamlessly with your vehicle’s electrical system and allows you to enjoy your favorite tunes on the go. In this section, we will cover the key aspects of wiring connections, including identifying the different wiring connectors, matching the harness connectors with the new stereo, and connecting the speakers and power wires.
Identifying the different wiring connectors
Before starting the installation process, it’s crucial to identify the various wiring connectors in your car. Each car model may have different connectors, so you should refer to the owner’s manual or consult the manufacturer’s website for a wiring diagram specific to your car. There are typically three types of connectors:
- Power connectors: These connectors provide the necessary power supply to the CD player. They usually include wires for constant power, ignition power, and ground. The constant power wire ensures that your stereo retains settings and memory even when the car is turned off, while the ignition power wire connects to the car’s ignition switch to activate the stereo when the key is turned on.
- Speaker connectors: These connectors connect the CD player to your car’s speakers. They typically consist of a positive wire (+) and a negative wire (-) for each speaker. It is vital to match the positive and negative wires correctly to ensure proper sound quality.
- Antenna connectors: These connectors enable your car’s radio to receive AM/FM signals. They are usually located at the back of the CD player and can be identified based on their shape, such as a round or rectangular connector.
Matching the harness connectors with the new stereo
Once you have identified the wiring connectors in your car, the next step is to match them with the harness connectors provided with your new CD player. The harness connectors serve as adapters that bridge the gap between the car’s wiring and the stereo’s wiring. The harness connectors should be labeled, making it easier to match them with your car’s wiring connectors. Ensure that you connect the power, speaker, and antenna connectors correctly, following the wiring diagram specific to your car model.
Connecting the speakers and power wires
Connecting the speakers and power wires is the final step in the wiring process. Start by connecting the speaker wires to the corresponding positive and negative terminals on your new CD player. If your car has multiple speakers, repeat this process for each speaker. Make sure the connections are secure and that the positive and negative wires are correctly matched to prevent sound distortion.
Next, connect the power wires which include the constant power, ignition power, and ground wires. Follow the wiring diagram to ensure the correct connection of these wires. Use wire connectors or electrical tape to secure the connections and prevent any potential shorts or loose connections.
Before completing the installation, it’s a good practice to double-check all the wiring connections to ensure they are secure and properly matched. Once you are confident in the setup, you can proceed to mount the CD player on your car’s dashboard and test the functionality.
Understanding the wiring connections is pivotal in installing a CD player in your car. Properly identifying the different wiring connectors, matching the harness connectors with the new stereo, and connecting the speakers and power wires will ensure a successful installation and an enjoyable audio experience on your journeys.
Securing The Cd Player In Place
Once you have gathered all the necessary tools and equipment, it’s time to secure the CD player in your car. This step is crucial to ensure that the stereo unit stays in place and functions properly. In this section, we will discuss two important steps: Using the appropriate mounting kit and brackets and Aligning the new stereo with the dashboard opening.
Using the appropriate mounting kit and brackets
The first step in securing the CD player is to use the appropriate mounting kit and brackets. These kits and brackets are designed to fit specific car models and allow for a seamless installation. Ensure that you have the correct kit and brackets for your car model to avoid any compatibility issues.
Here is a step-by-step guide to using the mounting kit and brackets:
- Refer to the instructions provided with the kit to identify the specific brackets and hardware needed for your car model.
- Attach the brackets to the sides of the Cd player using the screws provided. Make sure they are securely tightened.
- Slide the mounting sleeve into the dashboard opening, ensuring that it fits snugly.
- Align the brackets with the mounting sleeve and secure them using the screws provided.
Aligning the new stereo with the dashboard opening
Once you have secured the brackets and mounting sleeve, it’s time to align the new stereo with the dashboard opening. This step is important to ensure that the CD player fits perfectly and looks aesthetically pleasing.
Follow these steps to align the stereo unit:
- Gently slide the CD player into the mounting sleeve, being careful not to damage any wires or connectors.
- Align the edges of the stereo unit with the edges of the dashboard opening.
- Ensure that the CD player sits flush with the dashboard and there are no gaps or misalignments.
Securing the stereo unit firmly in place
Now that you have aligned the CD player with the dashboard opening, it’s time to secure it firmly in place. This step is crucial to prevent any movement or vibrations while driving, which can affect the performance of the stereo unit.
Here are a few tips to secure the stereo unit:
- Double-check that all the brackets and screws are tightened properly.
- If necessary, use adhesive strips or foam pads to provide additional support and stability.
- Test the CD player by gently pushing and pulling it to ensure it doesn’t move or wiggle.
By carefully following these steps, you can securely install a CD player in your car, enhancing your driving experience with your favorite music.

Testing And Troubleshooting
Once you have successfully installed your CD player in your car, it’s time to test it and troubleshoot any potential issues. This step is crucial to ensure that everything is working properly and that you can start enjoying your favorite tunes on the road. In this section, we will cover how to reconnect the car battery, turn on the stereo check for power, and troubleshoot common installation issues.
Reconnecting the car battery
Before you start testing your newly installed CD player, it’s important to reconnect the car battery if you disconnected it during the installation process. This step ensures that power is flowing to the stereo system, allowing it to function properly. Follow these simple steps to reconnect the car battery:
- Locate the positive (+) and negative (-) terminals on the car battery.
- Using a wrench or socket set, loosen the nut or bolt holding the negative cable in place.
- Remove the negative cable from the battery terminal.
- Repeat the same process for the positive cable, ensuring that it is from the positive terminal.
- Once both cables are removed, inspect the battery terminals for any corrosion or dirt. If necessary, clean them using a battery terminal cleaner or a wire brush.
- Reattach the positive cable to the positive terminal and tighten the nut or bolt.
- Repeat the same process for the negative cable.
- Ensure that both cables are securely attached to the respective terminals.
Turning on the stereo and checking for power
Now that the car battery has been reconnected, it’s time to turn on the stereo and check if there is power. Follow these steps to complete this process:
- Locate the power button or the “On” button on the CD player or stereo system.
- Press the power button to turn on the stereo.
- Observe the display panel on the stereo to see if it lights up. If it does, this indicates that there is power flowing to the system.
- If the display panel does not light up, ensure that the car battery is connected properly and that the cables are securely attached to the terminals. You may also want to check the fuse associated with the stereo system.
Troubleshooting common installation issues
While the installation process may go smoothly for most, there can be instances where you encounter issues with your newly installed CD player. Here are some common problems and their potential solutions:
| Issue | Solution |
|---|---|
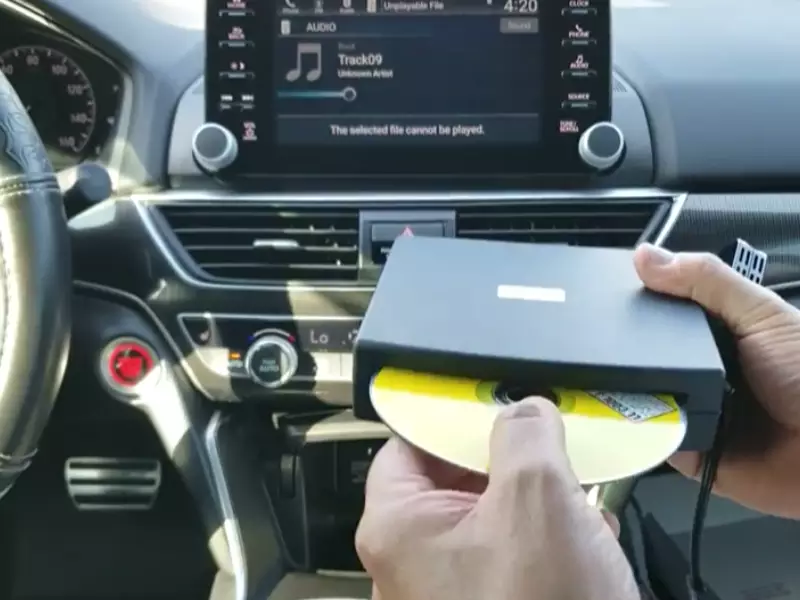
| No sound from the speakers | – Check the speaker connections to ensure they are securely plugged in – Make sure the speaker wires are not damaged or frayed – Adjust the audio settings on the CD player or stereo system |
| No power to the CD player | – Verify that the car battery is connected properly – Check the fuse associated with the stereo system – Ensure the wiring harness is properly connected to the CD player |
| Poor audio quality | – Check the audio input/output connections for any loose or damaged cables – Adjust the equalizer settings on the CD player or stereo system – Consider upgrading the speakers or audio system for better sound quality |
By following these troubleshooting steps, you should be able to identify and resolve common installation issues with your CD player. Remember to consult the user manual or seek professional assistance if you encounter any difficulties that cannot be resolved on your own.
Adjusting Audio Settings
When it comes to installing a CD player in your car, getting the audio just right is key to enjoying your music to the fullest. Luckily, most CD players come with a range of audio settings that allow you to adjust the sound preferences to your liking. In this section, we will explore how to access the equalizer and audio control options, set appropriate sound preferences, and make adjustments to improve audio quality and balance. So, let’s dive in and optimize your car’s audio system for an immersive and enjoyable music experience.
Accessing the Equalizer and Audio Control Options
To start adjusting the audio settings on your newly installed CD player, you need to access the equalizer and audio control options. These options are typically found within the settings menu of the CD player. Here’s how you can access them:
- Power on your CD player and ensure that it is in the “audio” mode.
- Navigate through the menu options using the control buttons on the CD player or the remote.
- Look for the “Settings” or “Audio Settings” option and press the corresponding button to access the submenu.
Setting the Appropriate Sound Preferences
Once you have accessed the equalizer and audio control options, it’s time to set the sound preferences that best suit your taste. Here’s how you can do it:
- Locate the “Equalizer” option in the settings menu and select it.
- The equalizer provides you with a range of preset sound profiles such as “Rock,” “Pop,” “Classical,” and more. Select the preset that aligns with the genre of music you mostly listen to. Alternatively, you can choose the “Custom” option to manually adjust the sound frequencies.
- Experiment with the different presets or customize the equalizer by raising or lowering specific frequency bands to enhance the bass, treble, or mid-range frequencies according to your preferences.
- Save your preferred settings by accessing the “Save” or “Apply” option.
Making Adjustments to Improve Audio Quality and Balance
Now that you have set the sound preferences, you can make further adjustments to improve the audio quality and balance. Here are some tips to help you achieve optimal audio performance:
- Balance: Adjust the stereo balance to ensure that the sound is evenly distributed between the left and right speakers. This will create a rich and immersive audio experience.
- Fader: If your car audio system has front and rear speakers, use the fader option to adjust the audio balance between them. This way, you can fine-tune the sound depending on the seating arrangement in your car.
- Loudness: Many CD players offer a loudness option, which boosts the low and high frequencies at lower volume levels. Enable this setting if you prefer a more dynamic sound even at lower volumes.
- Subwoofer Control: If you have a subwoofer installed, adjust the crossover frequency and gain control for a well-balanced and powerful bass response.
By exploring and experimenting with these audio settings, you can ensure that your car’s CD player produces the best possible sound quality and balance, bringing your favorite music to life on the road.
Remember, each car audio system may have slight variations in its settings and menu structure. Therefore, refer to the user manual provided with your CD player for specific instructions related to your particular model.
Installing Additional Features
When it comes to upgrading your car’s audio system, installing additional features can take your music experience to a whole new level. Whether you want to stream your favorite music wirelessly, connect external devices, or ensure enhanced safety with a rear-view camera, there are various options available to customize your car’s CD player. In this blog post, we will guide you through the process of installing three popular features: Bluetooth connectivity, a USB port, and a rear-view camera. Let’s dive in and make your ride more enjoyable and convenient!
Adding Bluetooth connectivity for wireless audio streaming
With the rise of smartphones, listening to music wirelessly has become more popular than ever. Adding Bluetooth connectivity to your car’s CD player allows you to stream music from your mobile device without dealing with tangled cables. It also enables you to make hands-free phone calls, ensuring a safe and convenient driving experience. Here’s a step-by-step guide to adding Bluetooth connectivity to your car’s CD player:
- Ensure your car’s CD player is compatible with Bluetooth connectivity. Some older models may require an adapter.
- Purchase a Bluetooth car kit or receiver suitable for your car’s CD player. There are various options available, from plug-and-play devices to ones that require professional installation.
- Prepare your car’s CD player for installation by disconnecting the power and removing any existing cables or connectors.
- Connect the Bluetooth car kit or receiver to your car’s CD player following the manufacturer’s instructions. This typically involves connecting the receiver to the CD player’s audio output.
- Power up the Bluetooth car kit or receiver and pair it with your mobile device. Follow the instructions provided with the device to complete the pairing process.
- Once paired, you can enjoy wireless audio streaming and hands-free calling directly from your car’s CD player.
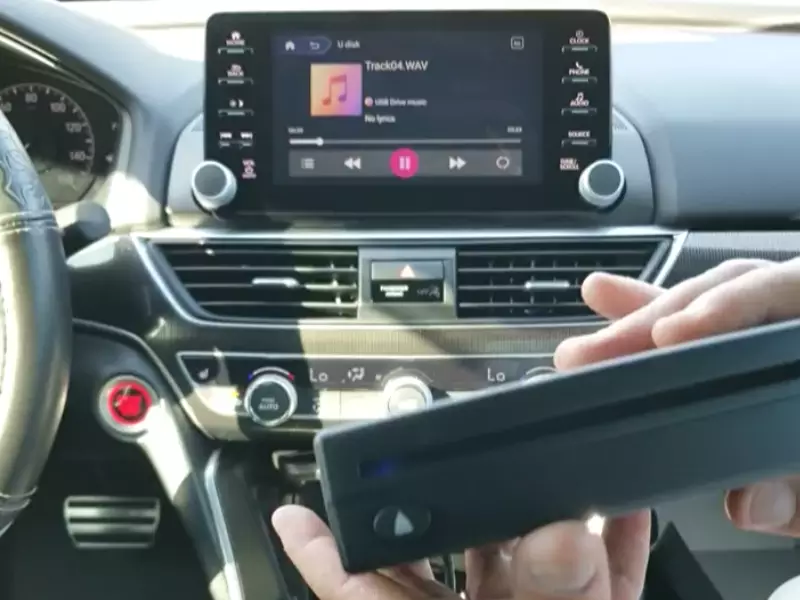
Installing a USB port for connecting external devices
In addition to Bluetooth connectivity, installing a USB port in your car’s CD player allows you to connect external devices such as USB flash drives, smartphones, or portable music players. This provides another convenient option for playing your favorite music directly through your car’s audio system. Here’s how you can install a USB port:
- Select a suitable USB port kit for your car’s CD player. Ensure compatibility and follow the manufacturer’s recommendations.
- Prepare your car’s CD player for installation by disconnecting the power and removing any existing cables or connectors.
- Identify the audio input pins or connectors on your car’s CD player. You may need to refer to the CD player’s user manual or consult a professional if needed.
- Connect the USB port kit to the appropriate audio input pins or connectors, following the manufacturer’s instructions.
- Power up the CD player and test the USB port by connecting a USB device. Ensure that the CD player recognizes and plays the music from the connected device.
Integrating a rear-view camera for enhanced safety
Installing a rear-view camera in your car not only enhances safety but also makes parking and maneuvering easier. A rear-view camera provides a clear view of what’s behind your vehicle, minimizing the risk of accidents and collisions. Here’s a guide to integrating a rear-view camera:
- Select a high-quality rear-view camera suitable for your car model and CD player. Consider factors such as resolution, viewing angle, and ease of installation.
- Prepare your car’s CD player for installation by disconnecting the power and removing any existing cables or connectors.
- Identify the appropriate location for mounting the rear-view camera. This is typically near the rear license plate or the trunk handle.
- Mount the rear-view camera securely according to the manufacturer’s instructions. Ensure it is positioned correctly for optimal visibility.
- Connect the camera to the CD player following the provided wiring diagram. This may involve routing cables through the car’s interior.
- Power up the CD player and test the rear-view camera. Make sure the camera feed is displayed on the CD player’s screen when in reverse gear.
- Adjust camera settings if required, such as brightness or parking guidelines, to suit your preferences.
By following these step-by-step guides, you can easily install additional features to enhance your car’s CD player. Enjoy wireless audio streaming, connect external devices, and ensure safety with a rear-view camera. Upgrade your car’s audio system and make your driving experience even more enjoyable!
Ensuring Proper Functionality
Once you have successfully installed a CD player in your car, it’s essential to ensure that all its features are working correctly. Proper functionality ensures an enjoyable and hassle-free experience every time you use your new CD player. In this section, we will take a closer look at the steps you need to follow to test all the features, verify the functionality of additional accessories and connections, and fine-tune the settings for optimum performance.
Testing all features of the new CD player
Before you hit the road with your new CD player, it’s crucial to test all its features to make sure everything is working as intended. Here are the steps to follow for a comprehensive feature test:
- Insert a CD: Begin by inserting a CD into the player and check that it loads properly.
- Playback controls: Test the playback controls such as play, pause, skip, rewind, and fast-forward to ensure they respond correctly.
- Volume control: Adjust the volume to different levels and check if the audio output is smooth and audible.
- Equalizer settings: Explore the equalizer settings and verify that different sound presets have the desired effect on the audio output.
- Repeat and shuffle: Test the repeat and shuffle functions to ensure they work without any glitches.
- Display: Check the display screen for clear visibility and accurate information display.
- Remote control (if applicable): If your CD player comes with a remote control, test all the functions of the remote to ensure it operates seamlessly.
Verifying functionality of additional accessories and connections
In addition to the CD player itself, you may have installed additional accessories or made connections to enhance your audio experience. It’s crucial to verify the functionality of these accessories and connections. Follow the steps below:
- Auxiliary input: If you have connected an auxiliary input, test it by connecting an external audio source and ensuring the audio plays through the speakers.
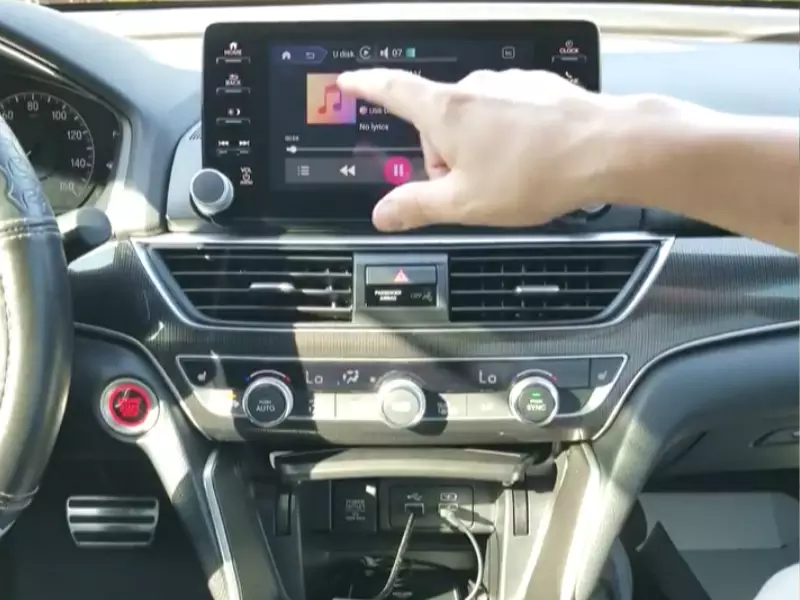
- USB port: If your CD player has a USB port, verify its functionality by connecting a USB drive with audio files and checking if the player recognizes and plays the files.
- Bluetooth connectivity: If your CD player supports Bluetooth, pair it with a compatible device and test the audio playback and other features.
- Amplifiers and speakers: If you have installed amplifiers or additional speakers, confirm that they are functioning correctly and producing the desired sound quality.
Fine-tuning settings for optimum performance
To optimize the performance of your CD player and ensure the best audio experience, you may need to fine-tune various settings. Follow these steps:
- Bass and treble adjustments: Experiment with the bass and treble settings to achieve the desired audio balance.
- Balance and fade settings: Adjust the balance and fade settings to ensure the audio is evenly distributed between the speakers.
- Display brightness: Adjust the display brightness to a level that is both visible and comfortable while driving.
- Language selection: If your CD player offers language options, select your preferred language for menu display and audio prompts.
- Firmware update: Check if there are any firmware updates available for your CD player and perform the updates if necessary to ensure optimal performance and compatibility.
By following these steps to test all the features, verify additional accessories, and fine-tune settings, you can ensure your newly installed CD player is functioning properly. This will allow you to enjoy your favorite music and make every journey a memorable one.
Frequently Asked Questions On How To Install A CD Player In Car
Is It Possible To Install A CD player In A Car?
Yes, it is possible to install a CD player in a car. Car audio professionals can help you choose the right CD player and install it for you. Enjoy your favorite CDs on the go!
Can You Put A CD player In A Car That Doesn’t Have One?
Yes, you can add a CD player to a car that doesn’t have one.
How Do You Put A CD in A Car?
To put a CD in a car, locate the CD player slot on the dashboard. Gently insert the CD into the slot, making sure it goes in straight. Wait for the CD to be pulled in, and it will start playing automatically.
Enjoy your music on the go!
How Do You Hook Up A CD Player?
To hook up a CD player, follow these steps:
- Connect the CD player’s audio cables to the corresponding inputs on the stereo system or speakers.
- Use RCA cables or optical cables depending on the connection options.
- Power on both the CD player and the audio device.
- Set the audio device to the correct input source.
- Play a CD on the player to test the connection.
Conclusion
Installing a CD player in your car is a simple process that can enhance your driving experience. By following the step-by-step instructions provided in this blog post, you can easily install a CD player in your vehicle without any hassle.
Remember to gather all the necessary tools beforehand and consult the user manual for your specific car model. With a bit of patience and attention to detail, you’ll be enjoying your favorite music on the road in no time. Happy driving!