To install a car tracker, find a suitable location in your vehicle and connect the tracker to the power source and, if needed, the GPS antenna. Installing a car tracker can provide added security and peace of mind, allowing you to keep tabs on the location of your vehicle at all times.
With the increasing instances of vehicle theft and unauthorized use, having a GPS car tracker can be a valuable investment. Whether you’re a concerned car owner or a fleet manager looking to monitor the whereabouts of your vehicles, installing a car tracker is a crucial step.
We will guide you through the process of installing a car tracker, ensuring that you understand the necessary steps and precautions to take. By the end, you’ll have the knowledge and confidence to successfully install a car tracker in your vehicle.
Understanding The Importance Of Car Trackers
Car theft is a rising concern in today’s world. Vehicles are valuable assets that can be easily targeted by criminals. As a car owner, it’s important to take proactive measures to protect your vehicle and ensure its security. One such measure is installing a car tracker.

Advantages of using car trackers
Car trackers offer numerous advantages when it comes to vehicle security. Some of the key benefits of using car trackers include:
- Real-Time Tracking: Car trackers provide real-time tracking of your vehicle’s location. This allows you to monitor the whereabouts of your car at any given time, giving you peace of mind.
- Vehicle Recovery: In the unfortunate event that your car gets stolen, a car tracker can greatly assist in its recovery. The GPS technology used in car trackers enables authorities to track and locate your vehicle, increasing the chances of a successful recovery.
- Insurance Benefits: Many insurance companies offer discounts on premiums for vehicles equipped with car trackers. By installing a car tracker, you not only enhance the security of your car but also save on insurance costs.
- Monitoring Driver Behavior: Some car trackers come with advanced features that allow you to monitor driver behavior. This can be useful for fleet management or tracking the driving habits of others who use your vehicle.
- Emergency Assistance: Certain car trackers come with additional features like panic buttons or SOS alerts. In case of an emergency, these features can be activated to signal for help, ensuring the safety of you and your passengers.
Why installing a car tracker is crucial for vehicle security
Installing a car tracker is crucial for vehicle security as it offers advanced protection against theft and increases the chances of recovering your stolen vehicle. Car trackers provide real-time tracking, enabling you to monitor your car’s location at all times and facilitating its quick recovery in case of theft. Additionally, car trackers can also help lower your insurance premiums and provide valuable insights into driver behavior. By taking the step to install a car tracker, you are taking a proactive approach towards safeguarding your vehicle and ensuring its safety.
Preparing For Installation
Choosing the Right Car Tracker Model
One of the first steps in installing a car tracker is to choose the right model for your needs. There are various types of car trackers available in the market, each with its own set of features and functionalities.
When choosing a car tracker model, consider the following factors:
- The purpose of the tracker – whether you want to track your vehicle’s location, monitor its speed, or have other specific requirements.
- The compatibility of the tracker with your vehicle’s make and model.
- The tracking range and accuracy of the device.
- The battery life and power source of the tracker.
- The ease of installation and user-friendly interface.
Gathering the Necessary Tools and Equipment
Before you start the installation process, make sure you have all the necessary tools and equipment.
The tools you may need include:
- Wire strippers and crimping tools to connect wires securely.
- Electrical tape or heat shrink tubing to insulate the connections.
- A drill and appropriate drill bits to create holes if required.
- Zip ties or cable ties to secure the wires neatly.
- A multimeter to test the electrical connections.
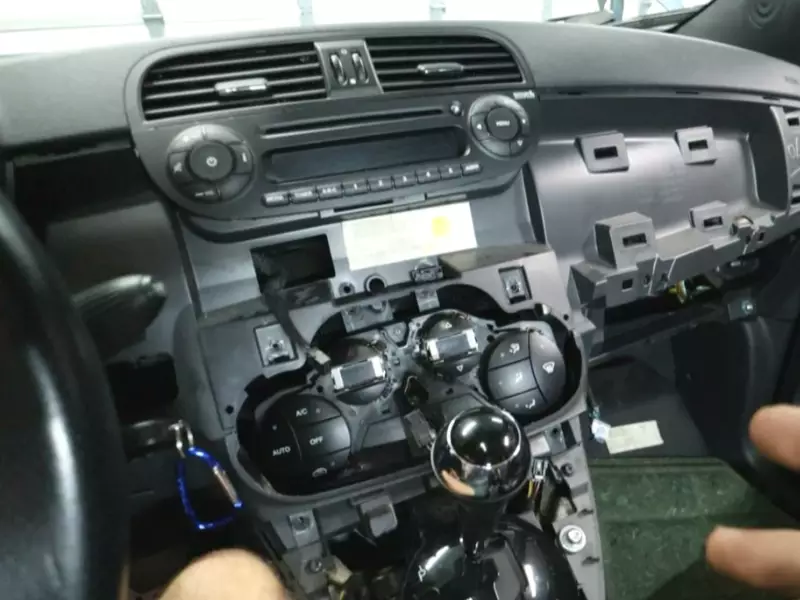
Checking the Vehicle Compatibility with the Tracker
Before proceeding with the installation, it is crucial to ensure that your vehicle is compatible with the car tracker you have chosen.
To check for compatibility:
- Refer to the tracker’s user manual or specification sheet to determine the compatible vehicle makes and models.
- Research online or contact the manufacturer to confirm the compatibility if needed.
- Check if any additional modules or adapters are required for the installation.
It is essential to verify compatibility to ensure the tracker will work seamlessly with your vehicle’s electrical system and provide accurate data.
Step 1: Locating The Obd-Ii Port
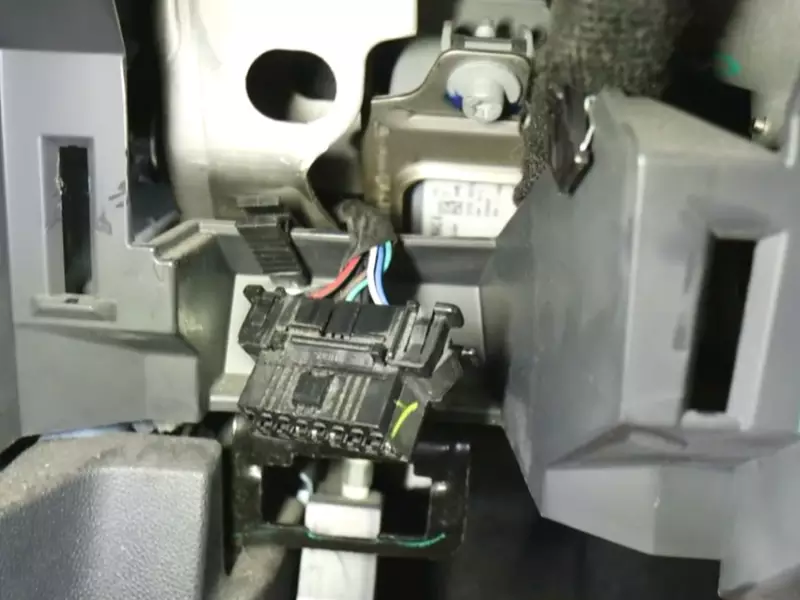
Before you start installing a car tracker, the first step is to locate the OBD-II port in your vehicle. This port is the key to connecting the tracker to your car’s onboard computer system. In this section, we will explain what the OBD-II port is, its functions, and how to find it in your vehicle.
What is the OBD-II port and its functions?
The On-Board Diagnostics II (OBD-II) port is a standardized diagnostic connector that can be found in most vehicles manufactured after 1996. It is typically located under the dashboard, near the steering column.
The OBD-II port serves as a gateway to your car’s computer system, allowing access to a wide range of data and parameters. It provides real-time information on various aspects of your vehicle’s performance, such as engine RPM, fuel efficiency, vehicle speed, and emission levels. Additionally, the OBD-II port can also help in diagnosing and troubleshooting any issues or problems your car may have.
Finding the OBD-II port in your vehicle
Finding the OBD-II port in your vehicle is relatively easy. Follow these steps to locate it:
- Start by sitting in the driver’s seat and looking under the dashboard, near the steering column.
- Scan the area for a rectangular-shaped connector with multiple pins inside it.
- The OBD-II port is usually black in color and labeled with “OBD” or “OBD-II”.
- If you are still having trouble locating it, you can refer to your vehicle’s owner manual for specific instructions.
Once you have found the OBD-II port, you can proceed to the next steps of installing the car tracker. It’s important to note that different vehicle models may have slight variations in the location of the OBD-II port, so be sure to consult your owner’s manual for accurate information.
Now that you have successfully located the OBD-II port, you are one step closer to installing your car tracker and enjoying the benefits of enhanced vehicle tracking and monitoring.
Step 2: Powering The Car Tracker
Now that you have successfully mounted the car tracker onto your vehicle, it’s time to power it up. Powering the car tracker is a crucial step as it ensures the device remains operational and allows you to monitor your vehicle’s location and other important data. In this step, we will discuss the different power options for car trackers and guide you through connecting the tracker to the vehicle’s power source.
Different Power Options for Car Trackers
When it comes to powering car trackers, there are several options available based on your preferences and requirements. Here are the most common power options:
| Power Option | Description |
|---|---|
| Battery-powered | Car trackers with built-in batteries are convenient as they don’t require any external power source. However, the battery life may vary depending on usage and the quality of the tracker. |
| Hardwired | Hardwiring the car tracker to the vehicle’s electrical system ensures a constant power supply. This option is suitable for long-term tracking without the need for frequent battery replacements. |
| Plug-in | If you prefer a temporary installation or need mobility for the tracker, plug-in power options are ideal. These trackers can be connected to the vehicle’s cigarette lighter or another power outlet. |
Connecting the Tracker to the Vehicle Power Source
To power your car tracker, follow these simple steps:
- Identify the power source: Before connecting the tracker, locate the vehicle’s power source that matches the power option you have chosen.
- Prepare the power cable: Depending on the tracker and power option, you may need to use a specific power cable. Refer to the manufacturer’s instructions to ensure you have the correct cable.
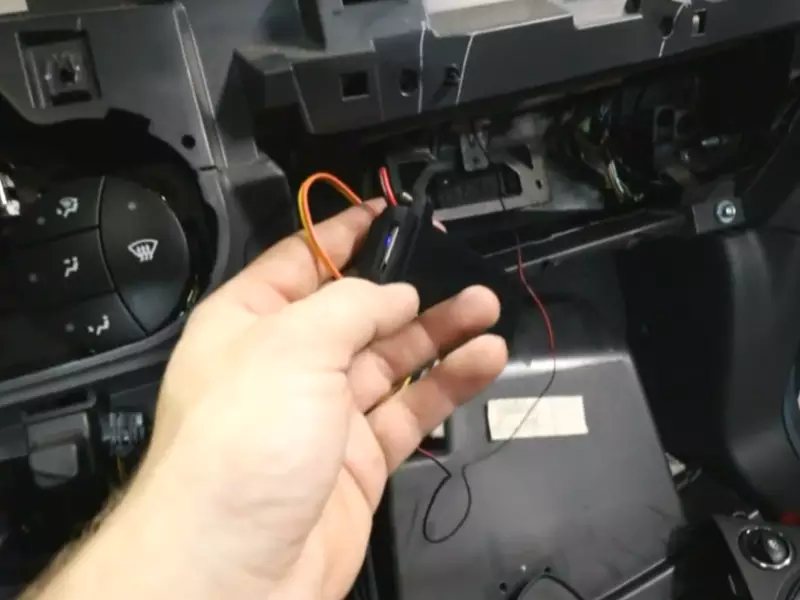
- Connect the cable: Connect one end of the power cable to the car tracker’s power input port and the other end to the designated power source in your vehicle.
- Secure the connections: Once the cable is connected, ensure that all connections are secure and tightly fitted to prevent any loose connections that may cause disruptions in the power supply.
- Test the power: After the connections are secure, turn on the vehicle’s ignition to verify if the car tracker is receiving power. Check the tracker’s LED indicators or any other power indication provided by the manufacturer.
By following these steps, you have successfully powered your car tracker and can now enjoy its tracking capabilities. Remember to refer to the specific instructions provided by the manufacturer for your particular car tracker model.
Step 3: Securing The Car Tracker
Once you have chosen the optimal location for your car tracker and properly mounted it, the next crucial step is to secure the tracker in place. Properly securing the tracker ensures its stability and accuracy in tracking your vehicle’s movements. In this step, we will guide you through tips and techniques to effectively secure your car tracker.
Choosing the Optimal Location for the Tracker
Before securing the car tracker, it is essential to choose the optimal location where it can function efficiently. Here are a few factors to consider when selecting the perfect spot:
- Accessibility: Ensure that the tracker can be easily accessed for maintenance or removal if necessary.
- Concealment: Opt for a discreet location that makes it difficult for potential thieves to spot the tracker.
- Signal Strength: Choose a spot where the tracker can receive a strong GPS signal for accurate tracking.
Once you have considered these factors, you can proceed to mount the tracker in the selected location.
Properly Mounting the Tracker
Mounting the car tracker securely is crucial to ensure its stability and longevity. Follow these steps for a proper mounting process:
- Gather the Mounting Accessories: Ensure you have all the necessary tools and accessories to mount the tracker, such as screws, brackets, and adhesive mounts.
- Prepare the Mounting Surface: Clean the mounting surface thoroughly to ensure proper adhesion or stability.
- Fix the Mounting Bracket: Install the mounting bracket securely, either using screws or adhesive mounts, depending on the type of tracker.
- Attach the Tracker: Carefully attach the car tracker to the mounting bracket, ensuring it is secured tightly.
After completing these steps, give the tracker a gentle tug to ensure it is firmly attached and does not move easily. Additionally, follow any specific instructions provided by the manufacturer to ensure proper installation.
Securing the car tracker effectively involves careful consideration of the location and a proper mounting process. By following these steps, you can ensure that your tracker remains securely in place, enabling accurate tracking of your vehicle’s location.
Step 4: Testing And Activating The Tracker
Now that you’ve successfully mounted the car tracker and connected it to the power source, it’s time to move on to the next crucial step – testing and activating the tracker. This step ensures that the tracker is functioning properly and will provide you with accurate data about your vehicle’s location.
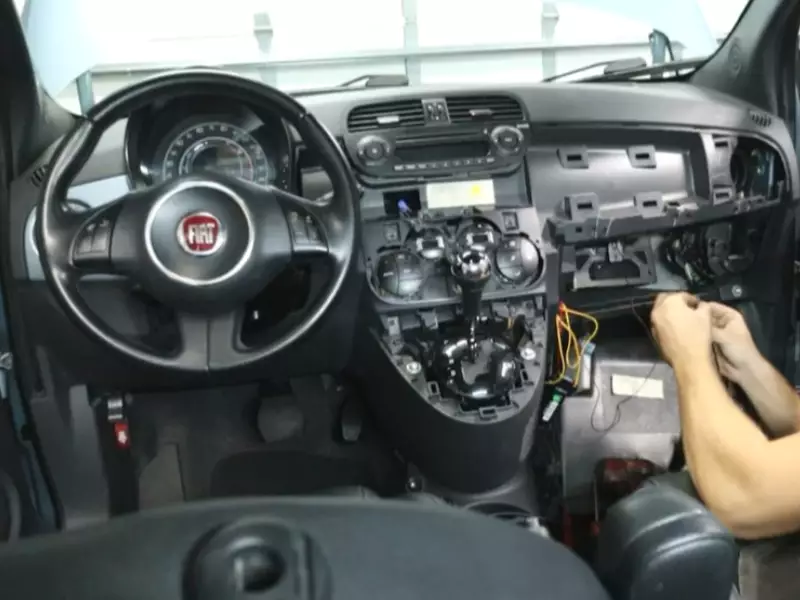
Verifying the connection of the tracker
Before proceeding with the activation process, it’s essential to verify whether the car tracker is properly connected to the vehicle’s power supply. If there are any loose connections or issues with the wiring, the tracker might not work as intended. Here’s a simple process to check the connection:
- Inspect the power cable and ensure that it is securely connected to the tracker and the vehicle’s power source.
- Check for any signs of damage or frayed wires that could affect the connection. If you notice any defects, it’s crucial to replace the cable before proceeding.
- Once you’ve examined the power cable, turn on the ignition of your vehicle to supply power to the tracker. You should see some indicator lights or signs of activity on the tracker, indicating that it’s successfully connected.
- If there are no signs of activity, double-check the power source and make sure it’s providing the necessary voltage. Refer to the tracker’s user manual or contact the manufacturer’s support for troubleshooting steps.
Activating the tracker through the manufacturer’s app or online portal
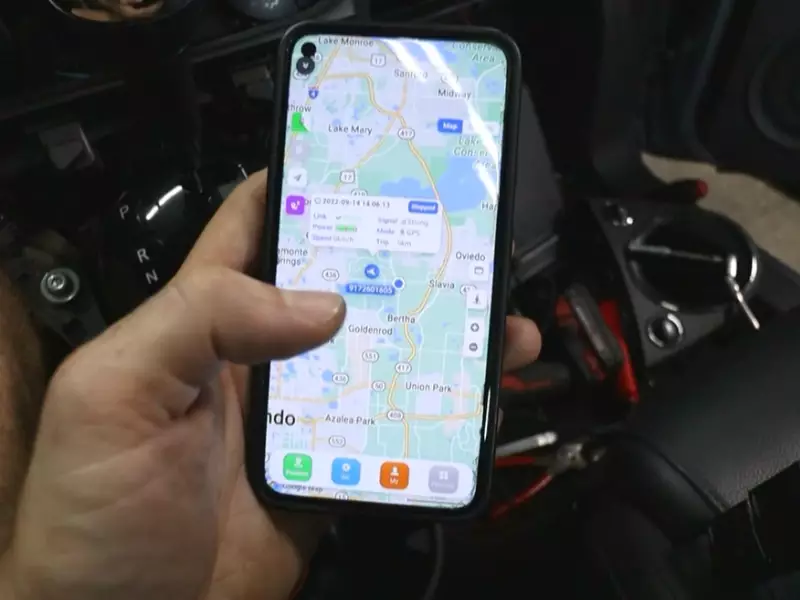
After confirming that the tracker is properly connected, it’s time to activate it using the manufacturer’s app or online portal. The activation process may vary depending on the specific car tracker you’ve purchased, but here’s a general guide to follow:
- Download and install the manufacturer’s app on your smartphone or tablet if it’s required for activation.
- Create an account or log in to your existing account on the manufacturer’s app or online portal.
- Follow the provided instructions to register the tracker by entering its unique identification number or serial number. This information is usually located on the tracker itself or included in the product packaging.
- Once the tracker is registered, you may need to input additional details about your vehicle, such as its make, model, and year.
- After completing the registration process, you should be able to access the tracking features and settings through the app or online portal.
- Take a moment to familiarize yourself with the app or online portal, as you’ll be using it to monitor your vehicle’s location, set up alerts, and access other relevant information provided by the tracker.
By following these steps, you can ensure that your car tracker is not only installed correctly but also fully functional and ready to provide you with peace of mind regarding your vehicle’s security and location.
Step 5: Troubleshooting Common Installation Issues
Once you have successfully installed a car tracker, it’s important to remember that occasional issues can arise. In this step, we will discuss some common installation problems you may encounter and how to troubleshoot them effectively. By familiarizing yourself with these solutions, you can ensure that your car tracker functions smoothly at all times.
Troubleshooting connectivity problems
One of the most common issues users face with car trackers is connectivity problems. If you notice that your car tracker is not showing accurate or up-to-date information on your monitoring platform, it could be due to a connectivity issue. Here are a few steps you can take to troubleshoot this problem:
- Check the network coverage in your area: Poor network coverage can lead to intermittent connectivity problems. Consult your service provider to ensure that the network coverage is strong in your region.
- Verify the SIM card status: Make sure that the SIM card inserted in your car tracker is activated and has an adequate data plan. You can also try removing and reinserting the SIM card to refresh the connection.
- Inspect the antenna connection: Ensure that the antenna connected to your car tracker is securely attached. A loose connection can result in weak signals and poor connectivity.
- Restart your car tracker: Sometimes, restarting the car tracker can resolve connectivity issues. Simply turn off the tracker and wait for a few seconds before switching it back on.
- Check for firmware updates: Occasionally, software updates may be released by the manufacturer to improve connectivity. Check if any firmware updates are available for your car tracker and install them if necessary.
Dealing with issues related to power supply
Power supply problems can also hinder the performance of your car tracker. Whether it’s a battery-related issue or a problem with the wiring, addressing these concerns promptly is essential. Here are a few steps you can follow to troubleshoot power supply issues:
- Check the battery level: Ensure that the battery connected to your car tracker is sufficiently charged. If the battery is running low, recharge it using the appropriate charging method mentioned in the device manual.
- Inspect the wiring connections: Verify that all the wiring connections, including those to the power source and the car tracker itself, are secure and intact. Loose connections can disrupt the power supply.
- Look for blown fuses: In case of a sudden power failure, there might be a blown fuse in the system. Examine the fuses connected to the car tracker and replace any that are damaged.
- Check for faulty wiring: If you suspect an issue with the wiring, visually inspect it for any signs of damage, such as frayed or exposed wires. Replace or repair the faulty wiring as required.
- Consider a professional inspection: If you have exhausted all troubleshooting options and are still experiencing power supply problems, it may be best to seek assistance from a professional car tracker installer or technician.
By following these troubleshooting steps, you can address common installation issues with your car tracker effectively. Remember, maintaining proper connectivity and power supply is crucial for accurate and reliable tracking. Regular monitoring and timely intervention will ensure that you can enjoy the benefits of your car tracker without any disruptions.
Frequently Asked Questions Of How To Install A Car Tracker
Can I Install Car Tracker Myself?
Yes, you can install a car tracker yourself. It is a DIY process that can be done following the provided instructions. Just ensure to carefully follow the installation guide for a successful setup.
Can You Put A Tracker On A Car Without Them Knowing?
Yes, it is possible to put a tracker on a car without them knowing.
How Much Does It Cost To Have A Tracker Fitted To Your Car?
The cost of fitting a tracker to your car varies depending on the type of tracker and the installation service. Generally, prices range from $100 to $500 for the device and installation. It is best to consult with a professional for an accurate quote tailored to your specific needs.
Where Is A Good Place To Hide A Gps Tracker?
A good place to hide a GPS tracker is inside the glove compartment or under the driver’s seat. These spots provide easy access and a discreet location to prevent detection and tampering.
Conclusion
Installing a car tracker is a smart and essential step to enhance the safety and security of your vehicle. With the simple steps outlined in this blog post, you can easily install a car tracker yourself and have peace of mind knowing that you can track your vehicle’s location at any time.
By following the tips and recommendations provided, you can ensure a smooth installation process and effectively protect your car from theft or loss. Start protecting your vehicle today with a reliable car tracker installation.
