To install a car stereo system, you need to follow a few simple steps. First, remove the old stereo and disconnect all the wiring.
Then, connect the new stereo to the car’s wiring harness and secure it into place.
Getting Started
Installing a car stereo system can be an exciting project, allowing you to enjoy your favorite music and enhance your driving experience. However, it is important to start off on the right foot. In this blog post, we will guide you through the crucial first steps of the installation process.
Choosing the right car stereo system
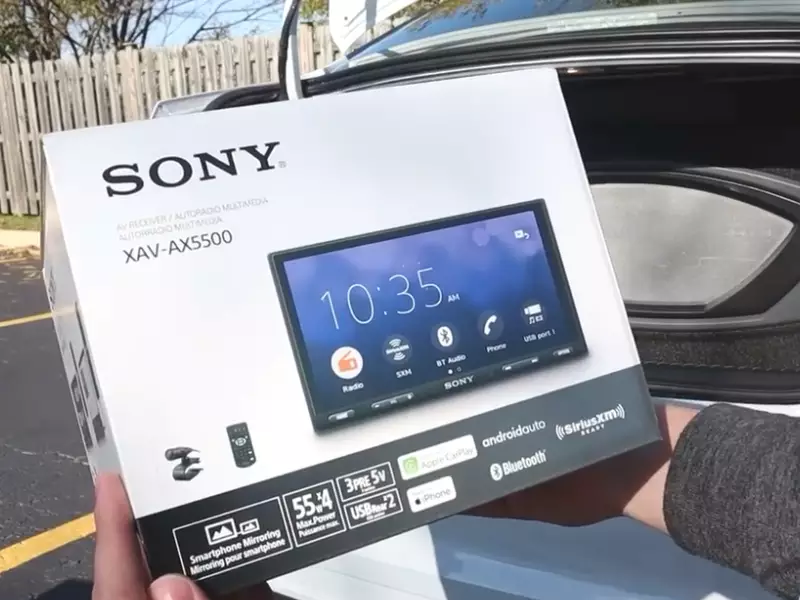
Before you begin the installation process, it is important to determine which car stereo system is suitable for your vehicle. Consider factors such as the compatibility with your car’s make and model, the features you desire, and your budget. You may want to consult online reviews and seek recommendations from car audio experts.
Ensure that the car stereo system you choose meets your specific requirements and enhances your audio experience. Whether you prioritize excellent sound quality, advanced connectivity options, or additional features such as Apple CarPlay or Android Auto, make sure the system you select aligns with your preferences.
Gathering the necessary tools and supplies
Once you have chosen the right car stereo system, it is time to gather the tools and supplies you will need for the installation. Having all the necessary equipment on hand will help streamline the process and prevent delays. Here are some tools you may require:
| Screwdriver set | Wire cutters/strippers | Electrical tape |
| Crimping tool | Panel removal tools | Wiring harness adapter |
| Fuse tester/puller | Mounting kit | Heat shrink tubing |
Make sure to have these tools readily available before you proceed with the installation. This will save you time and frustration, ensuring a smooth process.
Preparing the car for installation
Properly preparing your car for the installation is crucial to ensure a successful outcome. Take the following steps to get your vehicle ready:
- Disconnect the negative terminal of the car battery to avoid any potential electrical hazards.
- Study the car stereo system’s installation manual and familiarize yourself with the wiring diagram specific to your vehicle.
- Gather information about any additional components or accessories that may be required for your particular car model.
- Identify the location where you will mount the new car stereo system. Make sure it is compatible with your chosen mounting kit.
- Remove the existing car stereo system, whether it is an OEM unit or an aftermarket system, using the appropriate panel removal tools.
By properly preparing your car for the installation, you will minimize any potential complications and ensure a smooth and efficient process.
Now that you have chosen the right car stereo system, gathered the necessary tools, and prepared your car, you are ready to move on to the next steps of the installation process. Our next blog post will guide you through the electrical connections and mounting of the new system. Stay tuned!
Removing The Old Stereo
Removing the old stereo is an essential step in installing a new car stereo system. This process involves disconnecting the battery for safety, removing the trim panels, and accessing the old stereo. Let’s dive into each of these steps:
Disconnecting the battery for safety
Before you begin removing the old stereo, it is crucial to disconnect the battery to ensure your safety. Follow these steps:
- Locate the car’s battery, usually found under the hood or in the trunk.
- Using a wrench or socket, loosen the negative (-) terminal clamp.
- Once the clamp is loosened, remove it from the battery terminal.
By disconnecting the battery, you eliminate the risk of electric shock or damaging any electrical components while working on the car stereo system.
Removing trim panels and accessing the old stereo
With the battery safely disconnected, you can now remove the trim panels to access the old stereo. Follow these steps:
- Identify the trim panels surrounding the stereo.
- Using a panel removal tool or a flathead screwdriver wrapped in a cloth to prevent scratches, carefully pry off the trim panels.
- Set the removed panels aside in a safe place to avoid misplacing them.
- Once the trim panels are removed, you will have clear access to the old stereo unit.
Be cautious while prying off the trim panels, as excessive force can lead to breakage or damage. Take your time and ensure gentle yet firm pressure to remove the panels without causing any harm.
Disconnecting the wiring and antenna connections
Now that you can see the old stereo unit, it’s time to disconnect the wiring and antenna connections. Follow these steps:
- Identify the wiring harness connectors connected to the back of the stereo unit.
- Press the release tabs or squeeze the connectors to disconnect them from the stereo.
- For antenna connections, gently pull the antenna cable away from the old stereo unit.
- Ensure that you remember the positions and connections for the reinstallation process.
Take note of the wire colors and their corresponding functions to aid you in connecting the new stereo correctly.
With the old stereo system safely removed, you are now ready to install the new car stereo by following the proper installation steps. Stay tuned for our upcoming blog post on ‘How to Install a Car Stereo System’!
Installing The New Stereo
Now that you’ve completed the necessary preparation steps for installing a car stereo system, it’s time to move on to the exciting part – installing the new stereo. This process involves three key steps: connecting the wiring harness to the new stereo, attaching the mounting kit to the new stereo, and securing the new stereo into the dashboard. Let’s dive into each of these steps and get your new stereo up and running!
Connecting the wiring harness to the new stereo
The first step in installing your new car stereo is to connect the wiring harness to the new stereo. The wiring harness acts as the intermediary between the stereo and your car’s electrical system, allowing them to communicate effectively. To ensure a seamless connection, follow these steps:
- Identify the wiring harness specific to your vehicle’s make and model.
- Match the wire colors on the harness with those on the stereo’s wiring diagram.
- Connect the corresponding wires together, ensuring a secure and snug fit.
- Once all the wires are properly connected, use electrical tape to insulate and protect the connections.
Attaching the mounting kit to the new stereo
After successfully connecting the wiring harness, it’s time to attach the mounting kit to the new stereo. The mounting kit allows the stereo to fit securely into your car’s dashboard. Follow these steps to ensure a proper installation:
- Refer to the manufacturer’s instructions to identify the specific mounting kit required for your stereo and vehicle.
- Attach the mounting brackets provided with the kit to the sides of the stereo.
- Position the stereo with the attached mounting kit into the dashboard slot, ensuring a snug fit.
- Secure the mounting kit to the dashboard using screws or the provided locking mechanism.
Securing the new stereo into the dashboard
The final step in the installation process is to secure the new stereo into the dashboard, ensuring it is firmly in place. Here’s how:
- Double-check that all connections are secure and there are no loose wires.
- Gently slide the stereo into the dashboard slot, aligning it with the mounting kit and ensuring proper fit.
- Push the stereo in until it clicks into place or use the locking mechanism provided.
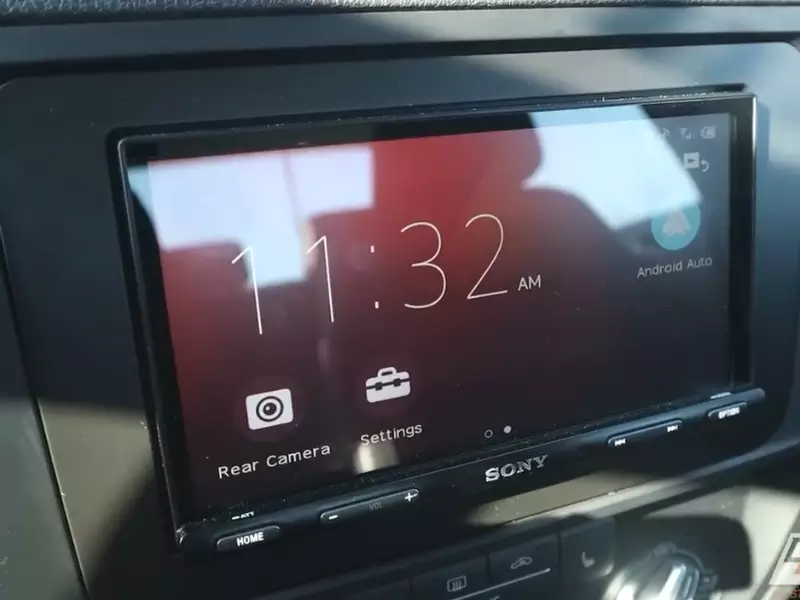
- Test the stereo to ensure it powers on and functions correctly before fully securing it.
With these steps completed, you’ve successfully installed the new car stereo system. Enjoy the enhanced audio experience on your drives!
Wiring And Powering The Stereo
Connecting the wiring harness to the car’s wiring
The first step in wiring and powering your car stereo system is to connect the wiring harness to the car’s existing wiring. The wiring harness acts as an interface between the stereo and the car, allowing for a seamless connection.
To start, locate the car’s wiring harness, typically found behind the stereo or in the dashboard. Once you’ve located it, you’ll need to match the wires on the stereo’s harness with the corresponding colors on the car’s harness. This ensures that the connections are properly aligned.
Using wire strippers, carefully remove about half an inch of insulation from each wire on both the car and stereo harnesses. Then, join the wires together using crimp connectors or soldering them for a more secure connection. Make sure to match the positive and negative connections correctly to avoid any electrical malfunctions.
The final step is to secure the connection by wrapping each individual wire with electrical tape. This prevents any loose connections or short circuits, ensuring a reliable and safe connection.
Connecting the antenna to the stereo
In order to receive radio signals, it’s essential to connect the car’s antenna to the stereo. This process is straightforward and requires minimal tools.
- Locate the car’s antenna cable, which is usually located behind the stereo or in the car’s trunk.
- Ensure that the antenna cable is compatible with the stereo by checking the connectors. If they don’t match, you may need to purchase an adapter.
- Connect the antenna cable to the corresponding antenna input on the back of the stereo. Ensure that the connection is secure and tight to avoid any signal interference.
- Once connected, neatly tuck away the excess cable to avoid any clutter or potential damage.
Testing the stereo’s functionality and sound quality
After completing the wiring and antenna connections, it’s crucial to test the stereo’s functionality and sound quality. This ensures that everything is working correctly and allows for fine-tuning if necessary.
Start by powering on the stereo and cycling through its functions, including radio, CD player, and any auxiliary inputs. Verify that each function is working correctly and that the sound is clear and balanced.
If any issues are detected, double-check the wiring connections to ensure they are properly secured and matched. Additionally, verify that the sound settings are adjusted correctly and that any sound enhancements, such as equalizers or crossovers, are properly configured.
You can also adjust the stereo’s balance and fade settings to ensure that the audio is distributed evenly throughout the vehicle. This will help eliminate any imbalances or distortion in the sound quality.
By following these steps and thoroughly testing the stereo’s functionality and sound quality, you can ensure a seamless installation and enjoy your car stereo system to its fullest potential.
Completing The Installation
Now that you have successfully installed the car stereo system, it’s time to complete the final steps to ensure everything is secure and in working order. Follow these crucial steps below to finish off the installation process:
Reattaching Trim Panels and Securing the Stereo
Using the trim removal tools, carefully reattach the trim panels that you had temporarily removed earlier in the installation process. Start with the main dashboard panel and work your way through each individual panel, ensuring they snap back into place securely. Take your time to align the clips properly, as forcing the panels into position may cause damage.
Once the trim panels are securely reattached, focus on securing the car stereo itself. Slowly slide the stereo unit into the dash until it fits snugly. If there are any connecting brackets or screws provided with the stereo, use them to ensure a tight fit. Refer to the manufacturer’s instructions for specific guidance on securing the stereo.
It is essential to double-check that the stereo unit is firmly in place before proceeding.

Testing the Stereo Again to Ensure Everything Works
Now that the stereo is properly secured, it’s time to test it once more to ensure all the functions are working correctly. Power on the stereo and check if the display turns on. Test each channel and adjust the volume to ensure clear sound output. Don’t forget to test the radio, CD player, aux input, and any additional features specific to your car stereo model. Confirm that all buttons and knobs are functioning correctly.
If you encounter any issues during this testing phase, refer to the troubleshooting section in the user manual or seek assistance from a professional.
Tidying Up and Organizing Any Loose Wiring
With the stereo fully tested and working perfectly, it’s time to tidy up any loose wiring to ensure a clean and organized install. Start by carefully grouping the wires together and securing them with zip ties or electrical tape. Make sure that no wires are pinched or obstructing any moving parts of the car. Properly organize the wires behind the dash to prevent any interference with the stereo or future maintenance tasks.
Take this opportunity to double-check that all connections are secure and properly insulated. Inspect the wire connections for any signs of damage or loose connections. Address any issues before finalizing the installation.
Once you are satisfied with the wiring organization and security, close any access panels or compartments back into place. Give the interior of your car a final once-over to ensure everything looks neat and tidy, and there are no loose tools or screws left behind.
Congratulations! You have successfully completed the installation of your new car stereo system. Take a moment to enjoy the enhanced audio experience in your vehicle!
Troubleshooting
Even with a meticulous installation process, it’s not uncommon to encounter some issues when setting up a car stereo system. Fortunately, many of these problems can be resolved with a little troubleshooting. In this section, we’ll explore some of the common issues that you may face and provide step-by-step solutions to help you get back on track.
Common issues and how to resolve them
Issue 1: No power to the stereo
If your car stereo fails to power up, there could be a few reasons behind it. First, ensure that your car’s battery is charged and the positive and negative connections are secure. Additionally, check the stereo’s fuse to make sure it hasn’t blown. If everything seems fine, try resetting the stereo by disconnecting it from the power source and reconnecting it after a few minutes.
Issue 2: Distorted sound
When your car stereo produces a distorted sound, it can be frustrating. One common cause is improper grounding. Ensure that the ground wire of your stereo is securely connected to a clean metal surface on the vehicle’s chassis. Moreover, make sure that all the speaker connections are properly soldered or crimped and that there are no loose wires. Adjusting the EQ settings on the stereo can also help eliminate distortion.
Issue 3: Poor reception
If you’re experiencing weak radio reception or frequent signal dropouts, the antenna might be the culprit. Check the antenna connection to ensure it is securely attached to the back of the stereo. If it’s an external, adjustable antenna, try rotating it or repositioning it for better reception. Additionally, make sure there are no obstructions blocking the antenna’s line of sight to the radio station tower.
Additional resources for further troubleshooting assistance
While the troubleshooting techniques discussed above should resolve the most common issues, you may encounter more complex problems that require additional assistance. To help you navigate through these challenges, here are some resources that you can refer to:
These resources offer a wealth of information, including step-by-step troubleshooting guides, forums where you can seek advice from fellow car audio enthusiasts and direct support from the manufacturers. Remember, troubleshooting is a normal part of any car stereo installation, so don’t hesitate to seek help when needed.
Enhancing Your Car Stereo System
When it comes to improving your car stereo system, there are several upgrades and additions that can take your audio experience to the next level. From enhanced sound quality to thunderous bass, here are three ways to enhance your car stereo system.
Upgrading Speakers for Better Sound Quality
To truly enjoy your favorite tunes while cruising down the road, upgrading your car’s speakers is a must. Factory-installed speakers often lack the power and clarity to provide an immersive audio experience. By installing high-quality aftermarket speakers, you can enjoy crisper highs, richer lows, and a well-balanced sound.
When choosing new speakers, consider the power handling and frequency response. Power handling refers to the speaker’s ability to handle the power from your car stereo system. Look for speakers with a higher power handling capability to ensure they can handle the output from your amplifier.
Frequency response is equally important as it determines the range of audio frequencies a speaker can produce. Look for speakers with a wide frequency response to ensure a broader range of sound reproduction. This will allow you to enjoy all the intricate details of your favorite music.
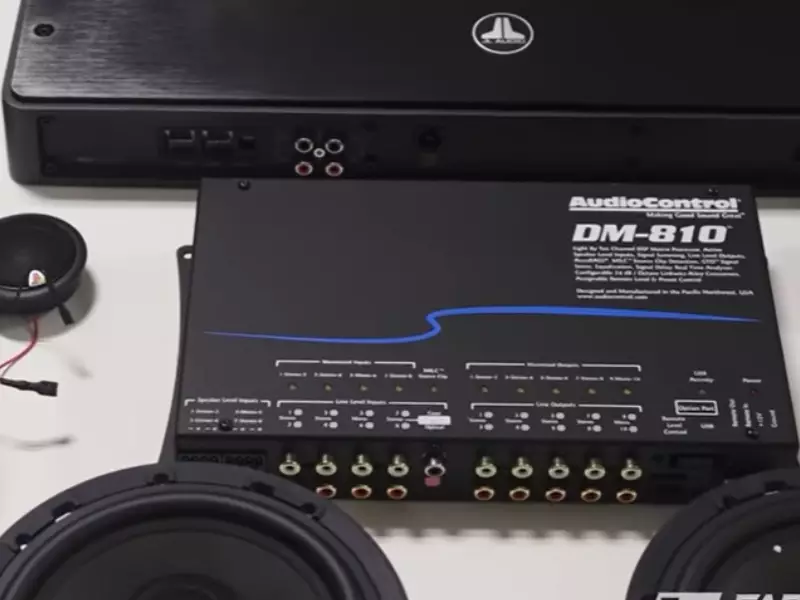
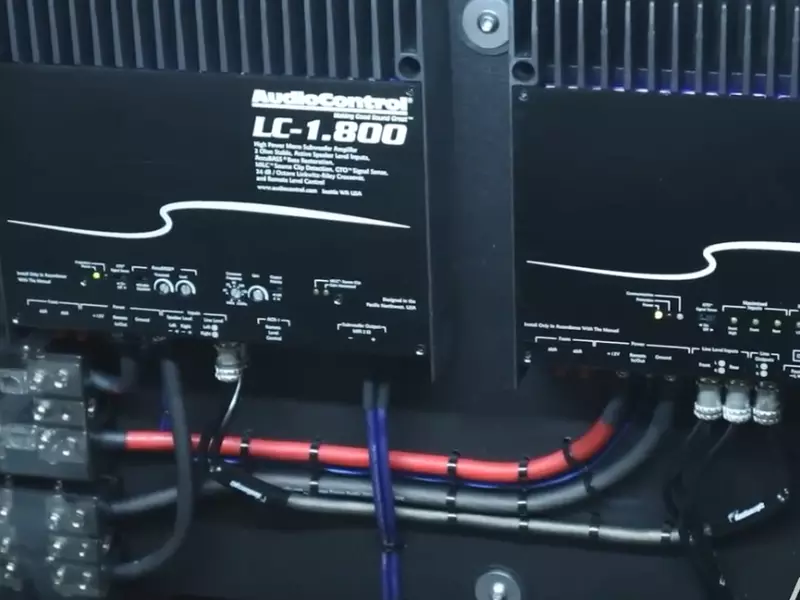
Adding Amplifiers and Subwoofers for Enhanced Bass
If you crave deep, booming bass that can make your heart race, adding amplifiers and subwoofers is the way to go. Amplifiers provide the extra power needed to drive your speakers and deliver clear, powerful sound at higher volumes. With a properly powered amplifier, your music will come alive, making every drive a concert-like experience.
Subwoofers, on the other hand, are designed specifically to reproduce low-frequency sounds. They add depth and impact to your music, making the basslines thump and the drums hit harder. When selecting a subwoofer, consider the size and power handling to match your preferences and the available space in your vehicle. A well-matched amplifier and subwoofer combination can transform your car stereo system into a bass powerhouse.
Integrating Bluetooth and Other Audio Connectivity Options
With the increasing demand for convenience and connectivity, integrating Bluetooth and other audio connectivity options into your car stereo system is essential. Bluetooth allows you to stream music wirelessly from your smartphone or tablet, eliminating the need for messy cables and auxiliary connections. Additionally, Bluetooth enables hands-free calling, ensuring you can stay connected on the road safely.
Other audio connectivity options such as USB and auxiliary inputs offer versatility in playing music from various devices. USB connections allow direct playback of digital music files, while auxiliary inputs provide the flexibility to connect other audio devices like MP3 players or portable CD players.
By incorporating these connectivity options, you can easily enjoy music from a variety of sources, enhancing the versatility and convenience of your car stereo system.
In conclusion, upgrading your car stereo system can greatly enhance your audio experience on the road. By upgrading speakers for better sound quality, adding amplifiers and subwoofers for enhanced bass, and integrating Bluetooth and other audio connectivity options, you’ll be able to enjoy your favorite music in a whole new way. So, why settle for average sound quality when you can take your car stereo system to the next level?
Frequently Asked Questions On How To Install A Car Stereo System
Can I Install A Car Stereo Myself?
Yes, you can install a car stereo yourself. It is a DIY task that requires some basic knowledge and tools. Make sure to follow the instructions in the installation manual carefully. It is recommended to disconnect the car battery before starting the installation process to ensure safety.
Can I Put Any Car Stereo In My Car?
Yes, you can put any car stereo in your car as long as it is compatible with your car model. Make sure it fits the dimensions and wiring of your car.
What Do I Need To Install Aftermarket Car Stereo?
To install an aftermarket car stereo, you’ll need a few key items:
- An aftermarket car stereo unit
- Wiring harness adapter specific to your vehicle make and model
- Dash kit to fit the new stereo into your car’s dashboard
- Antenna adapter if necessary for your car’s antenna connection
- Tools like wire strippers, crimpers, and screwdrivers for installation.
Do You Need A Wiring Harness To Install A New Radio?
Yes, you will need a wiring harness to install a new radio. The wiring harness connects the new radio to your car’s electrical system, allowing it to power on and function properly. It ensures compatibility and simplifies the installation process.
Conclusion
Installing a car stereo system may seem like a daunting task, but with the help of this guide, you can easily upgrade your vehicle’s sound system. By following the step-by-step instructions provided, you can ensure a successful installation. From understanding the basics to connecting the wires and testing the system, you now have the knowledge and confidence to embark on this DIY project.
By enhancing your driving experience with a new car stereo, you can enjoy the best sound quality on your journeys.