To install a car speaker, start by disconnecting the battery, removing the existing speaker, connecting the new speaker, and securing it in place. Installing a car speaker involves several simple steps that can enhance your audio experience while driving.
By following these steps, you can easily upgrade your car’s sound system and enjoy high-quality sound. Disconnecting the battery ensures safety during the installation process while removing the old speaker allows for the installation of the new one. Once you’ve connected the new speaker and secured it in place, you can reconnect the battery and test your new car speaker.
Understanding The Basics Of Car Speakers
When it comes to upgrading your car’s audio system, one of the key components to consider is the car speakers. These are responsible for delivering clear and high-quality sound while you’re on the road. In this section, we’ll dive into the basics of car speakers, including the different types of speakers available and the important specifications to consider. So, let’s get started!
Types of car speakers
There are two main types of car speakers: component speakers and coaxial speakers. Understanding the differences between these two types will help you make an informed decision when it comes to choosing the right speakers for your car.
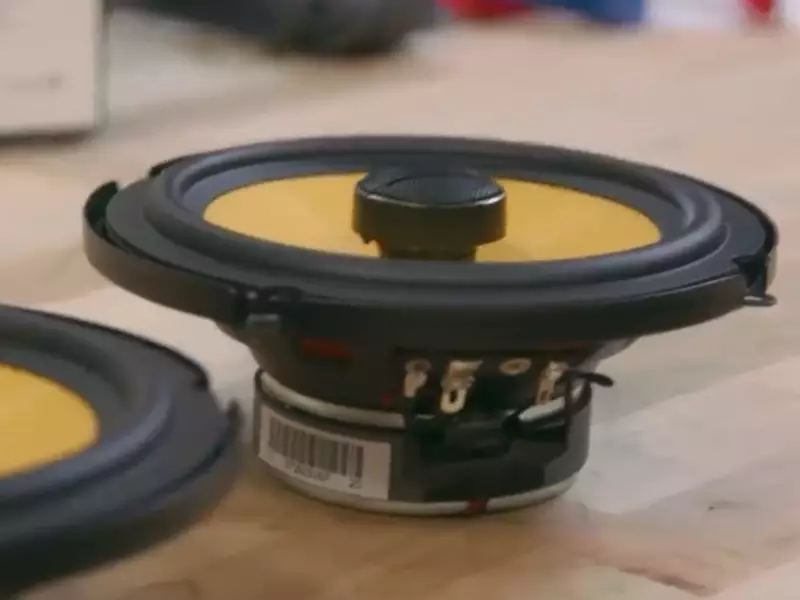
Component speakers
Component speakers consist of individual drivers, including tweeters, woofers, and external crossovers. This setup allows for better sound separation and imaging, resulting in a more immersive audio experience. Tweeters produce high-frequency sounds, while woofers handle the low-frequency sounds. The external crossover ensures that each driver receives the appropriate frequencies, reducing distortion and improving overall sound quality. Component speakers are ideal for car enthusiasts who prioritize audio performance and are willing to invest in a more advanced speaker setup.
Coaxial speakers
Coaxial speakers, also known as full-range speakers, combine multiple drivers into a single unit. These speakers are often more affordable and easier to install than component speakers. With coaxial speakers, the tweeter is mounted on top of the woofer, allowing for a more compact design. While they may not provide the same level of sound separation as component speakers, coaxial speakers are a popular choice for car owners looking for a straightforward upgrade without significant modifications.
Speaker specifications to consider
Before purchasing car speakers, it’s essential to consider their specifications. Understanding these specifications will help you choose speakers that are compatible with your car’s audio system and meet your listening preferences.
Power handling
The power handling specification refers to the amount of power a speaker can handle. It’s important to ensure that the power handling of the speakers matches the power output of your car stereo or amplifier. Choosing speakers with a higher power handling capability can prevent distortion or damage to the speakers.
Sensitivity
Sensitivity refers to how efficiently a speaker converts power into sound. A higher sensitivity rating means the speaker will produce a louder sound with the same amount of power compared to a speaker with lower sensitivity. If you have a low-powered car stereo, speakers with higher sensitivity can help you achieve satisfactory volume levels without straining your audio system.
Frequency response
The frequency response specification indicates the range of frequencies that a speaker can reproduce. It’s important to choose speakers with a wide frequency response to ensure that both high and low-frequency sounds are adequately reproduced. A broader frequency response allows for a more balanced and accurate audio experience.
Preparing For Installation
Before you can start installing your new car speaker, it’s important to properly prepare for the task. This involves gathering the necessary tools, choosing the right location for the speaker, and removing the old speaker from your car. In this section, we will guide you through these steps to ensure a successful installation.
Gathering the necessary tools
In order to install a car speaker, you will need a few essential tools. These tools include wire strippers, screwdrivers, and a crimping tool. Wire strippers are used to remove the insulation from the speaker wires, while screwdrivers are necessary for removing the old speaker and installing the new one. A crimping tool is required to properly secure the speaker wires during installation. Having these tools on hand will make the installation process much easier and more efficient.

Choosing the right location for the speaker
Choosing the right location for your car speaker is crucial for optimal sound quality. Depending on your vehicle and personal preference, you can either replace the existing speaker location or choose a new location altogether. Consider factors such as clearance, wiring accessibility, and the symmetry of sound distribution when selecting the ideal location. Additionally, make sure the speaker fits securely and does not obstruct any other components within the car.
Removing the old speaker
Before you can install a new car speaker, you must first remove the old one. Start by disconnecting the speaker wires connected to the back of the speaker. This is usually done by gently pulling apart the wire connectors. Next, use a screwdriver to remove any screws or bolts holding the speaker in place. Once all fasteners have been removed, carefully pull the speaker out of its mounting location.
Disconnecting the battery
For safety purposes, it is highly recommended to disconnect the car’s battery before proceeding with the speaker installation. This step will prevent any electrical accidents or short circuits from occurring during the process. Begin by locating the car battery and using a wrench or socket set to remove the negative (-) terminal. Make sure to tuck the disconnected cable away from the battery to prevent accidental reconnection.
Removing the door panel or speaker grille
The final step in preparing for the installation is to remove the door panel or speaker grille, depending on the location of the speaker. Door panels are typically held in place by screws, bolts, or plastic clips. Locate and remove these fasteners using the appropriate screwdrivers or a panel removal tool. Once all fasteners have been loosened or removed, gently pry off the door panel, being careful not to damage it. If the speaker is located behind a speaker grille, gently pry it off to access the speaker.
Wiring The Speaker
Identifying the Speaker Wires
Before you can start wiring your car speaker, it’s crucial to identify the speaker wires. By doing this, you’ll prevent any mishaps and ensure a seamless installation process. The speaker wires usually come in various colors, such as red, black, white, green, and blue. To determine which wire belongs to which speaker, you can consult your vehicle’s wiring diagram or use a multimeter to test for continuity.
Positive (+) and Negative (-) Terminals
Once you’ve identified the speaker wires, it’s essential to locate the positive (+) and negative (-) terminals on both the speaker and the car stereo. These terminals are typically labeled with a + or – sign and may be color-coded as red and black. Matching the polarities correctly is crucial for optimal sound quality, so take your time to ensure a correct connection.
Connecting the Speaker Wires
With the positive and negative terminals identified, you can now connect the speaker wires to your car speaker. Strip off a small portion (about half an inch) of insulation from each wire end using a wire stripper. Then, insert the exposed wires into the corresponding terminals, ensuring they are securely fastened. If necessary, you can tighten the terminals using a small screwdriver.
Crimping or Soldering the Connections
For a more secure and durable connection, you have the option to crimp or solder the speaker wire connections. Crimping involves using a crimping tool to attach a metal connector to the wire end, creating a solid connection. On the other hand, soldering involves melting a small amount of solder onto the wire ends, creating a permanent bond. Both methods have their advantages, so choose the one that suits your preference and skill level.
Using Electrical Tape to Secure the Connections
Once you’ve made the connections, it’s crucial to protect them from potential damage and short circuits. One way to do this is by using electrical tape. Simply wrap the tape around the exposed wire and terminals, ensuring a tight and secure seal. This will not only prevent any stray wires from touching each other but also protect them from moisture or other environmental factors that could affect their performance.
Routing the Speaker Wires
Now that your speaker wires are connected and secured, it’s time to route them properly within your vehicle. Depending on your vehicle’s interior design, you have a couple of options.
Through Existing Wire Channels
If your vehicle has existing wire channels, such as those for power windows or door locks, you can utilize these to route your speaker wires. This method helps keep the wires neatly organized and hidden from view, ensuring a clean and professional installation.
Using Wire Loom or Conduit for Protection
To protect the speaker wires from potential damage and ensure longevity, it’s advisable to use a wire loom or conduit. These flexible tubes can be easily installed and provide an added layer of protection against hazards like sharp edges or shifting objects. Additionally, wire loom or conduit helps maintain proper wire spacing and prevents them from tangling or getting entangled with other components.
By following these steps, you can successfully wire your car speaker and enjoy high-quality audio on the road. Remember, proper installation is key to achieving optimal sound performance and longevity, so take the time to do it right.
Mounting The New Speaker
Mounting options
Mounting the new speaker is an essential step when it comes to installing car speakers. Choosing the right mounting method ensures that your speakers are securely fastened and deliver the best sound quality. There are several mounting options available, depending on the type of vehicle and your personal preference. Let’s take a closer look at a few popular mounting options that you can consider for your car speakers.
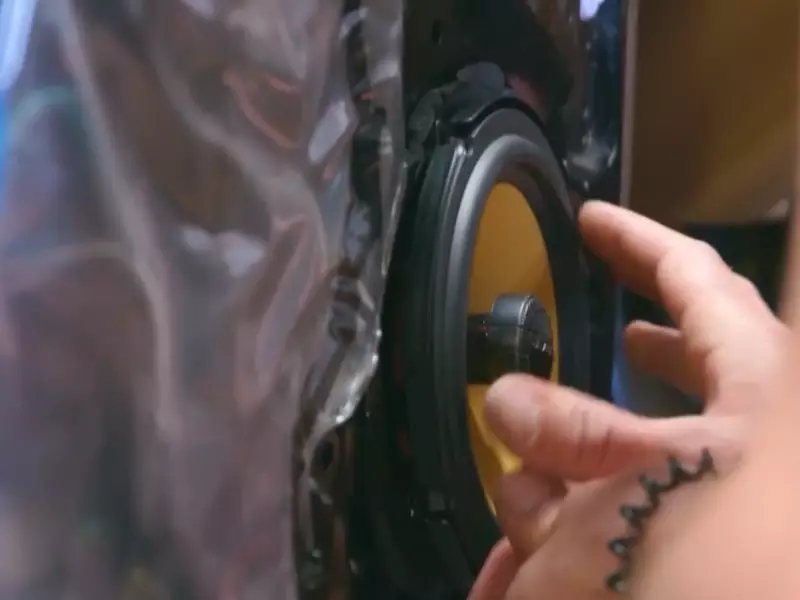
Using the factory mounting location
One common and convenient mounting option is to use the factory mounting location. Most vehicles come with pre-installed speaker mounts, making it easier to replace the existing speakers. To mount your new speaker in the factory location, follow these steps:
- Remove the old speaker by unscrewing the screws holding it in place.
- Disconnect the wiring harness from the old speaker and set it aside.
- Align the new speaker with the factory mounting holes.
- Secure the speaker in place using the screws provided with your new speakers.
- Reconnect the wiring harness to the new speaker.
Using the factory mounting location not only ensures a secure fit but also helps maintain the aesthetics of your car’s interior.
Creating a custom mounting bracket
If your vehicle doesn’t have a factory mounting location or if you prefer a different speaker placement, creating a custom mounting bracket might be the ideal solution. Here’s how you can create a custom mounting bracket:
- Measure the dimensions of the new speaker and the desired mounting location.
- Cut a piece of sturdy material, such as MDF or plastic, to match the dimensions.
- Drill holes in the bracket to align with the speaker mounting holes.
- Position the custom bracket in the desired location and mark the holes on the car’s interior.
- Remove the bracket and drill holes in the marked locations.
- Secure the bracket in place using screws or bolts.
- Attach the speaker to the bracket using the screws provided.
A custom mounting bracket allows you to achieve the perfect placement for your speakers, ensuring optimal sound projection and maximizing your audio experience.
Securing the speaker with screws or bolts
Regardless of the mounting option you choose, securing the speaker with screws or bolts is crucial to prevent any vibrations or movement that can affect sound quality. Consider the following steps to ensure a secure installation:
- Use the appropriate size and type of screws or bolts that are compatible with your speaker and mounting location.
- Align the speaker with the mounting holes.
- Insert the screws or bolts through the speaker and into the mounting holes.
- Tighten the screws or bolts firmly without over-tightening to avoid damaging the speaker or the mounting surface.
By following these steps, you can be confident that your speakers are securely mounted, allowing them to perform at their best and enhance your overall driving experience.
Testing And Troubleshooting
Once you have successfully installed your new car speaker, it’s time to put it to the test. This section will guide you through the necessary steps to ensure that your speaker is working properly and identify any potential issues. Testing and troubleshooting are crucial to achieve the best sound quality in your vehicle.
Reconnecting the battery
Before running any tests, it is important to reconnect the battery of your car. This ensures that the power supply is properly connected and allows the speaker to function. Ensure that the battery terminals are securely attached and there are no loose connections. If the battery was disconnected during the installation process, reconnecting it is a quick and essential step.
Testing the speaker
To test if your newly installed car speaker is functioning correctly, play some audio. Start by selecting a piece of music or an audio source that you are familiar with. Play the audio and listen attentively to assess the sound quality. Pay attention to the volume, clarity, and overall performance of the speaker. If you notice any issues, move on to the next steps for further testing and troubleshooting.
Playing different audio frequencies
In order to thoroughly assess the capabilities of your newly installed car speaker, it is recommended to play audio tracks with various frequency ranges. This helps to determine if the speaker performs well across the entire spectrum, from low bass to high treble. Experiment with different audio tracks that emphasize different frequencies and see how well the speaker handles each range.
Checking for distortion or rattling sounds
During the audio testing process, it is important to listen for any distortion or rattling sounds coming from the speaker. Distortion could indicate a problem with the installation or an issue with the speaker itself. Rattling sounds may suggest loose connections or improper mounting. If you notice any of these issues, further troubleshooting may be required to resolve them.
Troubleshooting common issues
Even with careful installation, issues can occasionally arise. Here are a couple of common problems you may encounter:
- Poor sound quality: If you are not satisfied with the sound quality, check the speaker connections to ensure they are secure. Make sure the speaker is properly mounted and there are no obstructions that could affect the sound. Adjusting the equalizer settings on your car stereo can also help optimize the sound quality.
- Speaker not working at all: If the speaker is not producing any sound, first check the speaker connections to ensure they are properly connected. Verify that the polarity (+/-) of the speaker is correctly aligned with the car stereo. Additionally, check the wiring to make sure there are no loose or damaged connections. If the issue persists, consider consulting a professional for further assistance.
By following these testing and troubleshooting steps, you will be able to ensure that your newly installed car speaker is functioning optimally. Addressing any issues early on will help you enjoy high-quality audio in your vehicle. However, if you encounter persistent problems or are unsure about the installation process, seeking professional help is always a good option.
Finalizing The Installation
Once you have successfully installed your car speaker and made all the necessary connections, it’s time to finalize the installation. This last step ensures that everything is in place and working correctly before you hit the road and enjoy your enhanced audio experience.
Reinstalling the door panel or speaker grille
Now that the speaker is securely mounted and all connections are complete, it’s time to put the finishing touches. Carefully place the door panel or speaker grille back onto the door frame and align it properly. Make sure all the clips or screws are in their original positions and tighten them as necessary. This ensures that the speaker is protected and the interior of your car looks neat and tidy.
Checking all connections and wire routing
Once the door panel or speaker grille is back in place, double-check all the connections you made earlier. Examine each wire to ensure it is properly connected and secure. Check the wire routing as well to make sure it is organized and not obstructing any other car components. You want to avoid any potential interference or damage to the wires in the future.
Testing the speaker again
To ensure that the installation was successful and that your new car speaker is working correctly, it’s essential to test it one final time. Turn on your car stereo and play a variety of audio tracks to check if the sound quality is as expected. Pay attention to any distortions, crackling noises, or uneven volume levels. If you notice any issues, go back and recheck the connections and wire routing. Once you are satisfied with the results and the sound is clear and balanced, you are ready to hit the road and enjoy your newly installed car speaker!
Tips For Better Sound Quality
Achieving superior sound quality in your car can greatly enhance your driving experience. Whether you’re a music enthusiast or simply prefer a more immersive audio environment, there are several tips and tricks you can employ to enhance the sound quality of your car speakers. In this article, we will explore some techniques that can take your car audio system to the next level.
Sound deadening materials
One effective way to improve the sound quality in your car is by using sound deadening materials. These materials work by eliminating vibrations and reducing road noise, resulting in a cleaner and more focused sound. Some popular sound deadening materials include:
| Material | Description |
|---|---|
| Butyl sheets | Easy to install, provides excellent sound isolation |
| Foam insulation | Reduces vibrations and echoes, perfect for doors and panels |
| Mass loaded vinyl | Provides excellent soundproofing, ideal for floor and trunk |
By applying these sound deadening materials to your car’s interior surfaces, you can minimize sound distortion and improve the overall audio quality.
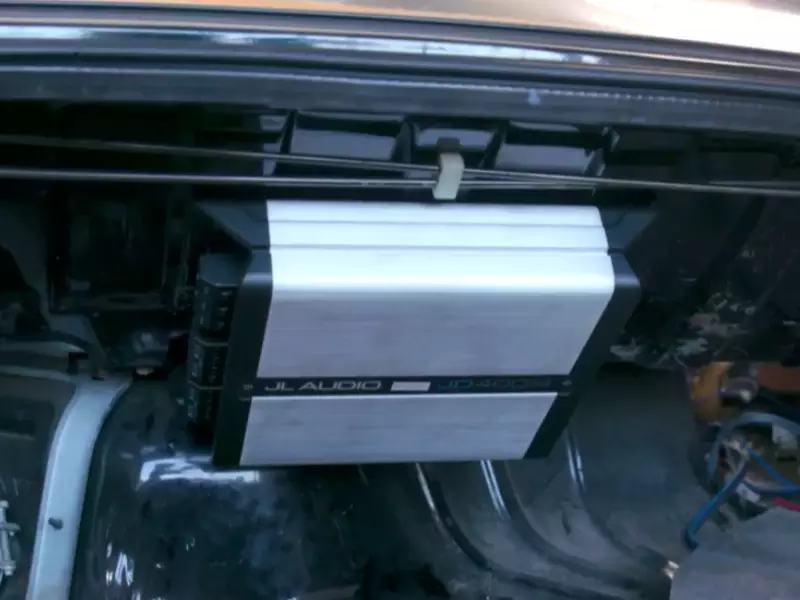
Upgrading the car stereo or amplifier
One of the most significant factors affecting sound quality is the quality of the car stereo or amplifier. If you’re still using the factory-installed audio system, consider upgrading to a higher-quality unit. Look for features like high RMS power, low THD (Total Harmonic Distortion), and advanced equalization settings. An aftermarket stereo or amplifier can provide cleaner and more powerful sound output, enabling you to enjoy your music with enhanced clarity and depth.
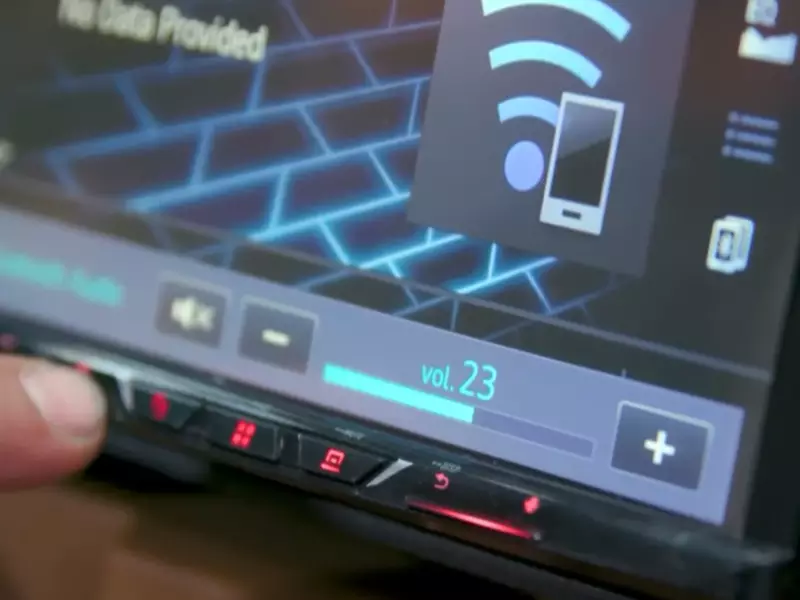
Adjusting the speaker settings in the audio system
Optimizing speaker settings is crucial for achieving the best sound quality. The audio system in your car may have various settings that can be adjusted to improve sound reproduction. Start by adjusting the equalizer settings to fine-tune the frequency response of your speakers. Experiment with different settings and listen for a balanced sound across the entire audio spectrum, from deep bass to crisp high frequencies.
Additionally, consider adjusting the balance and fade controls to ensure proper sound distribution between speakers and achieve a more immersive listening experience. Take your time to play with the settings until you find the perfect balance that suits your preferences and the specific acoustics of your car’s interior.
With these tips and techniques in mind, you can enhance the sound quality of your car speakers and transform your daily commute or road trips into a captivating audio experience. Embrace the power of sound and enjoy your favorite music like never before!
Frequently Asked Questions Of How To Install A Car Speaker
Can I Install New Car Speakers Myself?
Yes, you can install new car speakers yourself. It is a relatively simple task that requires basic tools and some basic knowledge of car audio systems. By following a step-by-step guide or tutorial, you can save money on professional installation and enjoy an enhanced audio experience in your car.
Is It Hard To Install Speakers In A Car?
Installing speakers in a car is not difficult. Just follow the instructions provided with the speakers, gather the necessary tools, and carefully connect the wires. It’s a straightforward process that can be done by most car owners.
How Do You Hook Up Car Speakers?
To hook up car speakers, first, locate the speaker wires in your car. Strip the wire insulation, then connect the positive (+) and negative (-) terminals of the speaker wires to the corresponding terminals on the speakers. Finally, secure the speakers in place and test the sound.
Do You Need An Amp To Install Car Speakers?
No, you don’t need an amp to install car speakers. However, using an amplifier can enhance sound quality and provide more power to the speakers. It is recommended for those seeking improved audio performance.
Conclusion
Installing a car speaker is a simple process that can greatly enhance your audio experience on the road. By following the step-by-step instructions provided in this guide, you can confidently tackle this DIY project. Remember to gather all the necessary tools, carefully connect the wires, and secure the new speaker in place.
With a little patience and attention to detail, you’ll be enjoying crystal-clear sound from your car’s speakers in no time!