To install a car DVD player, you need to gather the necessary tools and materials, remove the dashboard trim, connect the wiring harness, mount the new unit, and test its functionality. Installing a car DVD player requires a few steps, but with the right tools and knowledge, it can be done quickly and efficiently.
A car DVD player can provide endless entertainment options on long drives and make the overall driving experience more enjoyable for everyone involved. We will guide you through the process of installing a car DVD player, ensuring a smooth and successful installation.
Let’s get started!
Factors To Consider When Purchasing A Car Dvd Player
When it comes to upgrading your car’s entertainment system, a car DVD player is a great investment. Not only does it provide hours of entertainment, but it also adds convenience and functionality to your vehicle. However, with so many options available in the market, it’s important to consider a few factors before making a purchase. This article discusses some important factors that will help you choose the right car DVD player for your needs.
Budget
Your budget is an important factor to consider when purchasing a car DVD player. Car DVD players come in a wide price range, from affordable options to high-end models. It’s essential to set a budget and stick to it. Research different brands and models within your price range to find the best value for your money.
Compatibility with your car’s audio system
Compatibility with your car’s audio system is crucial to ensure a seamless installation process. Different car DVD players have different compatibility requirements. Before making a purchase, check the specifications and ensure that the DVD player is compatible with your car’s audio system. This includes checking the types of audio inputs, outputs, and connectors needed for installation.
Screen size and resolution
The screen size and resolution of a car DVD player significantly impact your viewing experience. A larger screen size provides a more immersive experience, while higher resolution ensures better picture quality. Consider the size of your car’s dashboard and choose a screen size that fits well without obstructing visibility. Additionally, opt for a DVD player with a resolution that offers sharp and clear images, so you can enjoy your favorite movies and videos to the fullest.
DVD playback options
When purchasing a car DVD player, it’s important to consider the DVD playback options it offers. Some DVD players only support standard DVDs, while others are compatible with various formats such as CDs, MP3s, and even USB drives. If you have a collection of diverse media, look for a DVD player that supports a wide range of formats. Additionally, consider if you want any additional features such as Bluetooth connectivity, navigation, or smartphone integration.
In conclusion, when purchasing a car DVD player, it’s important to consider factors such as budget, compatibility with your car’s audio system, screen size and resolution, as well as DVD playback options. By carefully considering these factors, you can choose a car DVD player that meets your specific needs and guarantees an enjoyable and hassle-free entertainment experience on the road.
Gather The Required Tools And Materials
Before you start installing a car DVD player in your vehicle, it’s crucial to gather all the necessary tools and materials. Having everything in one place will save you time and make the installation process smoother. Here are the tools and materials you’ll need:
Wiring harness
A wiring harness is a must-have item when installing a car DVD player. It allows you to connect the player to your car’s existing wiring system. Make sure you choose a wiring harness that is compatible with your vehicle’s make and model.
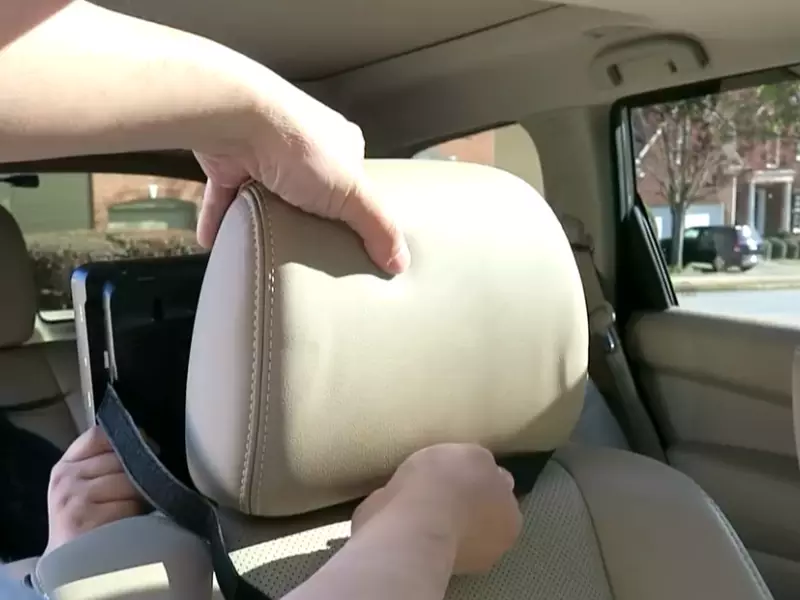
Mounting brackets
Mounting brackets are essential for securely attaching the DVD player to your car’s dashboard or headrest. These brackets help keep the player in place while driving, preventing any unnecessary vibrations or movements.
Screws and fasteners
When installing the car DVD player, you will need screws and fasteners to secure the mounting brackets to the dashboard or headrest. Choose screws and fasteners that are of the appropriate size and strength for a sturdy installation.
Screwdriver and pliers
A screwdriver and pliers are necessary for tightening the screws and fasteners during the installation process. These tools will help you achieve a secure and professional-looking installation.
Electrical tape
Electrical tape is essential for insulating and protecting the wiring connections. It ensures that the wires do not come into contact with any metal surfaces, preventing short circuits or damage to the player.
By gathering these tools and materials beforehand, you will be well-prepared to install your car DVD player. This will help you complete the installation process efficiently and ensure a successful outcome. So, let’s move on to the next step: Installing the Car DVD Player.
Removing The Old Stereo System
When it comes to installing a car DVD player, one of the first steps is to remove the old stereo system. This is an essential part of the process, as it allows you to make way for the new DVD player and ensure a seamless installation. In this section, we will guide you through the necessary steps to remove your old stereo system, step by step.
Disconnecting the battery
The first step is to disconnect the battery of your car to ensure safety during the process. This prevents any electrical hazards and ensures that you can work on your car’s stereo system without any risk. To do this, follow these simple steps:
- Locate the car battery, usually found under the hood.
- Using the appropriate tools, typically a wrench or pliers, disconnect the negative (-) terminal of the battery.
- Securely isolate the disconnected terminal to prevent accidental contact.
Removing the trim panel
After disconnecting the battery, you can proceed to remove the trim panel that surrounds the stereo unit. The trim panel not only provides a clean aesthetic appearance but also protects the stereo system. Here’s how to remove it:
- Identify the trim panel surrounding the stereo system.
- Using a trim panel removal tool or a flathead screwdriver covered with a cloth, carefully pry off the trim panel, starting from one corner.
- Work your way around the panel, gently releasing the clips that secure it in place.
- Once all the clips are released, carefully remove the trim panel and set it aside.
Detaching the old stereo unit
With the trim panel removed, you can now access the old stereo unit for removal. It’s important to ensure its proper detachment to avoid any damage during the process. Follow these steps:
- Locate the screws or bolts securing the stereo unit in place.
- Using the appropriate screwdriver or wrench, remove the screws or bolts.
- Gently pull out the old stereo unit, ensuring any connected wiring is disconnected properly.
- Take note of the wiring connections, as they will be essential when installing the new car DVD player.
With the old stereo system successfully removed, you are now ready to proceed to the next steps of installing the new car DVD player. Stay tuned for our upcoming blog posts where we will guide you through the installation process in detail!
Making The Necessary Wiring Connections
If you’re looking to upgrade your car’s entertainment system and enhance your driving experience, installing a car DVD player is a great option. However, before you can enjoy your favorite movies or music on the go, you need to make sure you have all the necessary wiring connections in place. In this guide, we’ll walk you through the process step by step, ensuring a smooth installation of your car DVD player.
Connecting the Wiring Harness Adapter
The first step is to connect the wiring harness adapter. This adapter allows you to easily connect the car DVD player’s wiring to your car’s existing wiring system. To do this, you’ll need to:
- Locate the wiring harness in your car and disconnect it.
- Connect the wiring harness adapter to the car’s wiring harness.
- Connect the other end of the wiring harness adapter to the car DVD player’s wiring harness.
Making these connections will ensure that the car DVD player is properly integrated with your car’s electrical system.
Matching the Wire Colors
After connecting the wiring harness adapter, the next step is to match the wire colors. This is essential to ensure that the correct wires are connected to each other. Most car DVD players and wiring harness adapters have color-coded wires for easy identification. To match the wire colors:
- Refer to the car DVD player’s installation manual to determine the function of each wire.
- Match the wire colors between the car DVD player’s wiring harness and the wiring harness adapter.
- Make sure to connect the corresponding wires for power, ground, speakers, and other necessary functions.
Matching the wire colors correctly will ensure that the car DVD player functions properly and safely.
Securely Connecting the Wires
Once the wire colors have been matched, the next step is to securely connect the wires. This is important to prevent any loose connections or electrical shorts. To securely connect the wires:
- Strip a small section of insulation from each wire end using wire strippers.
- Twist the exposed wire ends together firmly.
- Slide a crimp connector over the twisted wire ends.
- Use crimping pliers to crimp the connector, ensuring a tight and secure connection.
Securely connecting the wires will ensure a reliable and long-lasting connection between the car DVD player and your car’s electrical system.
Insulating the Connections with Electrical Tape
After securely connecting the wires, it’s important to insulate the connections with electrical tape. This helps to protect the connections from moisture, vibrations, and other potential sources of damage. To insulate the connections:
- Wrap each individual wire connection with electrical tape.
- Ensure that the tape covers the exposed wire ends and extends beyond the twisted section.
- Wrap the entire bundle of connected wires with electrical tape to provide additional protection.
Insulating the connections with electrical tape will help maintain the integrity of the wiring connections and prevent any issues in the future.
By following these steps and making the necessary wiring connections, you’ll be well on your way to enjoying your new car DVD player and all its entertainment features. Now, it’s time to sit back, relax, and enjoy your favorite movies or music on the road!
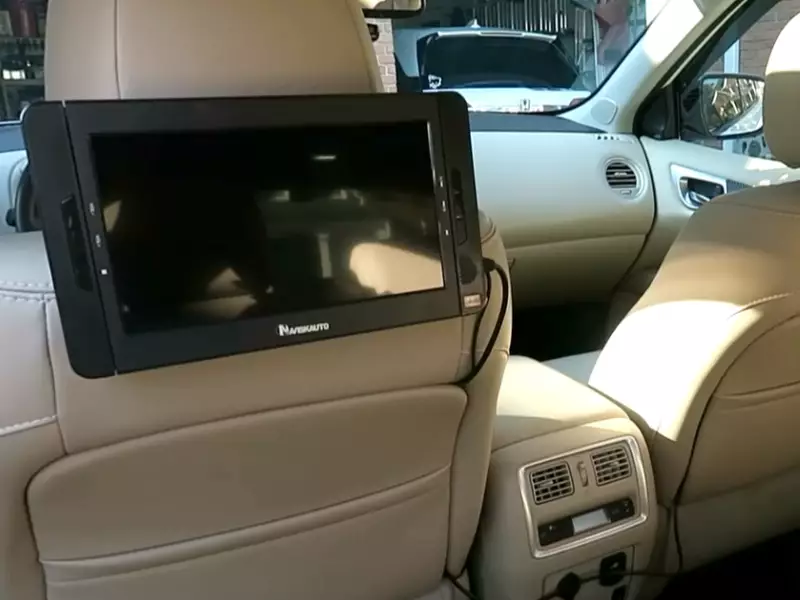
Mounting The Player
Mounting the DVD player in your car is a crucial step in the installation process. It ensures that the player is securely positioned and easily accessible for you and your passengers. In this section, we will discuss how to choose the right location for mounting the player, how to attach the mounting brackets, and how to secure the player in place.
Choosing the Right Location
When choosing the location for mounting your car DVD player, there are a few factors you should consider:
- Visibility: Select a location that provides clear and unobstructed visibility of the player so that you can easily operate it while driving.
- Accessibility: Ensure that the player is within reach and easily accessible for both the driver and passengers.
- Avoiding Airbags and Obstructions: Make sure to avoid mounting the player in areas where it may interfere with airbags or obstruct your view while driving.
Attaching the Mounting Brackets
Once you have chosen the location, it’s time to attach the mounting brackets. Follow these steps:
- Prepare the Mounting Surface: Clean the area where you will be attaching the brackets using a mild cleaning solution. Ensure it is free from dirt, dust, or any other debris.
- Position the Brackets: Place the brackets on the mounting surface according to the instructions provided by the manufacturer. Ensure they are aligned correctly and level with each other.
- Secure the Brackets: Use screws or adhesive provided with the brackets to secure them firmly onto the mounting surface. Double-check their stability before moving on to the next step.
Securing the Player in Place
With the mounting brackets in place, it’s time to secure the car DVD player. Here’s how:
- Align the Player: Carefully slide the player into the brackets, aligning the mounting holes on the player with the holes on the brackets.
- Attach the Screws: Insert screws into the mounting holes and tighten them securely using a screwdriver or a suitable tool. Ensure the player is firmly held in place.
- Double-Check Stability: Test the stability of the player by gently shaking it to ensure it does not move or come loose. If necessary, tighten the screws further.
By following these steps, you can mount your car DVD player effectively, providing an enjoyable and convenient entertainment experience for you and your passengers during your car journeys.
Connecting The Wiring
Connecting the wiring of your car DVD player is a crucial step in the installation process. It involves several components such as the power supply, audio and video cables, GPS antenna (if applicable), and the parking brake wire for added safety. By following these step-by-step instructions, you can easily connect the wiring and enjoy the benefits of a car DVD player in no time.
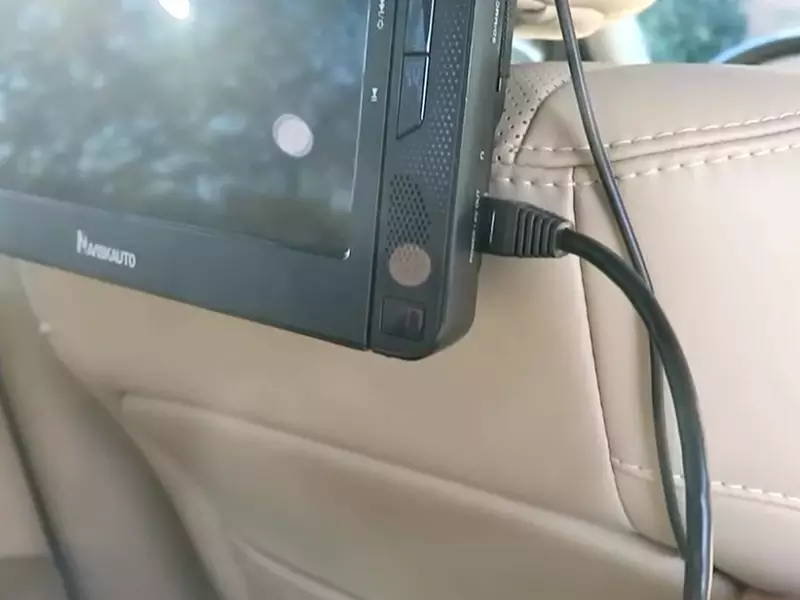
Connecting the power supply
The power supply is an essential part of your car DVD player, providing the necessary energy to operate the device. To connect the power supply:
- Locate the power wires included with your car DVD player.
- Identify the positive (+) and negative (-) wires.
- Connect the positive wire to a constant power source, such as the car battery. Use a fuse for additional protection.
- Connect the negative wire to a grounding point, ensuring a solid connection.
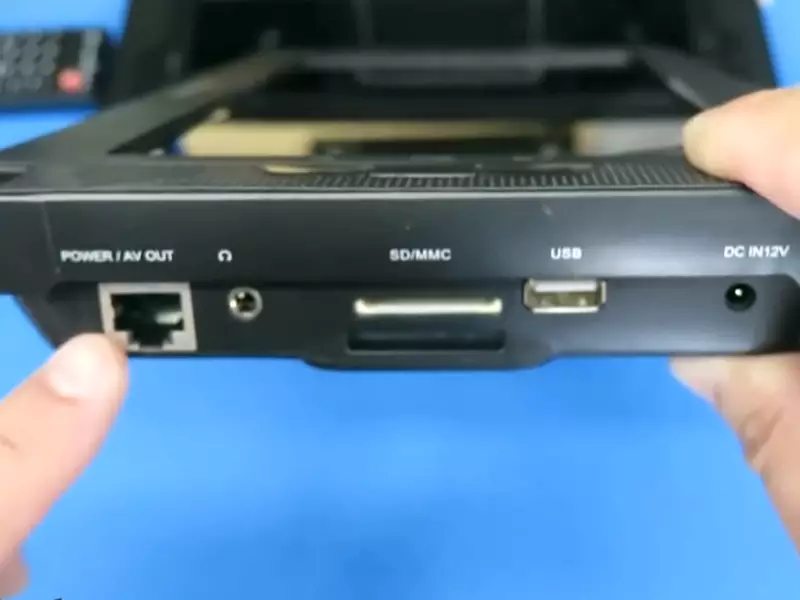
Attaching the audio and video cables
Attaching the audio and video cables is essential to ensure a seamless audiovisual experience. Follow these steps:
- Identify the audio and video output ports on your car DVD player.
- Locate the corresponding input ports on your car’s audio/video system.
- Connect the audio cables to the appropriate audio input ports, ensuring a snug fit.
- Connect the video cable to the video input port, making sure it is securely attached.
Installing the GPS antenna (if applicable)
If your car DVD player has a built-in GPS feature, you’ll need to install the GPS antenna for accurate navigation. Follow these steps:
- Locate a suitable spot on your car’s dashboard for installing the GPS antenna.
- Ensure the chosen spot allows for a clear line of sight to the sky.
- Attach the GPS antenna to the dashboard using adhesive or mounting hardware provided.
- Route the antenna cable carefully, avoiding any sharp edges or moving parts.
Connecting the parking brake wire (for safety purposes)
Connecting the parking brake wire to your car DVD player ensures extra safety by preventing video playback while the vehicle is in motion. Follow these steps:
- Locate the parking brake wire on your car DVD player’s wiring harness.
- Identify the parking brake wire in your car’s wiring system. Refer to the vehicle’s manual if needed.
- Connect the parking brake wire from the car DVD player to the parking brake wire in your car.
- Secure the connection with appropriate connectors and ensure proper insulation.
By carefully connecting the wiring of your car DVD player, you can enjoy a seamless audiovisual experience, accurate GPS navigation (if applicable), and enhanced safety features. Take your time to follow the instructions provided with your specific car DVD player model, and always prioritize safety while working with electrical components.
Testing And Finishing The Installation
Now that you have successfully installed your car DVD player, it’s time to test and finish the installation to ensure everything is working as it should. This final step is crucial to ensure that you can enjoy your new entertainment system hassle-free. In this section, we will walk you through the necessary steps to reconnect the battery, turn on the car DVD player, check all the functions and settings, and reinstall the trim panel.
Reconnecting the battery
After completing the physical installation of the car DVD player, it’s important to reconnect the battery. This is a crucial step in ensuring that your new entertainment system has the power it needs to function properly. Start by locating the negative terminal of the car battery and remove the negative cable. Carefully connect the cable back to the negative terminal, ensuring it is securely tightened. This will restore power to your car DVD player.
Turning on the car DVD player
Once the battery is reconnected, it’s time to turn on your car DVD player. Locate the power button on the device or the remote control and press it to power up the system. You should see the display come to life, indicating that the player is receiving power. If the screen remains blank or you encounter any issues, double-check the battery connection and consult the user manual for troubleshooting guidance.
Checking all the functions and settings
With the car DVD player powered on, it’s important to ensure that all the functions and settings are working properly. Start by checking the basic functions such as volume control, playback, and navigation menus. Test each function to ensure that it operates smoothly and without any glitches. Additionally, check the settings menu to confirm that you can adjust the display, audio, and other preferences to your liking. Take your time to familiarize yourself with the features and customize the settings according to your preferences.
Reinstalling the trim panel
Once you have verified that the car DVD player is functioning correctly, it’s time to reinstall the trim panel. Carefully align the panel with the dashboard and gently push it back into place. Ensure that all the clips and screws are properly secured, as this will prevent any rattling or loose fittings while driving. Take your time to ensure a seamless fit and double-check that the panel is snugly in place.
In conclusion, testing and finishing the installation of your car DVD player is a crucial step for a successful installation. By reconnecting the battery, turning on the player, checking all the functions and settings, and reinstalling the trim panel, you can ensure a smooth and enjoyable experience with your new entertainment system.
Common Installation Issues And Solutions
Installing a car DVD player can be an exciting upgrade to your vehicle, but it’s not always a smooth process. There are common installation issues that can arise, causing frustration for car owners. In this section, we will explore some of these issues and provide solutions to help you overcome them with ease.
No power to the DVD player
One of the most frustrating issues car owners face when installing a DVD player is a lack of power. If you find that your DVD player is not turning on or receiving power, there are a few potential causes and solutions to consider:
- Check the power connection: Ensure that the power cables are securely connected to the power source. Double-check all connections, including the wires leading from the DVD player to the vehicle’s power supply.
- Verify the fuse: Examine the fuse connected to the DVD player to see if it has blown out. If it has, replace it with a fuse of the same amperage to restore power.
- Test the power source: If the above steps do not resolve the issue, check the power source itself. Use a multimeter to ensure that the power outlet or battery is providing the necessary voltage to the DVD player.
No audio or distorted sound
Another common installation issue with car DVD players is a lack of audio or distorted sound. If you are experiencing this problem, consider the following solutions:
- Check the speaker connections: Ensure that the audio cables are properly connected to the DVD player and the vehicle’s speakers. Inspect the connections for any loose or damaged wires.
- Adjust the audio settings: Access the DVD player’s audio settings and make sure the volume is turned up. Additionally, check for any settings related to audio output, such as speaker configuration or equalizer settings.
- Test with different media: Sometimes, the issue may not lie with your DVD player but rather the media being played. Try using different DVDs or audio files to see if the problem persists.
Poor video quality
When installing a car DVD player, achieving optimal video quality is essential for an enjoyable viewing experience. If you are experiencing poor video quality, consider implementing these solutions:
- Check the video connections: Ensure that the video cables are securely connected to both the DVD player and the display screen. Verify that there are no loose connections or damaged wires.
- Adjust the display settings: Access the DVD player’s display settings and make adjustments to improve video quality. Play around with settings such as brightness, contrast, and color saturation until you achieve the desired outcome.
- Upgrade the display screen: If the video quality remains poor even after adjusting settings, consider upgrading your display screen. A higher resolution or larger screen size may provide better visuals.
By addressing these common installation issues and implementing the solutions provided, you can ensure a trouble-free installation process for your car DVD player. Enjoy your favorite movies, music, and more while on the road, with optimal power, audio, and video quality.
General Tips For A Successful Installation
Installing a car DVD player can enhance your driving experience by providing hours of entertainment on long trips. However, a successful installation requires careful attention to detail and proper execution. Follow these general tips to ensure a hassle-free installation of your car DVD player.
Double-checking the wiring connections
One of the most crucial aspects of installing a car DVD player is ensuring that all the wiring connections are securely and correctly in place. Before you finalize the installation, it is vital to double-check each connection to avoid any potential issues later on.
When connecting the power cables, make sure to match the positive and negative terminals correctly. Use electrical tape or heat shrink tubing to insulate the connections, preventing any short circuits. Additionally, test the audio and video connections to confirm that they are delivering the expected performance.
Using a professional if unsure
Installing a car DVD player can be quite challenging if you don’t have prior experience with automotive electronics. If you find yourself unsure about any aspect of the installation process, it is best to seek the assistance of a professional. They have the expertise and knowledge to handle even the most complex installations without causing any damage to your vehicle.
A professional installer can ensure that the wiring is done correctly, preventing any potential electrical issues that may arise later. They can also help you with any compatibility concerns or complexities that you may encounter during the installation process.
Properly routing and securing the cables
When it comes to a successful installation, proper cable routing and securing are crucial to achieving a clean and organized setup. Improperly routed cables can not only look messy but also pose a safety hazard by interfering with other vehicle components or getting tangled.
Start by identifying the best route for the cables, keeping them away from any moving parts or areas prone to heat. Utilize cable clips or zip ties to secure the cables along their designated path, minimizing any potential movement or looseness.
Pay attention to the input and output cables as well, ensuring they are routed properly to connect with external devices such as speakers or screens. By securing and organizing the cables effectively, you not only improve the aesthetics of your car DVD player installation but also reduce the risk of any future complications.
Proper Cleaning And Care For The Car Dvd Player
Keeping your car DVD player clean and well-maintained is essential to ensure optimal performance and longevity. By following a few simple cleaning and care practices, you can enjoy uninterrupted entertainment on the go. In this section, we will guide you through the proper cleaning steps for the screen and the exterior of your car DVD player, as well as provide tips on avoiding the use of harsh chemicals.
Cleaning the screen
To maintain a crystal-clear screen on your car DVD player, it’s important to clean it regularly. Here’s a step-by-step process to clean the screen effectively:
- Start by turning off the device and disconnecting it from the power source.
- Use a Microfiber Cloth, specifically designed for electronics, to gently wipe the screen in a circular motion. Avoid using paper towels or rough materials that can scratch the surface.
- Stubborn smudges or fingerprints can be removed by lightly dampening the cloth with distilled water or a screen cleaning solution, specifically formulated for electronic devices.
- Make sure not to spray the cleaning solution directly onto the screen. Instead, apply it to the cloth and wipe the screen gently.
- Once cleaned, use a dry Microfiber Cloth to remove any remaining moisture and leave the screen spotless.
Dusting the player’s exterior
Keeping the exterior of your car DVD player free from dust and debris not only enhances its appearance but also prevents any potential damage to the device. Follow these simple steps to dust the player’s exterior:
- Use a soft, dry cloth or a duster suitable for electronics to gently wipe away any visible dust or particles on the surface of the DVD player.
- Pay close attention to the ventilation gaps or slots on the player, as dust tends to accumulate there. You can use a small brush or a can of compressed air to blow away the dust from these areas.
- For stubborn dirt or grime, gently dampen the cloth with a mild, non-abrasive cleaner and wipe the affected areas.
- Once the cleaning is done, use a dry cloth to remove any moisture and leave the exterior of the player clean and dry.
Avoiding harsh chemicals
While cleaning your car DVD player, it’s crucial to avoid the use of harsh chemicals that can damage the device. Here are some tips to ensure the safety of your car DVD player while cleaning:
- Avoid using ammonia-based cleaners, alcohol, and other harsh chemicals on the screen or the exterior of the player, as they can cause yellowing, discoloration, or even permanent damage.
- Instead, opt for mild, non-abrasive cleaners specifically designed for electronics. These cleaners are often labeled as safe for use on LCD screens and electronic devices.
- Always follow the manufacturer’s instructions and recommendations regarding cleaning products to ensure the compatibility and safety of your car DVD player.
- When in doubt, a soft cloth dampened with distilled water is usually a safe and effective option for cleaning the screen and the exterior of the player.
By properly cleaning and caring for your car DVD player, you can ensure that it lasts longer and continues to provide you with excellent entertainment on the road. Incorporating these cleaning practices into your regular maintenance routine will help keep your car DVD player in top-notch condition for years to come.
Additional Features And Upgrades
Installing a car DVD player can greatly enhance the entertainment experience during your journeys. However, there are several additional features and upgrades that can take your car’s audio system to the next level. Let’s explore some of these options!
Adding a Backup Camera
One of the most practical upgrades you can make to your car DVD player is the addition of a backup camera. This feature provides an extra level of safety by allowing you to see what’s behind your vehicle when reversing. Installing a backup camera is a relatively straightforward process. All you need to do is connect the camera to the rear of your car and run the wires to the DVD player. Once the camera is installed, you can easily switch to the camera view on your DVD player’s screen with a simple touch of a button.
Bluetooth Connectivity
Bluetooth connectivity is another convenient feature that can greatly enhance your car audio system. With Bluetooth, you can wirelessly connect your smartphone or other compatible devices to your car DVD player. This allows you to play music, podcasts, or audiobooks directly from your device without the hassle of cables.
Additionally, Bluetooth connectivity also enables hands-free calling, allowing you to make and receive calls safely while driving. To set up Bluetooth connectivity, simply pair your device with the DVD player and enjoy the wireless freedom it offers.
Upgrading the Speakers
Upgrading the speakers in your car can have a significant impact on the overall sound quality. Factory-installed speakers may not always provide the best audio experience, especially if you enjoy listening to music with deep bass or crystal-clear highs.
By installing high-quality speakers, you can enjoy a more immersive and enjoyable audio experience while driving. When selecting new speakers, consider factors such as power handling, sensitivity, and frequency response to ensure optimal performance. Don’t forget to also consider the compatibility of the speakers with your car’s audio system to ensure a seamless installation.
By adding additional features and upgrading certain components of your car DVD player system, you can transform your driving experience. Whether it’s the practicality of a backup camera, the convenience of Bluetooth connectivity, or the improved audio quality from upgraded speakers, these enhancements can make your time on the road more enjoyable. So why wait? Start exploring these upgrades and take your car entertainment system to new heights!
Frequently Asked Questions Of How To Install A Car DVD Player
Can I Install A DVD player In My Car?
Yes, you can install a DVD player in your car.
Which Video Format Works On Car DVD Player?
Car DVD players generally support video formats such as AVI, MP4, WMV, and DivX. Make sure to check the specifications of your specific car DVD player to ensure compatibility.
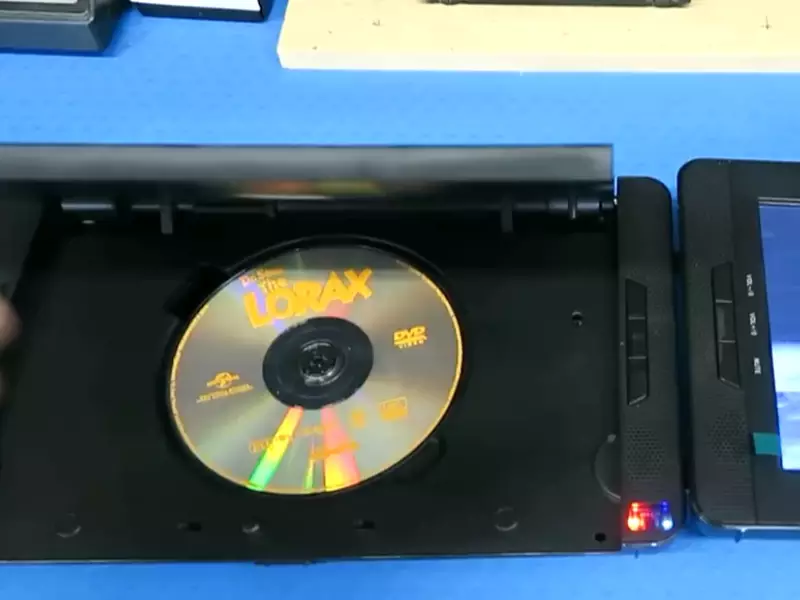
How Do You Hook Up A Portable DVD Player?
To hook up a portable DVD player, connect the player’s power cord to an electrical outlet. Then, use an AV cable to link the DVD player’s AV output to the corresponding AV input on your TV. Lastly, turn on both the DVD player and the TV, and select the correct input on your TV.
How Do You Set Up A Dvd Player?
Setting up a DVD player is easy. Connect the player to your TV using an HDMI or AV cable. Plug in the power cord and turn on the player. Use the remote to navigate and select settings. Insert a DVD and enjoy your movie.
It’s that simple!
Conclusion
Installing a car DVD player can be a straightforward process with the right guidance. By following the step-by-step instructions outlined in this blog post, you can enhance your driving experience and enjoy entertainment on the go. Remember to gather all the necessary tools and ensure you have a compatible unit for your vehicle.
With patience and attention to detail, you’ll soon be enjoying movies and music in your car like never before. So, go ahead and give it a try!