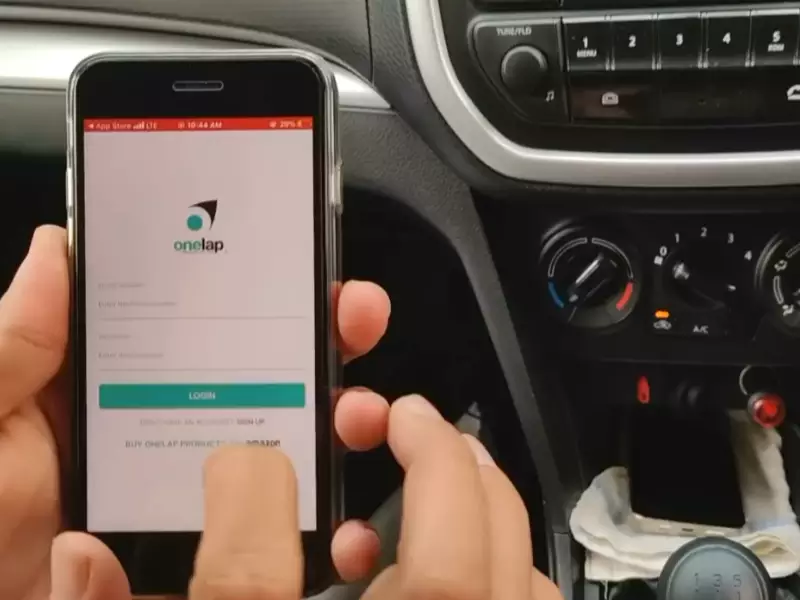
Installing an aux port in your car is a simple process that requires a few basic steps. Firstly, gather all the necessary tools and materials, including an aux input adapter, wire cutters, and electrical tape.
Next, locate the appropriate wiring harness in your vehicle and carefully splice into the wires using the wire cutters. Connect the adapter to the spliced wires, ensuring a secure connection. Finally, test the new aux port by plugging in a device and playing audio through the car speakers.
Understanding The Benefits Of Having An Aux Port In Your Car
In today’s digital age, music has become an essential part of our daily lives. Whether we’re commuting to work or embarking on a road trip, having our favorite tunes playing in the car enhances the overall driving experience. That’s where the aux port comes in. This handy little feature allows you to connect various audio devices directly to your car’s sound system, bringing a multitude of benefits to your driving experience.
Enhanced audio quality during music playback
One of the primary benefits of having an aux port in your car is the enhanced audio quality it provides during music playback. Unlike traditional FM radio or CD players, which may sometimes suffer from static or poor sound quality, connecting your audio devices directly to the aux port ensures a clear and crisp audio experience. Whether you’re blasting your favorite tunes or listening to a podcast, you’ll enjoy every beat and word with unparalleled clarity and depth.
Versatility to connect various audio devices
Another advantage of having an aux port in your car is the versatility it offers when it comes to connecting different audio devices. With an aux port, you can connect your smartphone, tablet, MP3 player, or any other device with a standard 3.5mm audio jack directly to your car sound system. This means you’re not limited to a single music source or format. Whether you prefer streaming music, listening to downloaded songs, or even playing audio from video apps, the aux port allows you to connect and enjoy your audio content hassle-free.
To fully understand the benefits of having an aux port in your car, it’s essential to recognize the advantages it brings to your audio experience. By providing enhanced audio quality during music playback and the versatility to connect various audio devices, the aux port turns your car into a mobile entertainment hub. So, if you’re looking to upgrade your driving experience and enjoy your favorite tunes with exceptional sound quality, installing an aux port in your car is a must.
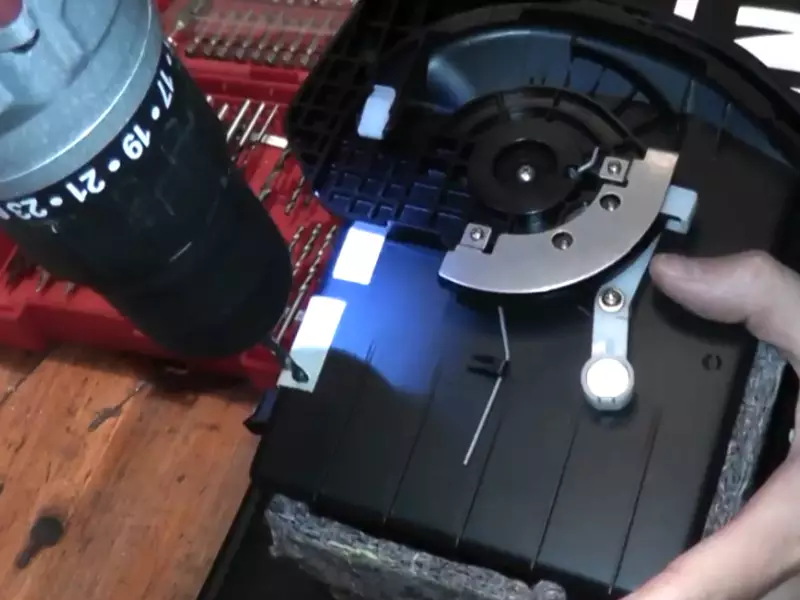
Tools And Equipment Required For Installing An Aux Port In Your Car
Installing an aux port in your car can bring your audio experience to a whole new level. With just a few tools and equipment, you can have a convenient way to connect your smartphone or MP3 player to your car’s stereo system. In this guide, we will walk you through the essential tools you’ll need to successfully install an aux port in your car.
Screwdriver
The first tool you’ll need is a screwdriver. This versatile tool will be used to remove any screws or fasteners holding the car’s interior panels in place. You’ll typically find Phillips head screws in most cars, but it’s always a good idea to have a set of different-sized screwdrivers on hand to ensure you have the right one for the job. Using the screwdriver, you’ll be able to access the areas where you’ll be installing the aux port.
Wire strippers
Next on the list is a pair of wire strippers. These handy tools are essential for removing the insulation from the wires you’ll be working with during the installation process. It’s important to choose wire strippers that are suitable for the gauge of wire you’ll be working with. The right wire strippers will make it easy to remove the insulation without damaging the underlying wires, ensuring a secure and reliable connection.
Soldering iron and solder
A soldering iron and solder are also necessary for a proper aux port installation. Soldering is a technique used to join two pieces of metal together, creating a strong and durable connection. In this case, you’ll be using the soldering iron and solder to attach the wires from the aux port to the existing wiring in your car. This ensures a solid electrical connection that will withstand vibrations and ensure clear audio transmission.
Heat shrink tubing
To protect your soldered connections and ensure long-lasting performance, heat shrink tubing is a must-have item. Heat shrink tubing is a type of plastic tubing that shrinks when heated, creating a tight and secure seal around the soldered joint. This helps to prevent moisture and other contaminants from getting inside the connection, reducing the risk of corrosion and signal loss. Make sure to choose heat shrink tubing that fits snugly over your soldered connections for the best results.
Electrical tape
Lastly, electrical tape is an essential tool for insulating and securing your wiring connections. Once you have made your connections using the soldering iron and covered them with heat shrink tubing, you can further protect them by wrapping them in electrical tape. Electrical tape creates a reliable barrier against moisture, dust, and other elements that could potentially cause issues with your aux port installation. It also helps to keep your wires organized and neatly secured.
Identifying The Existing Audio System In Your Car
Before you can install an aux port in your car, it is important to first identify the type of audio system your car has. This will help you determine the right approach and tools needed for the installation process. In this section, we will discuss how to determine if your car has a built-in audio system or an aftermarket stereo. Let’s get started!
Determine if your car has a built-in audio system
If your car is factory-made and does not have any modifications to its audio system, then it likely has a built-in audio system. To confirm this, you can follow these steps:
- Start by examining the head unit of your car’s stereo system. The head unit is the main control panel for your car’s audio system and is typically located in the center console or dashboard.
- Look for any branding or logo on the head unit. Many car manufacturers have their own branding on the audio system, which can help you identify if it is built-in or aftermarket.
- If you are unsure about the branding, you can check the car’s user manual or do a quick online search of your car’s make and model. This will provide you with information about the factory-installed audio system.
By following these steps, you will be able to determine if your car has a built-in audio system.
Determine if your car has an aftermarket stereo
If your car has a stereo system that has been installed or replaced after the car was manufactured, then it is likely an aftermarket stereo. Identifying an aftermarket stereo can be done by:
- Checking for any visible modifications to the car’s interior. Aftermarket stereos often have different designs, colors, or features compared to factory-installed audio systems.
- Looking for additional controls or buttons that are not part of the car’s original design. Aftermarket stereos usually have extra features and functionalities that are not present in built-in audio systems.
- Reading the documentation or manual that came with the car. If the documentation mentions the installation of an aftermarket stereo, it confirms that your car has one.
By examining these factors, you will be able to determine if your car has an aftermarket stereo.
Identifying the existing audio system in your car is the crucial first step in installing an aux port. Whether it’s a built-in audio system or an aftermarket stereo, understanding the type of system you have will help you proceed with the installation process confidently. In the next section, we will discuss the tools and materials you will need to install the aux port in your car.
Locating The Audio Input Source In Your Car
If you want to connect your phone or another audio device to your car’s sound system, you’ll need to locate the audio input source in your vehicle. This is the connection point that allows you to play external devices through your car’s speakers. In this section, we’ll discuss how to identify the audio input source options in your car, such as CD changer, tape deck, or radio.
Identify the Audio Input Source Options in Your Car
To begin, let’s take a closer look at the various audio input options that your car may have. Depending on the make and model, your vehicle could have one or more of the following options:
| Audio Input Option | Description |
|---|---|
| CD Changer | This option allows you to connect your audio device using the CD changer port. It typically provides a better sound quality compared to other input options. To locate the CD changer port, check the manual or look for a button or switch labeled “CD” on your car’s audio system. |
| Tape Deck | If your car has a tape deck, you can use a cassette adapter to connect your audio device. Simply insert the adapter into the tape deck, and the other end into your device’s headphone jack. Look for a button or switch labeled “Tape” or “Cassette” on your car’s audio system to locate the tape deck. |
| Radio | This option allows you to connect your audio device using an FM transmitter. The transmitter broadcasts the audio signal from your device to an empty FM frequency on your car’s radio. To locate the radio input source, tune your car’s radio to a frequency without any broadcasting signals. Then, connect your audio device to the FM transmitter and set it to the same frequency. |
Once you’ve identified the audio input options available in your car, you can determine which one is best suited for your needs. Keep in mind that the availability of these options may vary depending on your vehicle’s age and features.
Now that you understand how to identify the audio input source options in your car, you’re one step closer to installing an aux port and enjoying enhanced audio in your vehicle. In the next section, we’ll cover how to install the aux port and connect your audio device, so stay tuned!
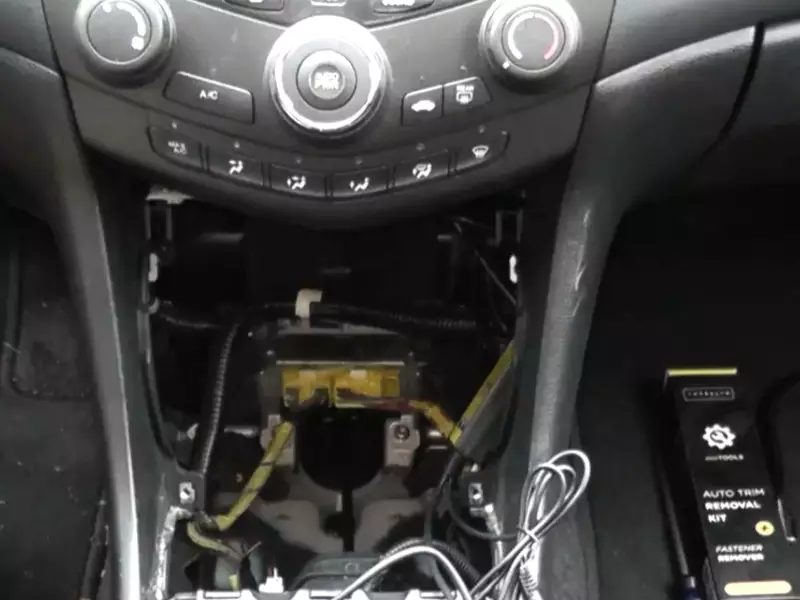
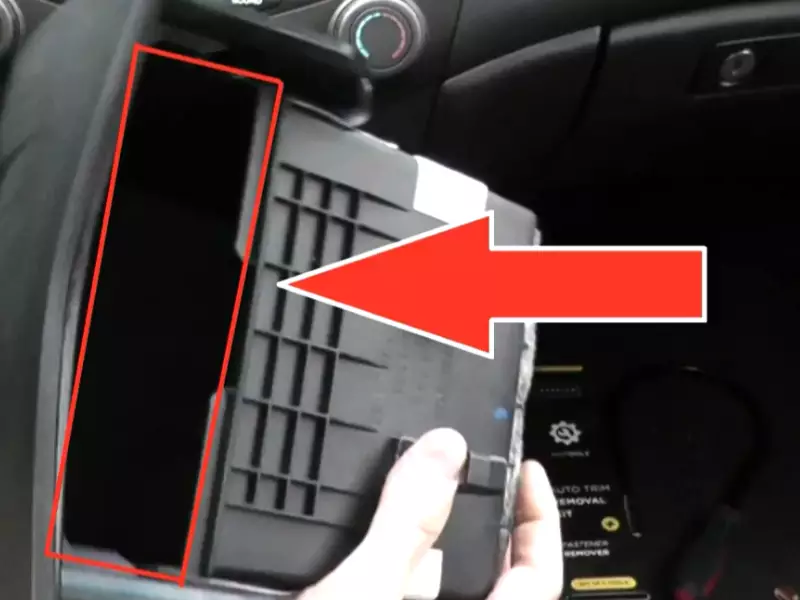
Removing The Necessary Car Panels And Dashboard Components
Removing the necessary car panels and dashboard components is an essential step when installing an aux port in your car. By carefully removing the dashboard trim and taking out the radio or audio system unit, you can gain access to the necessary wiring and connections for a successful installation. This guide will walk you through the process, ensuring that each step is clearly outlined and easy to follow.
Remove the Dashboard Trim
The first step in accessing the necessary components for installing the aux port is to remove the dashboard trim. This trim can typically be found around the edges of the dashboard and may be held in place by clips or screws. To remove it, follow these steps:
- Use a trim removal tool or a flathead screwdriver covered with a cloth to prevent scratches, carefully pry away the trim.
- Start from one end and work your way around, applying gentle pressure to release the clips or removing any screws that may be holding it in place.
- Once all the clips or screws are released, carefully remove the trim piece and set it aside in a safe location.
Take out the Radio or Audio System Unit
After removing the dashboard trim, the next step is to take out the radio or audio system unit. This will vary depending on the make and model of your car, but generally follow these steps:
- Locate the screws or bolts that secure the radio or audio system unit in place. These are often hidden behind the trim or on the sides of the unit.
- Use the appropriate screwdriver or wrench to remove the screws or bolts, making sure to keep them in a safe place for reassembly.
- Once the screws or bolts are removed, gently pull the radio or audio system unit forward. Be careful not to apply too much force, as there may be wiring connected to the unit.
- Disconnect any wiring harnesses or connectors attached to the back of the unit. These may require pressing a release tab or squeezing a connector to disconnect.
- With the wiring disconnected, carefully remove the radio or audio system unit from the dashboard and set it aside.
Now that you have successfully removed the necessary car panels and dashboard components, you are ready to proceed with the installation of the aux port. Remember to take note of the disassembly process, as it will be essential for reassembling the components later. Stay tuned for the next section of this guide to learn how to wire and connect the aux port for an enhanced audio experience in your car.
Preparing The Aux Port Wiring
Cut the necessary length of wiring for the aux port
Once you have gathered all the required tools and materials, it’s time to prepare the aux port wiring. First, you’ll need to determine the appropriate length of wiring needed for your specific car model. This will vary depending on the location of your aux port and where you plan to connect it. For example, if you plan to connect the aux port to the audio head unit, you may need a longer length of wiring compared to connecting it to a separate amplifier. Consider the distance between the aux port and the connection point and add a little extra length for flexibility.
To cut the necessary length of wiring, follow these steps:
- Measure the distance between the aux port and the connection point using a measuring tape.
- Add a few extra inches to allow for flexibility and ease of installation.
- Using wire cutters or a sharp knife, carefully cut the wiring to the desired length. Make sure to cut straight and avoid damaging the internal wires.
Strip the insulation from the wires
Once you have the correct length of wiring, the next step is to strip the insulation from the wires. This will expose the bare wires and make it easier to connect them to the appropriate terminals. Follow these steps to strip the insulation correctly:
- Using wire strippers, select the appropriate gauge size that matches the thickness of your wiring.
- Hold the wire tightly with one hand and position the wire strippers over the insulation.
- Apply firm pressure and rotate the wire strippers around the wire, allowing the blade to cut through the insulation.
- Once the insulation is cut, gently pull it away from the wire using your fingers.
- Inspect the exposed wires to ensure there is no damage or fraying. Trim any excess frayed strands if necessary.
By following these steps, you have successfully prepared the aux port wiring. The next section will cover how to connect the wiring to the appropriate terminals for a properly functioning aux port installation.
Connecting The Aux Port To The Audio System
Now that you have identified the appropriate connection point on the audio system, it’s time to connect the aux port to the audio system. This step is crucial as it ensures that you can enjoy all your favorite tunes through your car’s speakers.
Identify the appropriate connection point on the audio system
The first step in connecting the aux port to the audio system is to identify the appropriate connection point on the system. This will vary depending on the make and model of your car. In most cases, however, you can find the auxiliary input jack on the front or back of the audio system.
To locate it, look for a small 3.5mm headphone jack or a similar port labeled “AUX” or “Auxiliary.” It’s commonly located near the CD player, radio, or in the center console. Once you have located the connection point, you are ready to move on to the next step.
Solder the aux port wires to the corresponding audio system wires
Now comes the technical part – soldering the aux port wires to the corresponding audio system wires. This ensures a secure and reliable connection, allowing for optimal sound quality.
Before you begin, gather the necessary tools: a soldering iron, solder, heat shrink tubing, heat gun, and a wire stripper. It’s recommended to read the user manual for your specific car model to ensure you understand the wiring diagram and color codes.
Next, carefully strip a small portion of the insulation from both the aux port wires and the corresponding audio system wires. Then, twist together the exposed ends of the matching wires. This helps create a strong connection point for soldering.
Once the wires are twisted together, heat up your soldering iron. Apply the heated iron to the twisted wires and carefully melt the solder onto them. This process bonds the wires together, ensuring a secure connection. Be cautious not to apply too much heat, as it may damage the wires or nearby components.
After soldering the wires, it’s crucial to protect them from any potential damage or short circuits. Slide a piece of heat shrink tubing over the soldered area, covering the exposed wires. Then, use a heat gun to shrink the tubing, creating a tight seal around the soldered connection.
Finally, inspect the soldered connection and ensure it is secure and properly insulated. If everything looks good, proceed to test the audio system to ensure the aux port is functioning correctly.
By following these steps and taking the time to properly solder the aux port to the audio system, you can enjoy seamless music playback and a fantastic audio experience in your car.
Securing And Finishing The Wiring
Once you have soldered the connections and ensured everything is working properly, it’s time to secure and finish the wiring installation. This step is crucial to prevent any interference or damage to the wiring, ensuring a long-lasting and reliable aux port in your car.
Insulate the soldered connections with heat shrink tubing
To protect the soldered connections from potential damage or short-circuits, it is essential to insulate them properly. One effective way to do this is by using heat shrink tubing. Here’s how you can insulate the soldered connections:
- Cut a suitable length of heat shrink tubing for each connection. Make sure the tubing is slightly longer than the soldered area.
- Slide the heat shrink tubing over the soldered area, covering the joined wires completely.
- Apply heat to the tubing using a heat gun or a lighter, ensuring that it shrinks and forms a tight seal around the soldered connections.
- Allow the tubing to cool down before proceeding to the next step.
By insulating the soldered connections with heat shrink tubing, you not only protect them from external elements but also provide added stability and durability to your aux port wiring.
Secure the wiring to avoid interference or damage
Once the connections are insulated, you need to secure the wiring in your car to prevent any potential interference or damage. Here are some methods to secure the wiring effectively:
- Use zip ties or cable clips to bundle the wiring together. This ensures that the wires stay organized and do not obstruct any other components in your car.
- Avoid routing the wiring near any moving parts or sharp edges. This helps prevent accidental damage to the wiring while driving or making adjustments to your car.
- If necessary, use adhesive-backed cable holders or clips to fasten the wiring along the interior panels or under the dashboard. This helps keep the wiring in place and minimizes the risk of interference.
By securing the wiring properly, you can enjoy a hassle-free aux port installation without any signal interference or potential damage to your car’s internal components.

Mounting The Aux Port In A Convenient Location
Once you have chosen a suitable location for the aux port in your car, the next step is to securely mount it in that chosen spot. Mounting the aux port in a convenient location ensures easy access and a cleaner, more professional installation. In this section, we will guide you through the process of choosing a suitable location and securely mounting the aux port in your car.
Choose a Suitable Location for the Aux Port
When choosing a location for your aux port, it is important to consider both convenience and accessibility. You want to select a spot that is easily reachable while driving, but also doesn’t obstruct any important controls or instruments in your car. Here are some points to consider when deciding on the location:
- Look for a spot near your car’s stereo unit or dashboard where the aux cable can be easily connected.
- Avoid locations where the aux port may be susceptible to accidental damage, such as near cup holders or areas with heavy foot traffic.
- Consider the length of your aux cable and ensure that the chosen location allows for easy cable management.
By taking these factors into account, you can choose a suitable location that offers convenience and safety.
Securely Mount the Aux Port in the Chosen Location
Now that you have chosen a location for the aux port, it’s time to securely mount it to ensure it stays in place. The mounting process may vary depending on the type of aux port you have, but here are some general steps to follow:
- Prepare the mounting area by cleaning it thoroughly to ensure proper adhesion.
- Apply adhesive or double-sided tape to the back of the aux port, following the manufacturer’s instructions.
- Press the aux port firmly onto the chosen location, ensuring a strong bond between the port and the surface.
- If necessary, use additional mounting accessories such as brackets or clips to provide extra stability.
It’s essential to follow the manufacturer’s instructions and use appropriate mounting materials to ensure a secure installation. This will prevent the aux port from coming loose during driving or becoming a potential hazard.
By choosing a suitable location and securely mounting the aux port in your car, you can enjoy a seamlessly integrated audio experience. Take your time to find the perfect spot and follow the installation instructions carefully for a professional result.
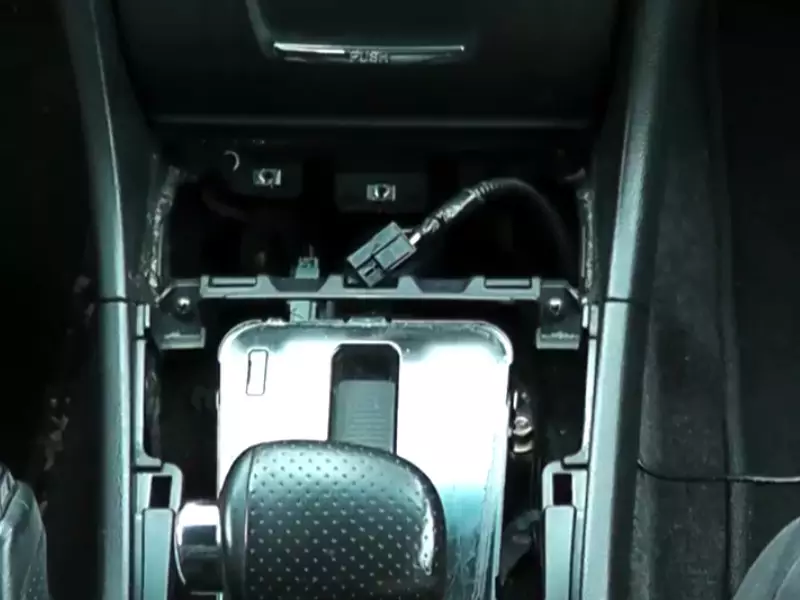
Reassembling The Car Panels And Dashboard Components
Once you have successfully installed the aux port in your car and made all the necessary connections, it’s time to put the car panels and dashboard components back together. This step is crucial as it ensures that your car looks neat and well-assembled.
Place the radio or audio system unit back into the dashboard
Begin by carefully placing the radio or audio system unit back into the dashboard. Make sure to align it properly with the pre-existing slots or brackets. This step may require some gentle maneuvering to fit the unit back in, so take your time and be patient. Once it is securely in place, you can move on to reattaching the dashboard trim.
Reattach the dashboard trim
The dashboard trim is the protective cover that conceals the internal components of the dashboard. To reattach it, start by aligning the trim with the edges of the dashboard. Carefully press it into place, ensuring that each latch or clip engages securely. If necessary, refer to your car’s manual for specific instructions on how to properly reattach the dashboard trim.
It is important to pay attention to any screws or fasteners that may need to be tightened during this process. Referencing your car’s manual can help you identify these areas and ensure that everything is properly secured.
Once the trim is securely reattached, give it a gentle tap with your hand to ensure it is firmly in place. Be mindful of any wires or cables that may be attached to the trim and make sure they are properly positioned and not at risk of being pinched or damaged.
Finally, take a step back and visually inspect the dashboard and car panels. Ensure that everything looks neat and aligned. Double-check that all buttons and controls are functioning properly.
Congratulations, you have successfully reassembled the car panels and dashboard components after installing the aux port! Now, you can enjoy your favorite music and audio content through your car’s audio system.
Testing The Aux Port Functionality
Connect an audio device to the aux port
To test the functionality of your newly installed aux port, the first step is to connect an audio device to it. Whether it’s your smartphone, MP3 player, or any other device with a headphone jack, make sure to plug it into the aux port securely. This will enable the transmission of audio signals from your device to the car’s audio system.
Test the audio playback through the car’s speakers
Once you have connected your audio device to the aux port, it’s time to test the audio playback through the car’s speakers. This will confirm whether the aux port is functioning properly and whether the audio signals are being successfully transmitted.
Start by selecting the auxiliary input on your car’s audio system. This can usually be done by pressing a specific button or navigating through the audio system’s menu options. Look for an icon or label that signifies the aux input.
With the aux input selected, play a song or any audio content on your connected device. Adjust the volume to a moderate level, ensuring it’s not too low or too high. This will help you determine if the audio output is clear and distortion-free.
Listen to the sound coming from the car’s speakers. If you can hear the audio clearly and it is synchronized with the device’s playback, congratulations! Your aux port installation was successful, and you can now enjoy your favorite music or podcasts during your journeys.
If, however, you encounter any issues during the audio playback, there are a few troubleshooting steps you can try:
- Make sure the audio device is properly connected to the aux port. Check for any loose connections or dirt that might be obstructing the proper transmission of signals.
- Confirm that the volume on your audio device is turned up and not muted. Sometimes, the audio source itself might be the culprit, so it’s worth double-checking.
- Try using a different audio device or cable, as there may be compatibility issues between the aux port and your current setup.
- If none of the above steps work, it’s advisable to consult a professional car audio technician who can diagnose and resolve any underlying issues with the aux port.
By following this simple testing process, you can ensure that your newly installed aux port is working flawlessly, allowing you to enjoy high-quality audio while on the road.
Common Issues And Solutions
Installing an auxiliary port in your car is a great way to enhance your driving experience by allowing you to connect your smartphone or other audio devices to your car’s audio system. However, like any other technology, you may encounter some common issues when installing an aux port. In this section, we will discuss some of these issues and provide you with practical solutions to troubleshoot and resolve them.
No sound or distorted sound
One of the most frustrating issues you may encounter after installing an aux port in your car is when you don’t get any sound or it is distorted. This problem can be attributed to various reasons, including:
- Misaligned or loose connection: Ensure that the auxiliary cable is securely plugged into both your audio device and the auxiliary port in your car. Make sure it is fully inserted to establish a strong and reliable connection.
- Volume settings: Check the volume settings on both your audio device and car stereo. Adjust the volume levels and make sure they are not set to zero or too low.
- Audio cable issues: Try using a different auxiliary cable to eliminate the possibility of a faulty cable. Sometimes, the cable itself may be damaged or defective, resulting in no or distorted sound output.
- Audio device settings: Ensure that your audio device is set to output sound through the auxiliary port. Some devices have dedicated settings that need to be adjusted to enable proper sound output.
Auxiliary input not recognized
Another common issue faced by car owners after installing an aux port is when the car’s audio system fails to recognize the auxiliary input. This can be frustrating, but fortunately, there are some troubleshooting steps you can follow to resolve this problem:
- Compatibility check: Ensure that your audio device is compatible with the car’s audio system. Some older car models may have limitations or compatibility issues with certain audio devices, so double-check if your device is supported.
- Auxiliary port settings: Check your car’s audio system settings and make sure that the auxiliary port is enabled. Some car models have the option to disable or enable the auxiliary input, so ensure it is turned on.
- Clean the auxiliary port: Over time, dirt, dust, and debris can accumulate in the auxiliary port, leading to poor connectivity. Use a can of compressed air or a soft brush to clean the port and remove any obstructions.
- Try a different port: Some cars may have multiple auxiliary ports. If the one you are using is not recognized, try using a different port to see if it resolves the issue.
By addressing these common issues and following the solutions mentioned above, you can troubleshoot and resolve problems that may arise after installing an aux port in your car. Enjoy the convenience and enhanced audio experience that a properly functioning aux port provides!
Additional Tips For A Successful Installation
Installing an auxiliary port in your car can greatly enhance your driving experience by allowing you to connect your devices and play audio directly through your car’s speakers. However, to ensure a successful installation, there are a few additional tips to keep in mind. Double-check all connections and wiring, and use quality audio cables for optimal performance. Following these tips will help you enjoy the best possible audio quality and a hassle-free installation process.
Double-check all connections and wiring
Before completing the installation, it’s essential to double-check all the connections and wiring. This step is crucial to ensure that everything is properly connected and secure, minimizing any chances of a loose connection or intermittent sound issues. Take the time to examine each connection point, making sure they are tight and secure. If necessary, use appropriate tools such as screwdrivers or pliers to tighten any connections.
Use quality audio cables for optimal performance
The quality of the audio cables you use can have a significant impact on the overall performance of your aux port. Investing in high-quality cables will ensure that you get the best audio experience in your car. Look for cables that are specifically designed for car audio systems, as they are generally shielded to minimize interference and deliver clean, clear sound. Opt for cables with gold-plated connectors, as they offer better conductivity and corrosion resistance, resulting in a reliable and long-lasting connection.
When selecting audio cables, pay attention to the length as well. Consider the intended placement of your aux port and choose cables that are long enough to comfortably reach your device without straining the cable or causing a mess of wires. It’s always better to have a slightly longer cable than one that falls short.
In addition to using high-quality cables, ensure that they are properly connected and secured at both ends. Loose connections can introduce static or cause the audio signal to cut out intermittently. Take the time to push the connectors in firmly, making sure they are fully inserted into the aux port of your car and the audio device.
By double-checking all connections and using quality audio cables, you can ensure a successful aux port installation in your car. These additional tips will help you achieve optimal audio performance, allowing you to enjoy your favorite music, podcasts, or audiobooks while on the go. With a properly installed aux port, your car will become a hub of entertainment for your journeys.
Frequently Asked Questions On How To Install An Aux Port In Your Car
Can You Add A Aux Port To Your Car?
Yes, you can add an aux port to your car. It is a simple and convenient way to connect external devices like phones or MP3 players to your car’s audio system. Adding an aux port allows you to listen to your favorite music or podcasts while driving.
How Do You Put An Aux In A Car That Doesn’t Have One?
To add an AUX input to a car without one, you can use an FM transmitter or a Bluetooth adapter. These devices connect to your car’s radio and allow you to play music from your phone or other devices through the car’s speakers.
How Much Does It Cost To Install An Aux Cord?
Installing an AUX cord can cost around $50 to $100, depending on the complexity of the installation and the type of car.
How Do I Connect My Phone To My Old Car Aux?
1. Connect your phone to your old car’s aux by first ensuring your car has an aux port.
2. Grab an aux cable and connect one end to your phone’s headphone jack.
3. Connect the other end of the aux cable to the aux port in your car.
4. Adjust the volume on your phone and car to enjoy your music or calls through the car speakers.
5. If your car doesn’t have an aux port, consider using a Bluetooth adapter or FM transmitter for wireless connectivity.
Conclusion
Adding an aux port to your car is a simple and convenient way to enhance your audio experience on the road. By following these easy steps, you can install an aux port in your car and enjoy your favorite music or podcasts.
With a little bit of time and effort, you can upgrade your car’s audio system and make your drive more enjoyable. So why wait? Get started on installing your aux port today and take your car’s audio game to the next level!