Installing an amp in a car involves connecting the amplifier to the car’s audio system and power supply. To do this, you will need to gather the necessary tools and materials, locate a suitable location for the amp, and follow the specific instructions provided by the amplifier manufacturer.
Factors To Consider When Selecting An Amp
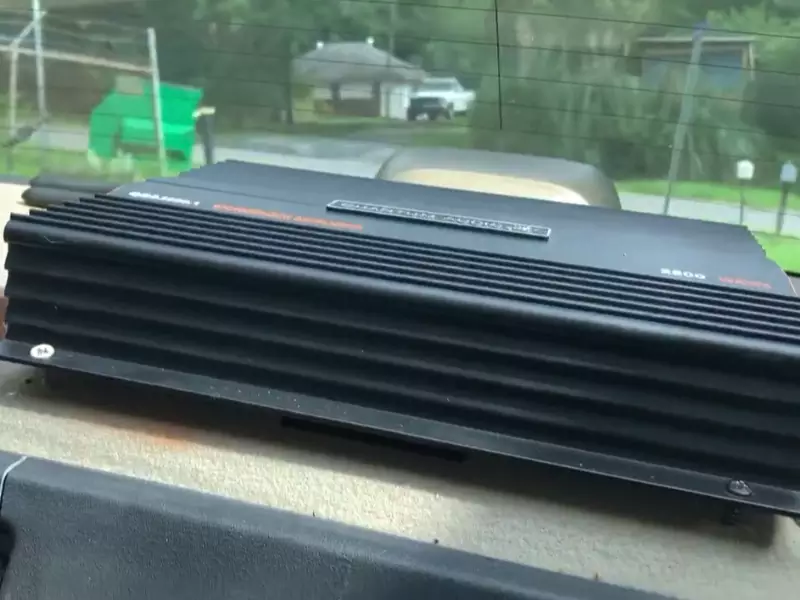
When it comes to upgrading your car’s audio system, installing an amplifier can greatly enhance the overall sound quality. However, with the myriad of options available in the market, choosing the right amp can be a daunting task. There are several factors you need to consider to ensure that the amp you select is compatible with your car’s audio system and fulfills your power requirements. Let’s dive into the key factors to consider when selecting an amp.
Power Requirements
The power requirements of your amp play a crucial role in determining its performance. The power output of an amplifier is measured in watts, and it is essential to match this output with your speakers’ power handling capability. If the amp’s power output exceeds the speakers’ power handling capacity, you risk damaging the speakers. On the other hand, if the amp’s power output is lower, you may not be able to achieve the desired sound quality. It’s important to find the right balance to ensure optimal performance.
Compatibility with Car Audio System
Another key factor to consider is the compatibility of the amp with your car’s audio system. Different vehicles have different audio setups, and it’s essential to select an amp that integrates seamlessly with your existing system. One way to ensure compatibility is to check the amp’s input and output connections. Most car amplifiers feature RCA inputs and outputs, which are compatible with standard car stereos. Additionally, consider the size and shape of the amp to ensure it fits in your car’s designated space.
Amplifier Class Options
Amplifiers come in various classes, each with its own advantages and disadvantages. The class of an amplifier refers to its circuit design and efficiency. The most common amplifier classes include Class A, Class AB, Class D, and Class H. Class A amplifiers offer high-quality sound but are less efficient and generate more heat. Class AB amps are a popular choice as they provide a good balance between sound quality and efficiency. Class D and H amps are known for their high efficiency and are ideal for powering subwoofers. Understanding the different amplifier classes can help you make an informed decision based on your specific audio needs.
Understanding Different Amplifier Classes
If you are someone who enjoys high-quality sound in your car, installing an amplifier is a must. However, before you jump into the installation process, it is crucial to understand the different amplifier classes. Each class has its own characteristics, advantages, and disadvantages, which can greatly impact the overall sound performance in your car. In this section, we will dive deep into the four main amplifier classes: Class A, Class B, Class AB, and Class D.
Class A
Class A amplifiers are known for their superior sound quality. They operate by using a single-ended transistor, which conducts continuously, regardless of the input signal. This means that the entire input waveform is amplified, resulting in extremely low distortion and excellent sound reproduction. Class A amplifiers are favored by audiophiles and music enthusiasts who value purity and accuracy in their sound. However, they are not efficient when it comes to power consumption, often requiring large heat sinks and additional cooling mechanisms.
Class B
Class B amplifiers are more efficient in terms of power consumption compared to Class A amplifiers. They use a push-pull configuration, where one transistor handles the positive side of the waveform, while another transistor handles the negative side. This allows for better power efficiency, but it introduces a potential issue known as crossover distortion. Crossover distortion occurs when there is a gap between the positive and negative signals, resulting in unwanted distortion in the output sound. Class B amplifiers are commonly used in car audio systems due to their efficiency and affordability, although the sound quality may not be as pristine as Class A amplifiers.
Class AB
Class AB amplifiers aim to combine the best of both Class A and Class B amplifiers. They use both a single-ended transistor and a push-pull configuration to minimize distortion and improve power efficiency. The single-ended transistor handles the smaller input signals, while the push-pull configuration takes over for larger input signals. This allows for a compromise between efficiency and sound quality, making Class AB amplifiers a popular choice for many car audio enthusiasts. They strike a balance between the high-quality sound reproduction of Class A amplifiers and the efficiency of Class B amplifiers.
Class D
Class D amplifiers, also known as digital amplifiers, are the most efficient and widely used amplifiers in-car audio systems today. Unlike the previous classes, Class D amplifiers operate by switching the output transistors on and off rapidly. This switching action allows for minimal power loss and high power efficiency. Class D amplifiers are also compact in size and generate less heat compared to other classes. They are capable of delivering powerful bass and high-quality sound, making them an ideal choice for those seeking a dynamic audio experience in their cars.
Now that we have explored the different amplifier classes, you can make an informed decision when it comes to choosing the right amplifier for your car audio system. Whether you prioritize sound quality, power efficiency, or a combination of both, understanding the characteristics of each class will help you find the perfect match for your needs.
Step 1: Gathering The Required Tools
- Screwdrivers
- Wire cutters
- Electrical tape
- Wire strippers
- Terminal connectors
Step 2: Disconnecting The Battery
Before installing an amp in your car, it is essential to disconnect the battery to ensure your safety and prevent any electrical mishaps. Disconnecting the battery will eliminate the risk of electric shock and damage to the amp or any other electronic components of your car. Follow these simple steps to safely disconnect your car battery.
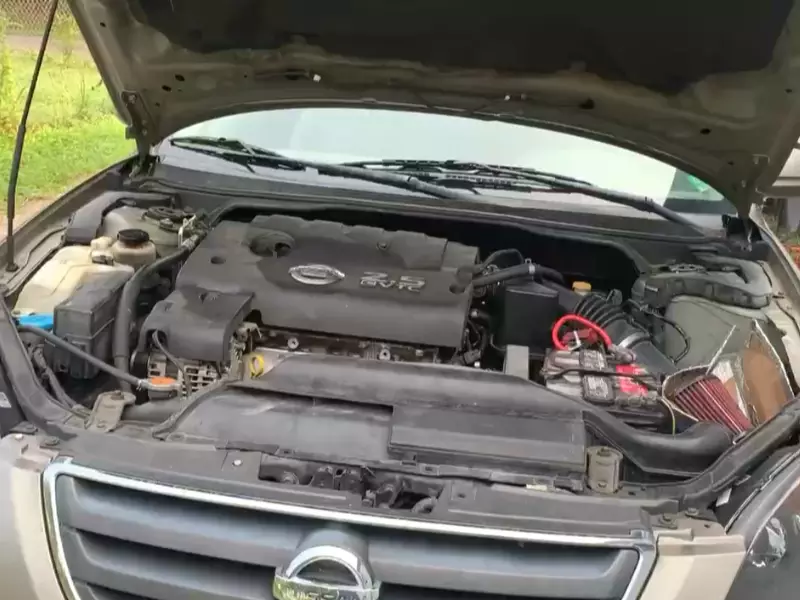
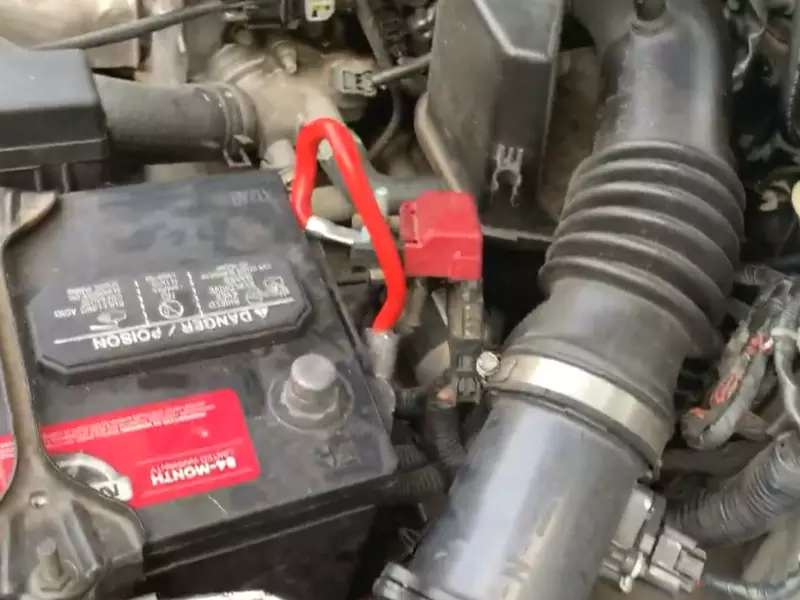
Locate the car battery
The first step is to locate the car battery. In most vehicles, the battery is located under the hood, either on the driver’s side or the passenger’s side. Once you open the hood, you can easily spot the battery, as it is a rectangular-shaped box with two cables attached to it.
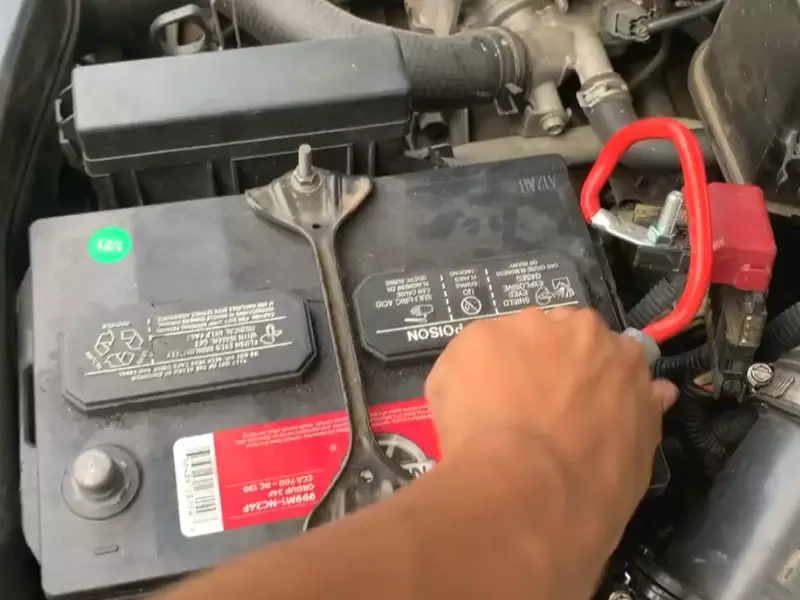
Disconnect the negative terminal
Start by disconnecting the negative terminal of the battery. The negative terminal is usually marked with a ‘-‘ symbol and is colored black. To disconnect it, follow these steps:
- Using a wrench or a socket, loosen the nut securing the negative terminal cable.
- Once the nut is loose, carefully remove the negative terminal cable from the battery.
- Wrap the disconnected negative terminal cable with a cloth or electrical tape to prevent accidental contact with the battery terminal.
By disconnecting the negative terminal first, you eliminate the risk of a short circuit if any metal object accidentally touches the car’s body or other metal parts.
Please note that some vehicles may have additional precautions or specific steps to disconnect the battery. It is always recommended to consult your car’s manual for detailed instructions.
Now that you have successfully disconnected the battery, you can proceed with the next steps of installing your amp in the car. Remember to follow the proper installation procedures to ensure a safe and efficient installation.
Step 3: Preparing The Car Interior
Now that you have gathered all the necessary tools and materials and have identified the power source in your car, it’s time to start preparing the car interior for the installation of your new amp. This step involves removing paneling or trim and finding an appropriate mounting location for your amp. Let’s dive in!
Remove paneling or trim
The first task in preparing the car interior is to remove any paneling or trim that may be obstructing your access to the desired mounting location for the amp. To do this, follow these steps:
- Start by assessing the area where you want to mount your amp. Look for any panels or trim pieces that cover that area.
- Use a trim panel removal tool or a flathead screwdriver wrapped in a cloth to avoid scratching the interior. Insert the tool or screwdriver into the gap between the panel and the car’s body.
- Gently pry the panel away from the body. Be careful not to use excessive force to prevent damaging the panel or the surrounding areas.
- Continue removing the panel by working your way around, releasing any clips or fasteners that hold it in place.
- Once the panel is free, carefully disconnect any electrical connectors or wiring harnesses that may be attached to it.
- Set the panel aside in a safe area where it won’t get damaged.
Find an appropriate mounting location
With the paneling or trim out of the way, it’s time to find the perfect mounting spot for your amp. Consider the following factors when selecting a location:
- Accessibility: Choose a location that allows easy access for connecting wires and adjusting controls. Avoid spots that are obstructed or hard to reach.
- Ventilation: Amps can get hot during operation, so opt for a location that provides adequate ventilation to prevent overheating.
- Stability: Look for a sturdy mounting surface that can support the weight of the amp and withstand vibrations from the car’s movement.
- Protection: Ensure that the amp is positioned in a way that protects it from excessive moisture, dust, and other potential hazards.
Once you have identified the ideal mounting location, proceed with securing the amp to the chosen surface. Make use of mounting brackets, screws, or straps as necessary, following the manufacturer’s instructions and any additional guidelines from your specific car model.
Remember, the amp’s positioning plays a crucial role in the sound quality and overall performance of your car’s audio system. So, take your time in selecting the right location, and don’t hesitate to consult an expert if needed.
Step 4: Wiring The Amplifier
Now that you have prepared the necessary tools and equipment, it’s time to start wiring your amplifier. Following these steps will ensure a proper and efficient installation of your amp in your car.
Connecting the power wire
The power wire is responsible for delivering the necessary electricity to your amplifier. To connect the power wire, follow these steps:
- Locate a suitable entry point for the power wire through the car’s firewall.
- Drill a hole in the firewall and secure a rubber grommet to prevent wire damage.
- Route the power wire from the battery to the amplifier, making sure to avoid any moving parts or hot surfaces.
- Connect one end of the power wire to the positive terminal of the amplifier.
- Attach the other end of the power wire to the positive terminal of the battery, ensuring a secure connection.
Before proceeding to the next step, make sure to install an appropriate fuse near the battery terminal to protect your amp and vehicle from any electrical issues.
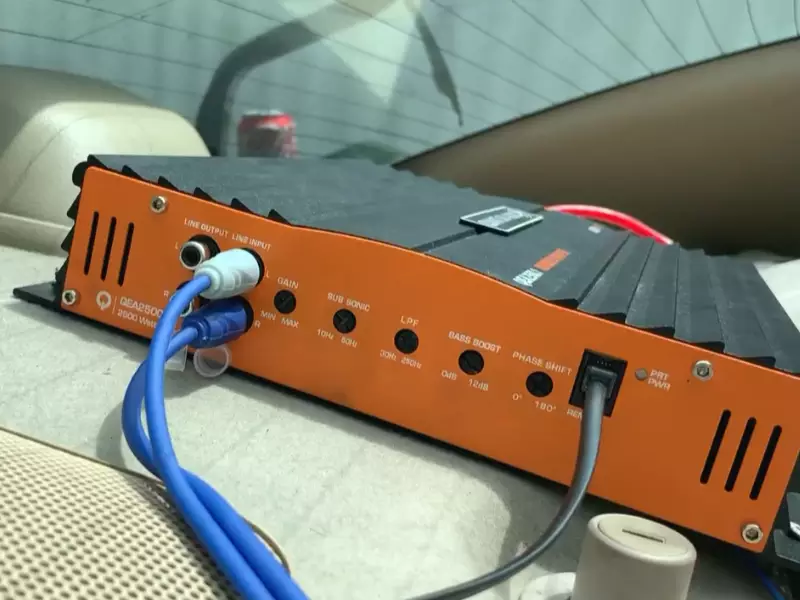
Running the RCA cables
RCA cables transmit the audio signal from the head unit to the amplifier. To run the RCA cables:
- Ensure the RCA cables are long enough to reach from the head unit to the amplifier.
- Locate the RCA output jacks on the head unit.
- Connect one end of the RCA cables to the RCA output jacks.
- Route the RCA cables along the car’s interior, away from any electrical wires or sources of interference.
- Connect the other end of the RCA cables to the RCA inputs of the amplifier.
Remember to properly secure the RCA cables to prevent any unnecessary movement or tangling.
Grounding the amplifier
Proper grounding is crucial for ensuring the amplifier functions correctly and minimizes any potential noise or interference. Follow these steps to ground your amplifier:
- Identify a suitable metal location near the amplifier to ground the amp.
- Using sandpaper or a wire brush, remove any paint or debris from the chosen grounding location.
- Connect a ground wire from the grounding location to the designated ground terminal on the amplifier.
Ensure the ground connection is tight and free from any obstructions to guarantee a solid electrical connection.
Routing the remote wire
The remote wire is responsible for turning the amplifier on and off with the car’s ignition. To route the remote wire:
- Locate the blue remote wire on the back of the head unit.
- Connect one end of the remote wire to the back of the head unit.
- Route the remote wire along the existing wire harnesses to the amplifier.
- Connect the other end of the remote wire to the remote terminal on the amplifier.
This connection ensures that the amplifier powers on and off with the car, preventing any unnecessary battery drain.
By completing these necessary wiring steps, you are now one step closer to enjoying enhanced audio in your car. Make sure to double-check all connections and secure any loose wires or cables for a safe and reliable installation.
Step 5: Connecting The Amp To The Car Stereo
Once you have identified the audio wiring harness of your car, it’s time to connect the amp to your car stereo. This crucial step will ensure that the power from your amplifier is properly channeled to the speakers, giving you the exceptional sound quality you desire. Follow the instructions below to connect your amp to the car stereo and take your car audio system to the next level.
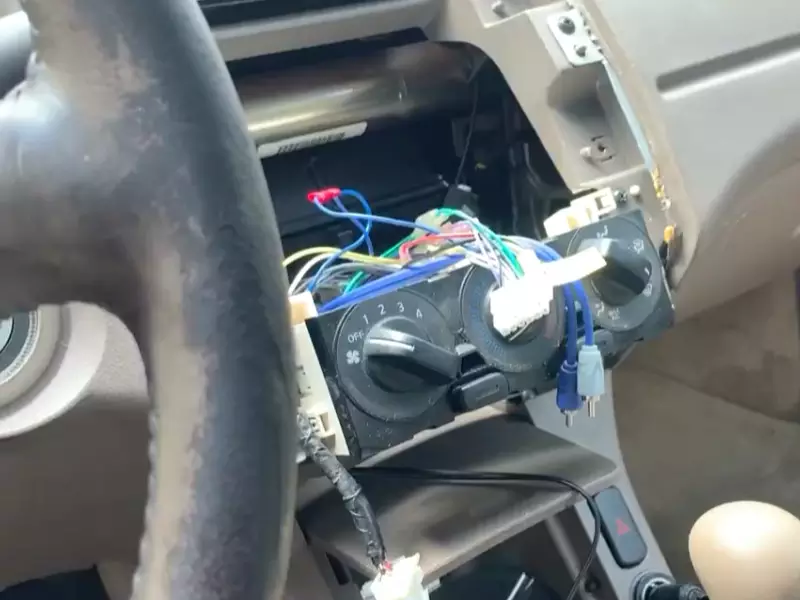
Identifying the radio wiring harness
The radio wiring harness is where you’ll find the necessary wires to establish a connection between your amp and car stereo. This harness is typically located behind the car stereo unit and is easily accessible by removing the dashboard panels or trim. To identify the radio wiring harness:
- Locate the car stereo unit and carefully remove it from its mounting bracket.
- Look for a bundle of wires connected to the back of the car stereo. This is the radio wiring harness.
Once you have identified the radio wiring harness, you’re ready to move on to the next step.
Splicing or using an adaptor
Now that you have located the radio wiring harness, the next step is to determine whether you need to splice the wires or use an adaptor to connect the amp to the car stereo. Both methods have their own advantages, so let’s take a closer look:
| Splicing | Using an Adaptor |
|---|---|
|
|
Choose the method that best suits your preferences and abilities. Regardless of which option you choose, make sure to follow the manufacturer’s instructions and secure all connections properly.
Connecting the RCA cables
Once you have established a connection between the amplifier and the car stereo’s wiring harness, the next step is to connect the RCA cables. These cables transmit the audio signal from the car stereo to the amplifier, allowing the amplifier to amplify the signal and deliver it to the speakers.
To connect the RCA cables:
- Locate the RCA outputs on the back of the car stereo unit. These outputs are usually labeled or color-coded for easy identification.
- Connect one end of the RCA cables to the RCA outputs of the car stereo.
- Connect the other end of the RCA cables to the RCA inputs of the amplifier. Again, these inputs are typically labeled or color-coded.
Ensure that the connections are secure and tightly fitted to minimize any potential audio interference or signal loss.
By following these steps and making all the necessary connections, you are now ready to experience the enhanced audio quality that comes with installing an amp in your car. Enjoy your favorite music with crystal-clear sound and immerse yourself in the ultimate driving experience.
Step 6: Connecting The Speakers
Now that you’ve successfully wired your amplifier and made the necessary connections, it’s time to move on to the next crucial step: connecting the speakers. Properly connecting your speakers to the amplifier ensures that you’ll enjoy high-quality sound in your car. Here’s how you can do it:
Identifying the speaker wires
Before you begin connecting the speakers, it’s essential to identify the speaker wires. Most car audio systems use color-coded wires to make this process easier for you. Generally, each speaker wire will have a positive (+) and negative (-) terminal.
To identify the speaker wires, check your car’s user manual or do a quick online search for your car’s specific wiring diagram. This will help you locate the color-coded wires and determine which ones correspond to each speaker.
Connecting speakers to the amplifier
Once you have identified the speaker wires, it’s time to connect them to the amplifier. Follow these steps:
- Start by stripping a small portion of insulation from the end of each speaker wire using wire strippers. This will expose the bare wire for a better connection.
- Next, locate the positive (+) and negative (-) terminals on the amplifier. These terminals are usually labeled or color-coded.
- Connect the positive (+) speaker wire to the positive (+) terminal on the amplifier. This can be done by either inserting the wire into the terminal or using a crimp connector for a more secure connection.
- Repeat the process for the negative (-) speaker wire, connecting it to the negative (-) terminal on the amplifier.
- Ensure that each speaker wire is firmly attached to its respective terminal, as loose connections can affect the sound quality.
- Repeat these steps for all the speakers in your car, taking care to connect each speaker wire to the correct corresponding terminal on the amplifier.
Once you have successfully connected all the speakers to the amplifier, you can proceed to the final step of the installation process: securing and organizing the wiring to ensure a clean and professional-looking installation.
Remember, correct speaker connections are crucial for optimal sound performance. Taking the time to properly connect each speaker wire to the amplifier will ensure a fantastic audio experience in your car.
Step 7: Testing The System
Congratulations! You’ve made it to the final step of installing an amp in your car. Now it’s time to test the system and make sure everything is working as it should before you hit the road and enjoy your upgraded audio experience. This step involves reconnecting the car battery and checking for proper connection and sound quality.
Reconnecting the car battery
Before you start testing the system, it’s important to safely reconnect the car battery. This ensures that the power is restored to your car’s electrical system and that the amp can operate properly. Here’s how you can do it:
- Locate the negative terminal of the car battery.
- Use the wrench to loosen and remove the negative cable from the battery terminal.
- Position the negative cable away from the battery terminal to prevent accidental contact.
- Wait for a few minutes to allow the system to reset.
- Reattach the negative cable to the battery terminal and tighten it securely.
Checking for proper connection and sound quality
With the car battery reconnected, you can now test the system for proper connection and sound quality. Here’s how you can do it:
- Turn on your car stereo and the amp.
- Test each speaker to make sure they are all functioning correctly.
- Check for any unwanted noises, such as static or distortion.
- Adjust the settings on your amp, such as the gain, bass, and treble, to achieve the desired sound quality.
- Play a variety of music genres and listen keenly to ensure that the sound reproduction is clear, balanced, and enjoyable.
If you encounter any issues during the testing process, it’s important to troubleshoot them before hitting the road. Check all the connections, ensure that the amp is receiving power, and verify that the settings are properly adjusted.
Amp Not Turning On
If your car’s amp is not turning on, it can be frustrating and disappointing, especially if you’re excited to experience that crisp, powerful sound in your vehicle. However, don’t worry just yet! There are a few steps you can take to troubleshoot this issue and get your amp up and running again. In this section, we’ll take a look at some common problems and solutions that can help you diagnose and fix the problem.
Checking Power Connections
The first step in troubleshooting an amp that is not turning on is to check the power connections. Incorrect or loose power connections can prevent your amp from receiving the necessary electrical supply to turn on. Here’s what you need to do:
- Ensure that the amplifier’s power cable is properly connected to the car’s battery. Check for any loose connections or damaged wires.
- Inspect the fuse that is connected to the amp’s power cable. A blown fuse can interrupt the power supply and prevent the amp from turning on. Replace the fuse if necessary.
- Check the ground wire connection of the amp. A poor ground connection can also cause the amp not to turn on. Make sure the ground wire is securely connected to a clean, metal surface on the car’s chassis.
Testing Remote Wire Connection
The remote wire connection of your amp is responsible for turning it on and off when you start or stop your car’s ignition. Here’s what you can do to test the remote wire connection:
- Inspect the remote wire for any damage or loose connections. Ensure that it is securely connected to the appropriate terminal on the head unit or the car’s wiring harness.
- Use a multimeter to test the continuity of the remote wire. Set the multimeter to the continuity or resistance mode, and touch the probes to each end of the remote wire. If there is no continuity or very high resistance, the remote wire may be faulty and need to be replaced.
- Check the remote wire input on the amp itself. Sometimes, the remote wire input can become loose or damaged. Ensure that it is securely connected to the amp’s remote wire terminal.
Verifying Ground Connection
Another common cause of an amp not turning on is a poor ground connection. The ground wire provides the amp with a stable reference voltage and grounding point. Here’s what you should do to verify the ground connection:
- Inspect the ground wire for any damage or loose connections. Look for any corrosion, frayed wires, or loose bolts.
- Ensure that the ground wire is securely connected to a clean metal surface on the car’s chassis. Remove any paint, rust, or dirt that may prevent a good electrical connection.
- Consider using a dedicated ground distribution block for multiple amplifiers, as this can help improve the grounding quality.
By following these steps, you can troubleshoot and fix common issues that may be preventing your amp from turning on. Remember to take necessary safety precautions and consult a professional if you are unsure or uncomfortable performing any of these steps.
Distorted Sound
Adjusting Gain Settings
One of the main causes of distorted sound when installing an amp in a car is improper gain settings. The gain settings control the amount of amplification the amp provides to your speakers. If set too high, it can result in a distorted sound that is uncomfortable to listen to. To adjust the gain settings correctly, follow these steps:
- Start by playing some music through your car stereo system.
- Turn the gain control knob on your amp to the lowest setting.
- Increase the gain gradually while paying close attention to the sound quality.
- Once you notice any distortion in the sound, back off the gain slightly until the distortion disappears.
- Repeat this process for each channel of your amp to ensure a balanced sound output.
By properly setting the gain settings, you can achieve clear and distortion-free sound from your car’s audio system.
Checking Speaker Connections
Another common reason for distorted sound after installing an amp in a car is improper speaker connections. Faulty or loose connections can cause a poor flow of audio signals and result in distorted sound. To check and ensure proper speaker connections, follow these steps:
- Inspect each speaker wire connection for frayed or damaged wires.
- Ensure that the wires are securely connected to the amplifier’s speaker outputs.
- Check that the speaker wires are connected to the appropriate terminals on the speakers.
- Tighten any loose connections or replace damaged wires if necessary.
By making sure all speaker connections are secure and properly connected, you can eliminate the possibility of distorted sound caused by poor audio signal flow.
Ensuring Proper Amp Power Rating
The power rating of your amp plays a crucial role in achieving optimal sound quality. Using an amp with a power rating that is too low for your car’s speakers can lead to distortion when the volume is turned up. To ensure a proper amp power rating, follow these steps:
- Check the power rating of your car’s speakers.
- Choose an amp with a power rating that matches or slightly exceeds the rating of your speakers.
- Avoid overpowering your speakers, as it can also cause distortion.
- Refer to the manufacturer’s specifications to ensure compatibility between your amp and speakers.
By selecting an amp with the appropriate power rating for your speakers, you can enjoy clear and undistorted sound even at higher volume levels.
Engine Noise
Engine noise can be a frustrating problem for car audio enthusiasts. The constant hum or buzz coming from the speakers can really take away from the overall listening experience. Fortunately, there are a few things you can do to tackle this issue and enjoy clear and crisp sound in your car.
Ground loop isolation
One common cause of engine noise in-car audio systems is a ground loop. This occurs when there are multiple grounding points in the audio system, creating an unwanted electrical loop. To fix this issue, you can use a ground loop isolator.
A ground loop isolator is a small device that connects between the RCA cables and the amplifier. It essentially breaks the loop and eliminates any unwanted electrical noise. To install it, simply disconnect the RCA cables from the amplifier, connect them to the ground loop isolator, and then connect the isolator to the amplifier. This simple addition can significantly reduce engine noise in your car audio system.
Checking RCA connections
Another common culprit for engine noise is loose or faulty RCA connections. RCA cables are responsible for transmitting audio signals between the head unit and the amplifier. If these connections are not secure or if the cables are damaged, it can lead to unwanted noise.
To check the RCA connections, start by disconnecting the cables from both the head unit and the amplifier. Inspect the connectors for any visible damage or corrosion. If you notice any issues, replace the cables with new ones. Once you have new RCA cables, firmly connect them to both the head unit and the amplifier. This should help eliminate any potential noise caused by loose or faulty connections.
Using noise suppressors
If you have tried the above steps and are still experiencing engine noise, you can try using noise suppressors. These small devices are designed to filter out unwanted electrical noise and can be a great solution when dealing with stubborn engine noise.
Noise suppressors are typically installed in line with the power and ground cables of the amplifier. They work by actively suppressing any interference or noise that may be affecting the audio signal. To install a noise suppressor, simply disconnect the power and ground cables from the amplifier, connect the suppressor in line with the cables, and then reconnect them to the amplifier. This should help minimize or eliminate any remaining engine noise.
Engine noise can be a nuisance, but with the right techniques, it is possible to enjoy a high-quality audio experience in your car. By addressing ground loops, checking RCA connections, and using noise suppressors, you can greatly reduce or even eliminate engine noise in your car audio system.
Cleaning The Amplifier
Regular cleaning of your car’s amplifier is essential for maintaining its performance and longevity. Dust and debris can accumulate over time and impact the amplifier’s functionality. In this section, we will discuss some effective methods for cleaning your amplifier and keeping it in top shape.
Using compressed air
One effective way to clean your amplifier is by using compressed air. Compressed air is readily available at most electronic stores and can remove dust and debris from hard-to-reach areas.
To clean with compressed air:
- Ensure your amplifier is turned off and disconnected from the power source.
- Locate the ventilation openings on the amplifier.
- Gently hold the compressed air canister in an upright position and direct the nozzle towards the ventilation openings.
- With short bursts, spray the compressed air into the openings, removing any dust or debris.
- Repeat the process for all ventilation openings on the amplifier.
Remember to use the compressed air in a well-ventilated area and with caution.
Avoiding liquid cleaners
While it may be tempting to use liquid cleaners to clean your amplifier, it is highly recommended to avoid them. Liquid cleaners can damage the sensitive electronic components and cause irreversible damage.
Instead, stick to dry cleaning methods like using compressed air or a soft brush to remove any dust or debris. This will help maintain the amplifier’s functionality without risking any damage.
Dusting the amplifier regularly
Regular dusting is crucial for keeping your amplifier clean and free from debris. Dust can accumulate on the surface and ventilation openings, affecting the amplifier’s performance.
To dust your amplifier:
- Ensure your amplifier is turned off and disconnected from the power source.
- Using a soft microfiber cloth or a soft brush, gently wipe the surface of the amplifier to remove any dust.
- Pay attention to the ventilation openings and remove any visible dust or debris.
By incorporating regular dusting into your car maintenance routine, you can prolong the life of your amplifier and ensure optimal sound quality.
Cleaning your amplifier is an essential part of car audio maintenance. By using compressed air, avoiding liquid cleaners, and regularly dusting the amplifier, you can keep it in excellent condition for years to come.
Protecting The Amplifier
Avoiding overheating
One of the key considerations to protect your amplifier is to ensure that it doesn’t overheat. Overheating can not only reduce the performance of your amp but also lead to irreparable damage. Here are a few tips to help you avoid overheating:
- Proper ventilation: Ensure that your amplifier is installed in a location that allows for adequate airflow. Avoid enclosing it in a tight space or obstructing the cooling vents.
- Use a cooling fan: In situations where ventilation is limited, consider installing a cooling fan near the amplifier to improve airflow and dissipate heat.
- Monitor temperature: Keep an eye on the amplifier’s temperature during use. Many amplifiers have built-in temperature indicators, but you can also use an external thermometer to gauge the temperature.
- Reduce power load: Avoid pushing your amplifier to its maximum limits for extended periods to prevent excessive heat buildup. Consider upgrading your power supply or using multiple amplifiers if you require more power.
Protecting from moisture
Moisture can be a silent amplifier killer, causing irreversible damage to the circuitry and electrical components. Follow these tips to protect your amp from moisture:
- Choose a dry installation location: When installing your amplifier, select a spot that is sheltered from rain, humidity, and condensation. Avoid mounting it near windows or areas prone to water leaks.
- Utilize waterproofing solutions: Apply a waterproofing spray or coating to the amplifier’s exposed parts, such as the circuit board and connectors, to create a barrier against moisture.
- Seal connections: Ensure that all wiring connections are properly sealed using moisture-resistant materials like electrical tape or heat shrink tubing. This helps prevent water from seeping into the amplifier through gaps or exposed conductors.
- Use covers or enclosures: Consider using protective covers or enclosures specifically designed for amplifiers to shield them from moisture and other environmental hazards.
Proper storage during long periods of inactivity
If you plan to store your car or amplifier for a prolonged period without use, it is essential to take precautions to preserve its condition. Here’s how to store your amplifier correctly:
- Disconnect power: Before storing, ensure that you disconnect all power sources to prevent any electrical mishaps or drains on the battery. Unplug any cables or batteries connected to the amplifier.
- Clean and dry: Thoroughly clean the amplifier, removing any dirt or dust that may have accumulated. Ensure it is completely dry before storing to prevent any moisture-related issues.
- Store in a safe location: Select a cool, dry, and well-ventilated place to store your amplifier. Avoid extreme temperatures, direct sunlight, and areas prone to excessive humidity.
- Use a protective case: Consider utilizing a protective case or bag specifically designed for amplifier storage to provide an extra layer of protection against dust, moisture, and physical damage.
Frequently Asked Questions For How To Install A Amp In A Car
Is It Easy To Install An Amp In A Car?
Installing an amp in a car is relatively easy. Just follow the instructions provided with the amp and make sure to connect it correctly to the car’s audio system. It may require some basic knowledge of car electronics, but with proper guidance, anyone can do it.
How Do I Hook Up An Amp To A Car?
- To hook up an amp to a car: Gather the necessary equipment.
- Disassemble your car’s stereo.
- Connect the amp to the stereo’s wiring harness.
- Install the ground wire to a metal surface in your car.
- Connect the amp to your car’s speakers.
- Finally, test the setup to ensure it’s working properly.
How Do I Add An Amp To My Factory Radio?
To add an amp to your factory radio, you’ll need a line output converter. This device converts speaker-level signals to line-level signals that your amp can handle. After connecting the converter, you can then connect the amp to the factory radio using RCA cables.
Where Do You Put An Amp In A Car?
In a car, the amp is typically placed in the trunk, under a seat, or in a designated amp rack.
Conclusion
To sum up, installing an amp in a car is a relatively simple process that can greatly enhance your audio experience while driving. By following the step-by-step guide provided in this blog post, you can confidently tackle this DIY project and enjoy the benefits of a powerful sound system.
Remember to gather the necessary tools, carefully read and follow the instructions, and take your time to ensure a successful installation. With the right knowledge and patience, you’ll be enjoying your favorite tunes with crystal-clear sound in no time.