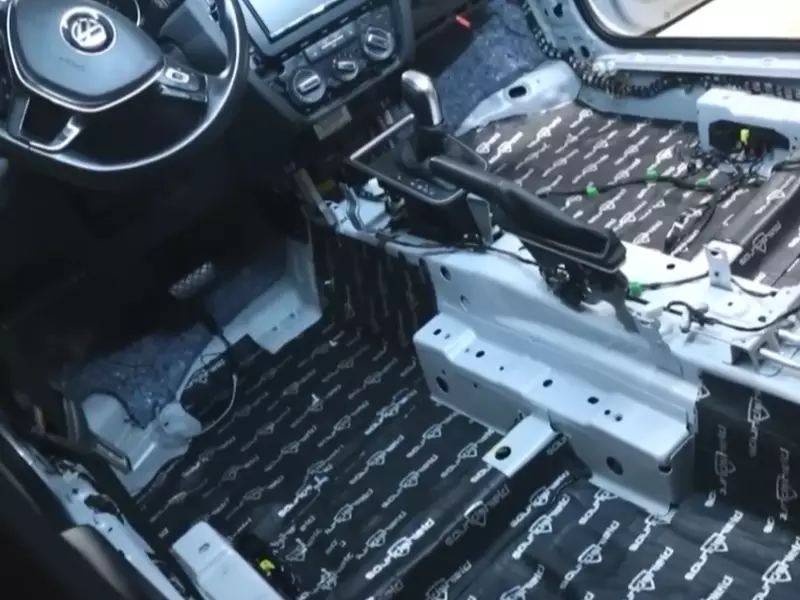
Sound deadening in a car can be installed by following a simple step-by-step process.
Choosing The Right Sound Deadening Materials
When it comes to installing sound deadening in your car, choosing the right materials is essential for achieving optimal results. There are several types of sound deadening materials available in the market, and understanding their differences will help you make an informed decision. In this section, we will explore the various types of sound deadening materials and guide you on how to assess your car’s soundproofing needs.
Understanding the Different Types of Sound Deadening Materials
Before you begin your soundproofing project, it’s crucial to familiarize yourself with the different types of sound deadening materials available. Each type offers unique benefits and is designed to tackle specific soundproofing challenges. Let’s take a closer look at three popular options:

Mass Loaded Vinyl (MLV)
Mass Loaded Vinyl (MLV) is a dense, flexible material that effectively blocks airborne noise and vibrations. It is commonly used to soundproof car doors, floors, and trunk areas. MLV acts as a barrier to prevent sound from traveling through the vehicle’s panels, reducing road noise, engine noise, and other external sounds. The heavy mass of MLV enables it to absorb and dissipate noise, making it an excellent choice for sound deadening.
Butyl Rubber Sheets
Butyl rubber sheets are another popular option for sound deadening in cars. These sheets are highly durable, flexible, and self-adhesive, allowing for easy installation. Butyl rubber sheets have excellent vibration-dampening properties, making them ideal for reducing low-frequency noises, such as engine rumble and tire noise. In addition to soundproofing, butyl rubber sheets also help improve the overall insulation of your vehicle.
Closed-Cell Foam
Closed-cell foam is a versatile sound deadening material that offers both thermal insulation and soundproofing properties. This type of foam is ideal for reducing high-frequency noises, such as wind noise and squeaks. Closed-cell foam acts as a barrier, absorbing sound waves and preventing them from entering the car’s interior. It is commonly used in areas like the roof, firewall, and dashboard for optimal sound deadening results.
Assessing Your Car’s Soundproofing Needs
Before you dive into the installation process, it’s essential to assess your car’s soundproofing needs. You can start by identifying problem areas where noise is most prominent. Common problem areas include car doors, trunk, floor, and wheel wells. Take note of the specific noises you want to eliminate or reduce, such as road noise or engine noise. Understanding your car’s specific soundproofing requirements will help you determine the most suitable sound deadening materials.
Determining the Required Amount of Sound Deadening Material
Once you have assessed your car’s soundproofing needs, the next step is to determine the required amount of sound deadening material. This will depend on the size and shape of the problem areas you identified earlier. Carefully measure and calculate the total surface area that needs to be covered. This will help you estimate the quantity of sound deadening material required for the project.
Researching and Comparing Brands and Products
With numerous brands and products available in the market, it’s crucial to research and compare their features and specifications. Look for reputable brands that specialize in automotive sound deadening products. Consider factors such as material quality, durability, and ease of installation. Researching and comparing different options will help you choose the brand and product that best meets your specific soundproofing needs.
Reading Reviews and Ratings
Reading reviews and ratings from other customers is an excellent way to gain insights and make an informed decision. Look for reviews of the sound deadening materials and brands you are considering. Pay attention to feedback regarding installation ease, effectiveness, and durability. Real-life customer experiences can provide valuable information that will help you make the right choice.
Considering Budget and Quality
When selecting sound deadening materials for your car, it’s crucial to consider both your budget and the quality of the products. While it’s important to stick to your budget, compromising on quality may result in subpar soundproofing and durability. Look for a balance between affordability and quality to ensure you get the most value for your money.
Preparing Your Car For Sound Deadening Installation
Before you start installing sound deadening in your car, it’s important to properly prepare the surfaces and gather the necessary measurements and templates. This step is crucial to ensure a successful and effective installation. In this section, we will guide you through the process of cleaning and decontaminating the surfaces, taking measurements, and removing interior trims and panels.
Cleaning and Decontaminating the Surfaces
The first step in preparing your car for sound deadening installation is to thoroughly clean and decontaminate the surfaces. This will remove any dirt, grease, or wax that can hinder the adhesion of the sound deadening material. Here’s what you need to do:
- Remove any loose items from the car, such as floor mats, to ensure easy access to all the surfaces.
- Start by vacuuming the interior of the car to remove loose dirt and debris.
- Next, use a mild cleanser or isopropyl alcohol to clean the surfaces. This will remove any grease or wax that might be present.
- Apply the cleanser or isopropyl alcohol to a clean cloth and gently wipe the surfaces, making sure to pay extra attention to areas that are commonly greasy or dirty, such as the door handles and armrests.
- Repeat this process until all surfaces are clean and free from any contaminants.

Taking Measurements and Creating Templates
Once the surfaces are clean and decontaminated, it’s time to take measurements and create templates for the sound deadening material. This will ensure that you have the right amount of material and that it fits accurately in the desired areas. Here’s what you need to do:
- Start by mapping out the areas in your car that you want to sound deaden. Common areas include the doors, floor, roof, and trunk.
- Using a measuring tape, take precise measurements of each of these areas.
- Transfer the measurements to a piece of cardboard or paper to create templates.
- Ensure that your templates are accurate and representative of the actual areas you want to sound deaden.
- Label each template accordingly for easy reference.
Removing Interior Trims and Panels
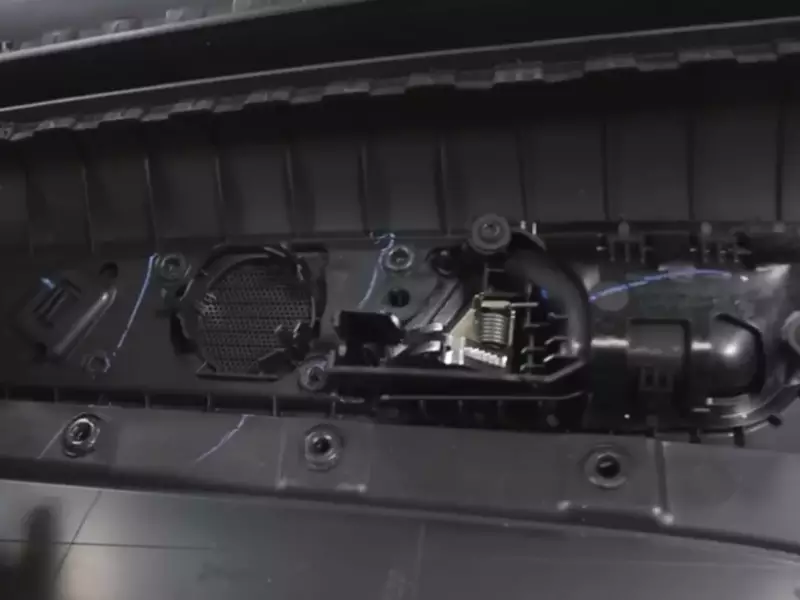
In order to properly install the sound deadening material, you’ll often need to remove interior trims and panels. This will allow you to access the areas that need to be sound deadened and ensure a more effective installation. Here’s what you need to do:
- Familiarize yourself with your car’s manual or the manufacturer’s instructions for removing interior trims and panels.
- Carefully follow the instructions to remove the necessary trims and panels.
- Be gentle and take your time to avoid damaging any components or panels.
- Properly label and organize the removed parts to ensure easy reassembly later on.
By following these steps to prepare your car for sound deadening installation, you’ll be setting yourself up for a successful and effective installation process. Take the time to clean and decontaminate the surfaces, take accurate measurements, and remove necessary interior trims and panels. This will help ensure a smooth and hassle-free installation, allowing you to enjoy a quieter and more enjoyable ride in your car.
Installing Sound Deadening Material In Your Car
Installing sound deadening material in your car can significantly improve your driving experience by reducing road noise, vibrations, and outside elements. Not only does it create a quieter and more comfortable cabin, but it also enhances the overall audio quality of your car’s sound system. In this article, we will walk you through the process of installing sound deadening material, from applying it to doors and panels to strategically placing additional layers for maximum effectiveness.
Applying Sound Deadening to Doors and Panels
One of the first places to start when installing sound deadening material in your car is the doors and panels. These areas are often the primary source of outside noise and vibrations. To effectively reduce this noise, follow these steps:
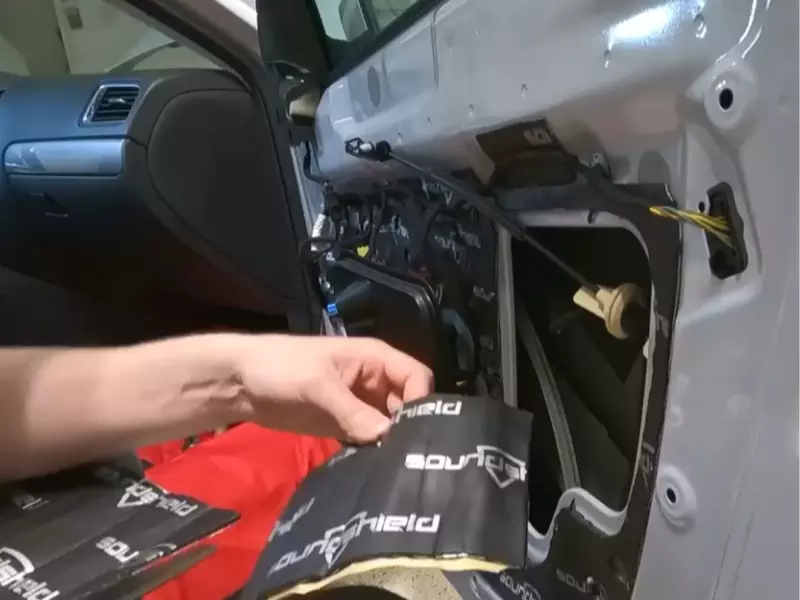
- Cutting the Material to Size: Measure the surface area of the door or panel and cut the sound-deadening material accordingly. Ensure that it covers the entire surface, leaving no gaps for optimal soundproofing.
- Peeling Off the Backing and Adhering to Metal Surfaces: Carefully peel off the backing of the sound deadening material and firmly press it onto the metal surface of the door or panel. Make sure to smooth out any bubbles or creases for perfect adhesion.
- Using a Roller or Trowel to Ensure Proper Adhesion: To ensure the sound deadening material adheres tightly to the surface, use a roller or trowel to apply pressure. This step helps to remove any air pockets and allows the material to conform to the contours of the door or panel.
- Filling and Sealing Gaps and Cracks: Inspect the door or panel for any gaps or cracks and fill them with a sealant or foam. This step is crucial as it prevents sound leakage from these areas, ensuring maximum soundproofing efficiency.
Applying Butyl Rope or Caulking
In addition to applying sound deadening material to doors and panels, using butyl rope or caulking can further enhance the soundproofing capabilities. Here’s how to do it:
- Smoothing and Leveling the Surface: Once the sound deadening material is in place, use a roller or trowel to smooth and level the surface. This step ensures that the butyl rope or caulking adheres evenly and creates a watertight seal.
- Applying Butyl Rope or Caulking: Apply butyl rope or caulking around the edges of the sound deadening material. This extra layer helps seal any remaining gaps, preventing sound from leaking through.
Adding Additional Layers of Sound Deadening
To achieve the best soundproofing results, consider adding multiple layers of sound-deadening material. Here’s how to do it effectively:
- Understanding the Benefits of Multiple Layers: Adding multiple layers of sound deadening material provides better insulation against noise and vibrations. Each layer acts as an additional barrier, reducing sound transmission.
- Strategically Placing Additional Sheets for Maximum Effectiveness: Identify areas in your car that are particularly prone to noise and vibrations, such as the floor and trunk. Install additional sheets of sound deadening material in these areas to maximize the soundproofing effect.

Reassembling And Testing The Soundproofed Car
After successfully installing sound deadening materials in your car, it’s time to put everything back together. This crucial step ensures that all trims, panels, and components are properly aligned and fit, resulting in a quiet and comfortable driving experience. Additionally, it allows you to test the effectiveness of the soundproofing measures you’ve taken. Let’s dive into the process of reassembling and testing your soundproofed car.
Putting Back Trims and Panels
Now that the soundproofing materials are in place, begin by carefully putting back the trims and panels you removed earlier. Make sure to follow the reverse process of removal, referring to any reference photos or markings you made along the way. This step is crucial to ensure that every component is returned to its original position, retaining the car’s factory look and functionality.
Following the Reverse Process of Removal
As you reinstall each trim and panel, adhere to the reverse process of removal. Start with the largest pieces and work your way to the smaller ones. This methodical approach will help prevent any damage or misalignment during reassembly, giving you a seamless finish.
Ensuring Proper Alignment and Fit
During the reassembly process, it’s important to double-check the alignment and fit of each trim and panel. Ensure that they properly align with neighboring components and that there are no gaps or misfits. This attention to detail guarantees that your soundproofing efforts have not compromised the car’s structural integrity.
Checking for Proper Fitment and Functionality
Once everything is in place, check for proper fitment and functionality of all components. Open and close doors, windows, and other moving parts to make sure they operate smoothly and without any interference. This step ensures that the soundproofing materials do not interfere with the car’s mechanisms, providing a comfortable and hassle-free driving experience.
Testing Doors, Windows, and Other Moving Parts
Now, focus your attention on the doors, windows, and other moving parts of your car. Test each one to make sure they operate smoothly and without any unusual noises or vibrations. The soundproofing materials should have effectively reduced the amount of noise and vibrations, resulting in a quieter and more enjoyable driving experience.
Verifying the Reduction in Noise and Vibrations
Once you have tested all the moving parts, verify the reduction in noise and vibrations inside the car. Take a short drive on different types of roads to evaluate the effectiveness of the sound deadening materials. Pay close attention to any noticeable reduction in road noise and interior rattles, appreciating the serene environment created by your soundproofing efforts.
Enjoying the Improved Driving Experience
Now it’s time to sit back, relax, and enjoy the improved driving experience in your newly soundproofed car. Whether you’re commuting to work or embarking on a road trip, you can now appreciate the reduction in unwanted noise and vibrations, allowing you to fully immerse yourself in your music, and conversations, or simply enjoy the peace and quiet.
Noticing the Difference in Sound Quality
One of the most remarkable changes you’ll notice is the difference in sound quality inside the car. The soundproofing materials will minimize outside noises and enhance the clarity and depth of your audio system. Enjoy a more immersive sound experience as you listen to your favorite tunes or podcasts while on the road.
Appreciating the Reduction in Road Noise and Rattles
Finally, take a moment to appreciate the significant reduction in road noise and rattles. Your soundproofing efforts have provided insulation against external sounds, making your driving experience quieter and more peaceful. No longer will the constant hum of the road or the rattling of loose components distract you from enjoying your journey.
Frequently Asked Questions For How To Install Sound Deadening In Car
Where Do You Put Sound Deadening In A Car?
Sound deadening in a car is typically placed in the doors, floor, and trunk area. It helps reduce road and engine noise, resulting in a quieter interior.
How Much Does It Cost To Sound Deaden A Car?
Sound deadening a car can vary in cost depending on the materials used and the size of the vehicle. On average, it can cost between $200 and $600 for materials and installation. However, prices may vary, so it’s best to consult with a professional for an accurate quote.
Does Spray-On Sound Deadener Work In Car?
Yes, spray-on sound deadeners work effectively in cars to reduce noise and vibrations. They provide insulation and absorb sound, creating a quieter and more enjoyable driving experience.
Does Sound Deadening Go On the Inner Or Outer Door?
Sound deadening is typically applied to the inner door panels.
Conclusion
To sum up, installing sound deadening in your car can greatly improve your driving experience. By reducing noise and vibrations, you can enjoy a quieter and more comfortable ride. With the step-by-step guide provided in this blog post, you can easily take on the task yourself and achieve professional results.
So, don’t let external noises disrupt your journey. Follow these instructions and make your car a haven of peace and tranquility.
