To install a push start button, first, locate the ignition switch wires and identify the starter wire. Then, connect the push start button according to the manufacturer’s instructions and secure all connections to enjoy the convenience of a push button ignition.
Introducing push start buttons to your vehicle can enhance the driving experience by providing a modern and convenient way to start the engine. Instead of using a traditional key to start the car, push start buttons allow you to start the engine with just a simple push.
Whether you want to upgrade your car or replace a faulty ignition switch, installing a push start button can be a straightforward process. We will guide you through the steps of installing a push start button, ensuring a hassle-free experience. By following these instructions, you can add a touch of modernity and convenience to your vehicle’s ignition system.
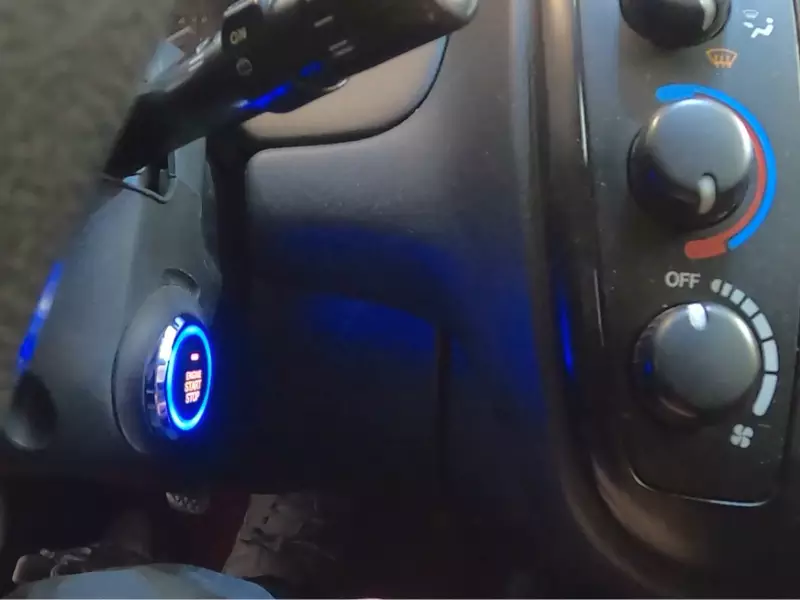
Factors To Consider When Selecting A Push Start Button
Installing a push start button in your vehicle can add a touch of modernity and convenience to your driving experience. However, with various options available in the market, it is important to consider a few factors before making a purchase. The functionality, compatibility with your vehicle’s electrical system, and design and aesthetics are some key aspects you should keep in mind. Let’s dive deeper into these factors to help you select the perfect push start button for your vehicle.
Functionality
The functionality of a push start button is a crucial consideration. You need to determine the features and capabilities you desire in a push start button. Some buttons come with additional functionalities like remote start, keyless entry, and alarm systems. Others may have illuminated LED lights or customizable button colors. Think about your specific needs and preferences to select a button that offers the desired functionality for your vehicle.
Compatibility with Vehicle’s Electrical System
When selecting a push start button, it is essential to ensure compatibility with your vehicle’s electrical system. Different vehicles have varying wiring configurations, voltage requirements, and ignition systems. Make sure to choose a button that is specifically designed for your car make and model. It is worth consulting your vehicle’s manual or seeking professional advice to ensure a proper match.
Design and Aesthetics
The design and aesthetics of a push start button can enhance the overall look and feel of your vehicle’s interior. It is essential to select a button that complements your vehicle’s style. Consider factors like button shape, color options, and material finish. Sleek and modern designs can add a touch of elegance, while sporty designs can give a more dynamic appearance. Choose a push start button that aligns with your personal taste and enhances the visual appeal of your vehicle.
Gathering The Necessary Tools And Equipment
Before you can start installing a push start button in your car, it’s important to gather all the necessary tools and equipment. Having everything at hand will make the installation process much smoother and efficient. In this section, we will go over the essential tools and equipment you will need for the installation.
Screwdriver
A screwdriver is a tool that you simply cannot do without when installing a push start button. It will be used to remove the existing ignition switch and any other components that need to be replaced. Make sure you have a screwdriver with a comfortable grip and the right size and type of screwdriver head for the job. This will ensure that you can easily remove the screws without causing any damage to the surrounding components.
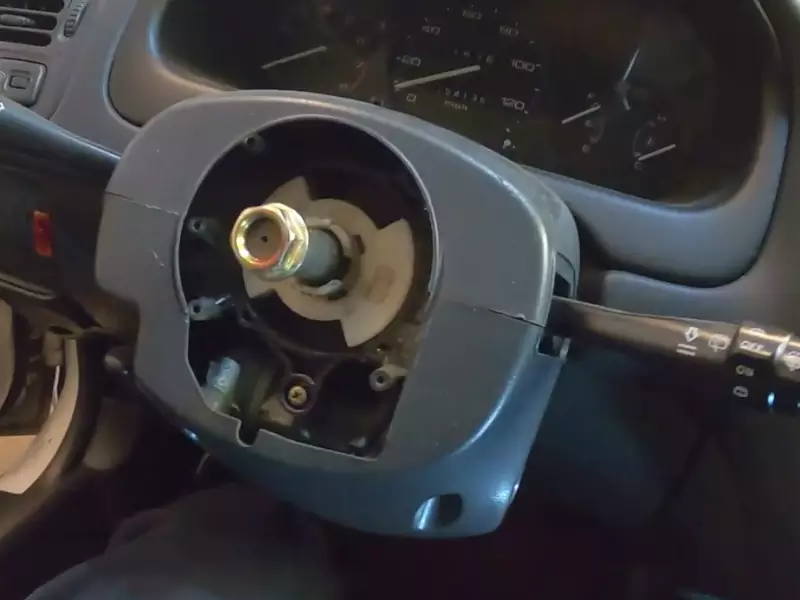
Wire Crimper
A wire crimper is a vital tool when it comes to properly connecting the wires for your push start button. It allows you to securely attach the wires to their respective terminals, ensuring a reliable electrical connection. When choosing a wire crimper, look for one that is of good quality and suitable for the wire gauge you will be working with. This will help you achieve tight and secure crimps, preventing any loose connections that could lead to electrical issues down the line.
Electrical Tape
Electrical tape is an essential item for any electrical installation, including the installation of a push start button. It is used to insulate and protect the exposed wires once they are connected. Additionally, electrical tape provides an extra layer of protection against moisture and other elements that could potentially cause damage to the electrical system. Make sure you choose a high-quality electrical tape that provides good insulation and is designed for automotive applications.
Push Start Button Kit
The most important item you will need is a push start button kit. This kit typically includes the push start button itself, as well as the necessary wiring harnesses and connectors. It may also come with additional accessories such as an LED indicator or a remote start system. When choosing a push start button kit, make sure it is compatible with your specific car make and model. This will ensure a proper fit and function once the installation is complete.
By gathering all these tools and equipment, you will be well-prepared to begin installing your push start button. Having them at hand will not only save you time but also ensure a successful and hassle-free installation process.
Disconnecting The Battery
Locating the Battery
Before you can start disconnecting the battery, you need to locate it. The battery is typically located under the hood of your car.
To find the battery, open the hood and take a look at the engine compartment. Look for a rectangular or square-shaped box with two cables attached to it. This is the battery.
Keep in mind that the battery’s location may vary depending on the make and model of your car. If you’re having trouble finding it, consult your car’s owner’s manual or perform a quick online search for your specific car model.
Removing the Negative Battery Terminal
Now that you’ve located the battery, it’s time to start disconnecting it. The first step is to remove the negative battery terminal. The negative terminal is usually marked with a minus (-) sign or the letters “NEG”.
To remove the negative battery terminal, use a wrench or a battery terminal puller tool. Loosen the nut on the negative terminal and carefully lift the cable off the terminal.
Remember, it’s essential to start with the negative terminal because it helps prevent any accidental electrical shock or damage to your car’s electrical system.
Once you’ve removed the negative terminal, you can proceed to disconnect the positive terminal, which is usually marked with a plus (+) sign or the letters “POS”.
Important: Avoid touching both terminals at the same time or letting any tools come into contact with both terminals simultaneously. This could create a short circuit or cause sparks, which can be dangerous.
By following these steps, you’ll be able to safely disconnect the battery in preparation for installing the push start button.
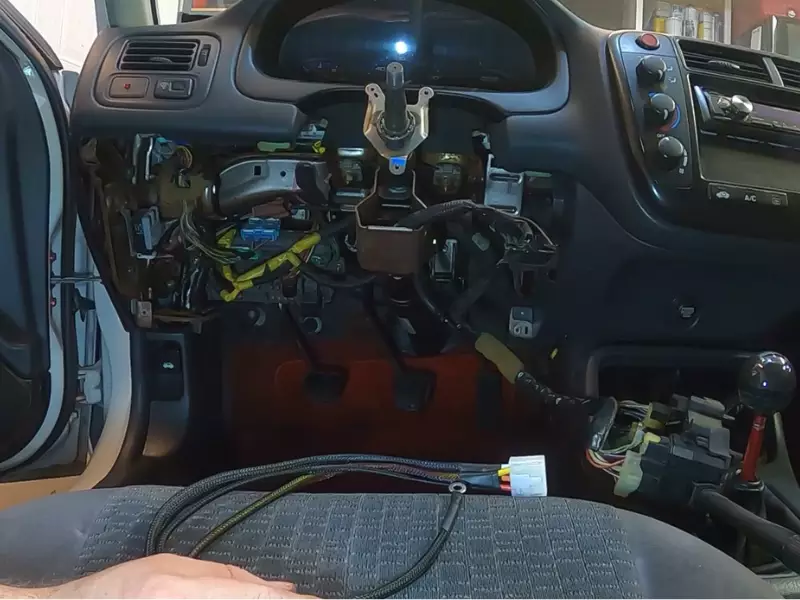
Identifying The Ignition Wiring
Installing a push start button can add convenience and style to your vehicle. One of the first steps in the installation process is identifying the ignition wiring. This crucial step will ensure that you connect the push start button correctly and avoid any potential damage to your vehicle’s electrical system.
Locating the Ignition Switch
The ignition switch is the component that allows you to start your vehicle’s engine. It is usually located on the steering column or dashboard, near the steering wheel. To locate the ignition switch, follow these steps:
- Start by turning off the engine and removing the key from the ignition.
- Inspect the steering column and dashboard for any panels or covers.
- Remove any panels or covers that may be obstructing access to the ignition switch.
- Look for a device with multiple wires connected to it. This is likely the ignition switch.
Once you have located the ignition switch, you can move on to understanding the wiring diagram.
Understanding the Wiring Diagram
The wiring diagram is a visual representation of how the ignition wiring is connected. It provides valuable information about the color coding of the wires and their corresponding functions. To understand the wiring diagram, follow these steps:
- Obtain a copy of the wiring diagram specific to your vehicle make and model.
- Study the diagram and familiarize yourself with the different symbols and color codes used.
When studying the wiring diagram, pay close attention to the wires connected to the ignition switch. These are typically labeled with letters or numbers that correspond to specific functions such as ignition power, accessory power, and starter signal.
By identifying the ignition wiring and understanding the wiring diagram, you will be well-prepared to install a push start button in your vehicle. Remember to always consult the manufacturer’s instructions and seek professional assistance if needed.
Mounting The Push Start Button
Choosing the Suitable Location
The first step in mounting a push start button is to select the right location for it. The perfect spot will make it convenient for you to reach and use the button without any difficulty. You should consider a few factors while choosing the suitable location:
- Accessibility: The location should be easily accessible, preferably within arm’s reach from the driver’s seat.
- Visibility: Ensure that the button is clearly visible so that you can identify it quickly.
- Aesthetics: Choose a spot where the push start button complements the overall interior design of your vehicle.
Drilling Holes (If Required)
If the chosen location doesn’t already have a suitable hole to mount the push start button, you may need to drill one. Here are the steps to follow:
- Mark the spot: Use a marker or a piece of masking tape to mark the precise location where you want to drill the hole.
- Gather the tools: Get an appropriate-sized drill bit, a power drill, and safety goggles to protect your eyes.
- Drill the hole: Place the drill bit at the marked spot and drill straight in, using steady pressure. Be sure to keep your hands steady and the drill perpendicular to the surface.
- Clean up: Remove any debris or sharp edges left behind by the drilling process, ensuring a clean and safe finish.
Securing the Button with Screws or Adhesive
After choosing the suitable location and drilling the necessary hole, you need to secure the push start button in place. Depending on the button and your personal preference, you can use screws or adhesive to mount it. Here’s how:
Mounting with Screws:
- Align the button: Place the push start button over the drilled hole and align it properly.
- Insert screws: Using a screwdriver, insert the screws through the designated holes on the button and tighten them just enough to hold it securely in place. Avoid overtightening, as it may damage the button or the surface.
Mounting with Adhesive:
- Clean the surface: Ensure that the mounting surface is clean and free from any dust, oil, or debris.
- Apply adhesive: Apply an appropriate adhesive to the back of the push start button.
- Press and hold: Press the button firmly against the surface and hold it for a few seconds to allow the adhesive to bond securely.
Whether you choose screws or adhesive, it’s vital to follow the manufacturer’s instructions and recommendations for the specific push start button you are installing. Give the mounted button a gentle tug to ensure it is firmly secured before operating it.
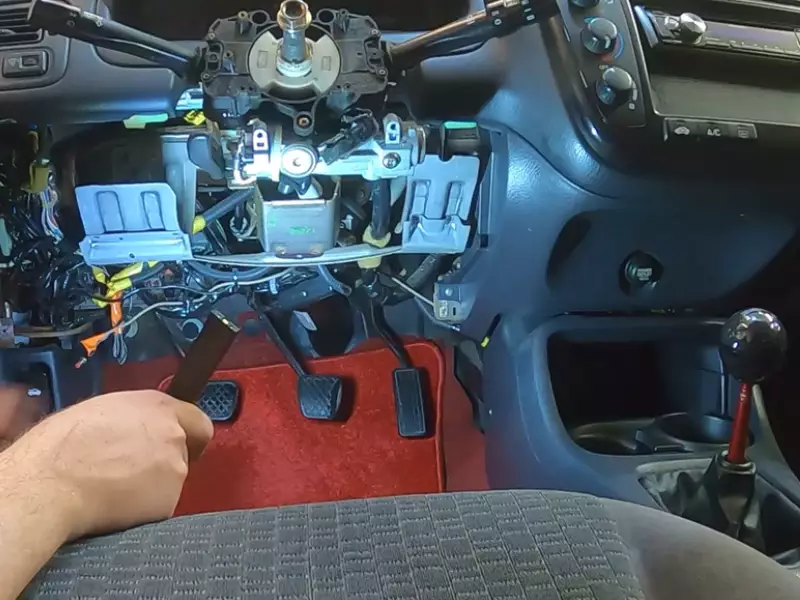
Connecting The Wiring
In this section, we will discuss the crucial step of connecting the wiring for your push start button installation. By correctly identifying the necessary wires, splicing into the ignition wiring, and connecting the push start button wires, you’ll be well on your way to enjoying the convenience and modernity of a push start system in your vehicle.
Identifying the Necessary Wires
Before beginning the installation process, it’s essential to identify the necessary wires you’ll be working with. Refer to the wiring diagram specific to your vehicle’s make and model. This diagram will help you locate the ignition wire, power wire, accessory wire, and ground wire necessary for properly installing the push start button.
If you’re unsure about which wires are which, consult a professional or refer to your vehicle’s manual. Accurate identification of these wires is crucial for the successful installation of the push start button.
Splicing into the Ignition Wiring
Once you have identified the ignition wire, it’s time to splice into it. To do this:
- Begin by using wire strippers to remove a small section of insulation from the ignition wire. Be careful not to damage the wire itself.
- Next, take the push start button’s ignition wire and strip a small section of insulation from it as well.
- Twist the exposed ends of the ignition wire and the push start button’s ignition wire together securely.
- Use electrical tape or heat shrink tubing to cover the splice, ensuring a secure and insulated connection.
Properly splicing into the ignition wiring is essential for the push start button to function correctly, so take your time and ensure a strong connection.
Connecting the Push Start Button Wires
With the ignition wire appropriately spliced, it’s time to connect the push start button wires. Follow these steps:
- Locate the wires coming from the push start button. These typically include a power wire, accessory wire, ground wire, and sometimes an optional auxiliary wire.
- Connect the power wire from the push start button to the positive terminal of the vehicle’s battery using an appropriate connector, such as a ring terminal or butt splice connector.
- Connect the accessory wire to a power source that only receives power when the ignition is turned on.
- Connect the ground wire to a solid metal part of the vehicle’s chassis.
- If your push start button has an optional auxiliary wire, connect it to the desired vehicle function, such as door locking or trunk release.
Double-check all connections to ensure they are secure and properly insulated. Once everything is connected, test the push start button to ensure it functions correctly before reassembling any panels or covers.
By carefully following these steps, you should now have your push start button wiring correctly connected. This brings you one step closer to enjoying the convenience of a push start system in your vehicle. Now, let’s move on to the next step of the installation process.
Testing The Installation
Once you have successfully connected the push start button, it is important to test the installation to ensure it is functioning properly. Testing the installation involves reconnecting the battery and checking the functionality of the push start button.
Reconnecting the Battery
To begin testing the installation, start by reconnecting the battery. Follow these steps:
- Ensure the ignition is off and all vehicle systems are turned off.
- Locate the vehicle’s battery and identify the positive and negative terminals.
- Slide the positive terminal cover off and using a wrench or pliers, loosen and remove the positive terminal connector.
- Repeat the same process for the negative terminal.
- Carefully connect the positive terminal first, then the negative terminal.
- Tighten the terminal connectors securely.
- Slide the positive terminal cover back onto the positive terminal.
Once the battery is reconnected, you can move on to testing the functionality of the push start button.
Testing the Push Start Button Functionality
Now it’s time to ensure that the push start button is working as intended. Follow these steps:
- Get into the driver’s seat and close all doors.
- Insert the key into the ignition and turn it to the “ON” position.
- Press and hold the push start button for a few seconds. The engine should start.
- Release the button and verify that the engine remains running.
- Turn off the engine by pressing the push start button once again.
If the push start button functions correctly, congratulations! You have successfully installed and tested a push start button in your vehicle. However, if there are any issues or the button does not work as expected, it is essential to double-check the connection and consult the installation instructions or seek professional assistance, if needed.
Securing And Concealing The Wiring
Once you have connected the necessary wires for your push start button, it’s imperative to secure and conceal them properly. This not only ensures a clean and professional installation but also prevents any potential damage or interference. There are a few methods you can employ to achieve this, including using wire ties or clips, wrapping the wiring with electrical tape, and installing wire looms for added protection.
Using Wire Ties or Clips
One simple and effective way to secure the wiring is by using wire ties or clips. These small, versatile tools can be easily attached to surfaces such as the dashboard or interior panels, holding the wires in place and preventing any dangling or loose connections. When using wire ties or clips, make sure to choose ones that are specifically designed for automotive use, as they are more durable and resistant to vibrations.
Wrapping the Wiring with Electrical Tape
Another method to secure and conceal the wiring is by wrapping it with electrical tape. Electrical tape provides insulation and protection against potential short circuits or exposed wires. To wrap the wiring, start at one end and tightly wind the tape around the entire length, ensuring it stays in place. If you have multiple wires, you can bundle them together using electrical tape, reducing clutter and enhancing the overall neatness of the installation.
Installing Wire Looms for Added Protection
If you desire an extra layer of protection for the wiring, consider installing wire looms. Wire looms are plastic or fabric sleeves that encase the wires, shielding them from potential damage caused by heat, moisture, or sharp edges. These protective sleeves not only enhance the aesthetics of the installation but also offer added durability. To install wire looms, simply slide them over the wiring and secure them in place using zip ties or clips.
By securing and concealing the wiring using wire ties or clips, wrapping the wiring with electrical tape, or installing wire looms, you can ensure a clean and professional installation of your push start button. Not only will this protect the wiring from potential damage, but it will also provide a seamless integration with your vehicle’s interior. Take the time to properly secure and conceal the wiring to achieve a reliable and visually appealing push start button installation.
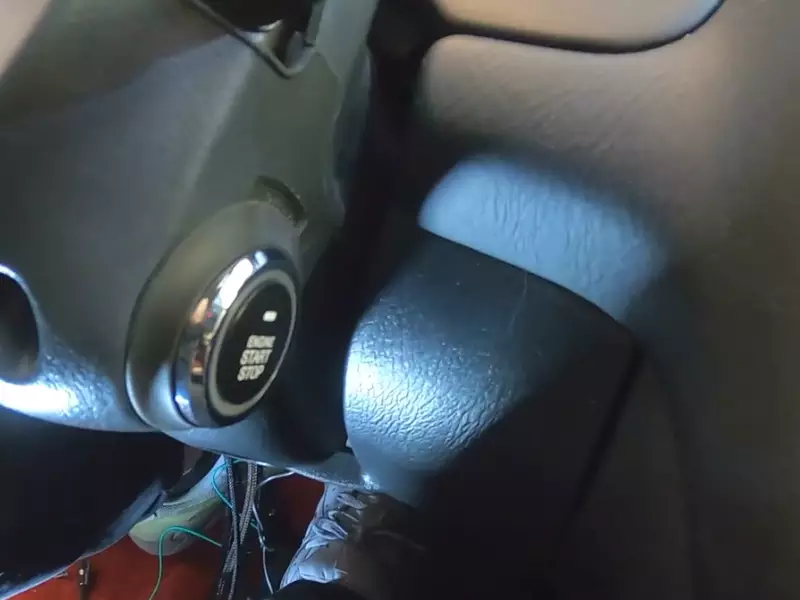
Common Issues With Push Start Button Installation
When it comes to installing a push start button in your vehicle, you may encounter a few common issues that can make the process a bit tricky. In this section, we will discuss the most typical problems that arise during push start button installation and provide potential solutions for each issue.
Wiring Connection Problems
One of the most common issues when installing a push start button is encountering problems with the wiring connections. If the wiring is not properly connected, it can affect the functionality of the button and prevent your vehicle from starting smoothly.
Here are a few troubleshooting steps to address wiring connection problems:
- Inspect the wiring connections to ensure all wires are securely attached to the appropriate terminals. Loose or disconnected wires can disrupt the electrical flow.
- Check for any damaged or frayed wires that may be causing a poor connection. If any wires appear damaged, it is essential to replace them with new ones.
- Make sure to follow the manufacturer’s wiring diagram or instructions carefully. Incorrectly connecting the wires can lead to malfunctions or even potential damage to your vehicle’s electrical system.
Compatibility Issues
Compatibility issues can also arise during push start button installation if the button you’ve chosen is not suitable for your specific vehicle make and model. Different vehicles may have varying electrical systems and wiring setups, which can impact the compatibility of the button.
To prevent compatibility issues, consider taking the following steps:
- Research and ensure that the push start button you purchase is designed for your specific vehicle model. Check the compatibility information provided by the manufacturer to verify compatibility.
- If you are unsure about compatibility or have doubts, consult with a professional installer or your vehicle’s manufacturer for expert advice. They can help you choose a compatible button or provide alternative solutions if necessary.
- Double-check the connections and wiring compatibility before finalizing the installation. Make sure the pinouts of the push start button match the corresponding pins in your vehicle’s electrical system.
Malfunctioning Button
In some cases, the push start button itself may malfunction, leading to difficulties starting your vehicle. This can be due to a faulty button or a manufacturing defect.
If you encounter a malfunctioning push start button during installation, consider the following actions:
- Inspect the button for any visible signs of damage, such as cracks or loose parts. If any issues are detected, it may be necessary to replace the button with a new one.
- Ensure that the button is securely installed and making proper contact with the connecting wires. Loose connections can affect the functionality of the button.
- If the button continues to malfunction, contact the manufacturer or supplier for further assistance. They may provide troubleshooting advice or offer a replacement if the button is defective.
By addressing these common issues with push start button installation, you can ensure a smooth and successful installation process. Remember, if you are unsure or encounter significant difficulties, it is always recommended to seek professional assistance to avoid any potential damage to your vehicle or its electrical system.
Tips For A Successful Installation
Installing a push start button can be a fantastic upgrade for your vehicle. Not only does it add a touch of modernity, but it also enhances convenience and security. However, to ensure a successful installation, there are a few important tips to keep in mind. In this section, we will discuss the essential steps you need to follow for a trouble-free installation.
Double-Checking Wiring Connections
One of the most critical aspects of installing a push start button is ensuring that all the wiring connections are properly made. A loose or incorrect connection can result in malfunctioning or even damage to your vehicle’s electrical system. To avoid any mishaps, it is crucial to double-check all the connections before finalizing the installation.
Inspect each wire and connector to ensure they are firmly connected and securely attached to the respective terminals. Additionally, make sure to follow the wiring diagram provided by the manufacturer for accurate connection placement.
Following the Manufacturer’s Instructions
When it comes to installing a push start button, it is vital to follow the manufacturer’s instructions meticulously. Each brand or model may have specific requirements or variations in the installation process. Reading and understanding the instructions beforehand will help you avoid any mistakes or oversights.
Pay attention to details such as wire colors, placement of components, and any additional steps or precautions mentioned in the manual. By adhering to the manufacturer’s instructions, you can ensure a smooth and successful installation.
Seeking Professional Help if Needed
In some cases, the process of installing a push start button may require advanced technical skills or specialized knowledge. If you are unsure or uncomfortable with any aspect of the installation, it is always wise to seek professional help. Automotive technicians or electricians with experience in installing push-start buttons can provide expert guidance and assistance, ensuring a professional and error-free installation. Investing in professional help will not only save you time and effort but also minimize the risk of potential damage to your vehicle’s electrical system.
By keeping these tips in mind, you can confidently install a push start button in your vehicle. Remember to double-check all wiring connections, diligently follow the manufacturer’s instructions, and seek professional help if needed. Enjoy the convenience and modernity that a push start button brings to your driving experience!
Frequently Asked Questions For How To Install A Push Start Button
Can I Add Push Button Start To My Car?
Yes, it is possible to add push button start to your car. A skilled technician can install a push button start system, but it may require modifications to your car’s ignition system. Consulting with a professional is crucial to ensure compatibility and proper installation.
How Do You Wire A Push Button Switch?
To wire a push button switch, follow these steps:
- Identify the wires. Find the power source and the load wires.
- Prepare the wires. Strip the insulation from the ends to expose the bare wire.
- Connect the wires. Attach the power source wire to one terminal and the load wire to the other.
- Secure the connections. Use electrical tape or wire connectors to ensure a tight and safe connection.
- Test the switch. Confirm that the switch activates the desired function.
Can You Replace Key Start With Push Button Start?
Yes, it is possible to replace a key start with a push button start for your vehicle. This can provide convenience and modernize your car’s starting system. However, it is recommended to consult a professional to ensure compatibility and proper installation.
How Much Is A Push To Start Key?
The cost of a push to start key varies depending on the make and model of your car. It can range from $50 to $400.
Conclusion
After following the step-by-step guide outlined in this blog post, installing a push start button in your vehicle is now within reach. By understanding the necessary tools, preparing the wiring connections, and carefully mounting the button, you can enjoy the convenience and modernization that this feature provides.
Don’t hesitate to explore this DIY project and enhance your driving experience.
